Editing a clip, Displaying the clip menu screen, Editing a clip’s name – Roland P-20HD Video Instant Replayer User Manual
Page 22: Changing the length of a clip, Changing the thumbnail position, Registering a clip to a palette, Sorting a clip, Video operations
22
Video Operations
Editing a Clip
You can change a clip’s parameters after it is created.
* You can’t edit clips during playback.
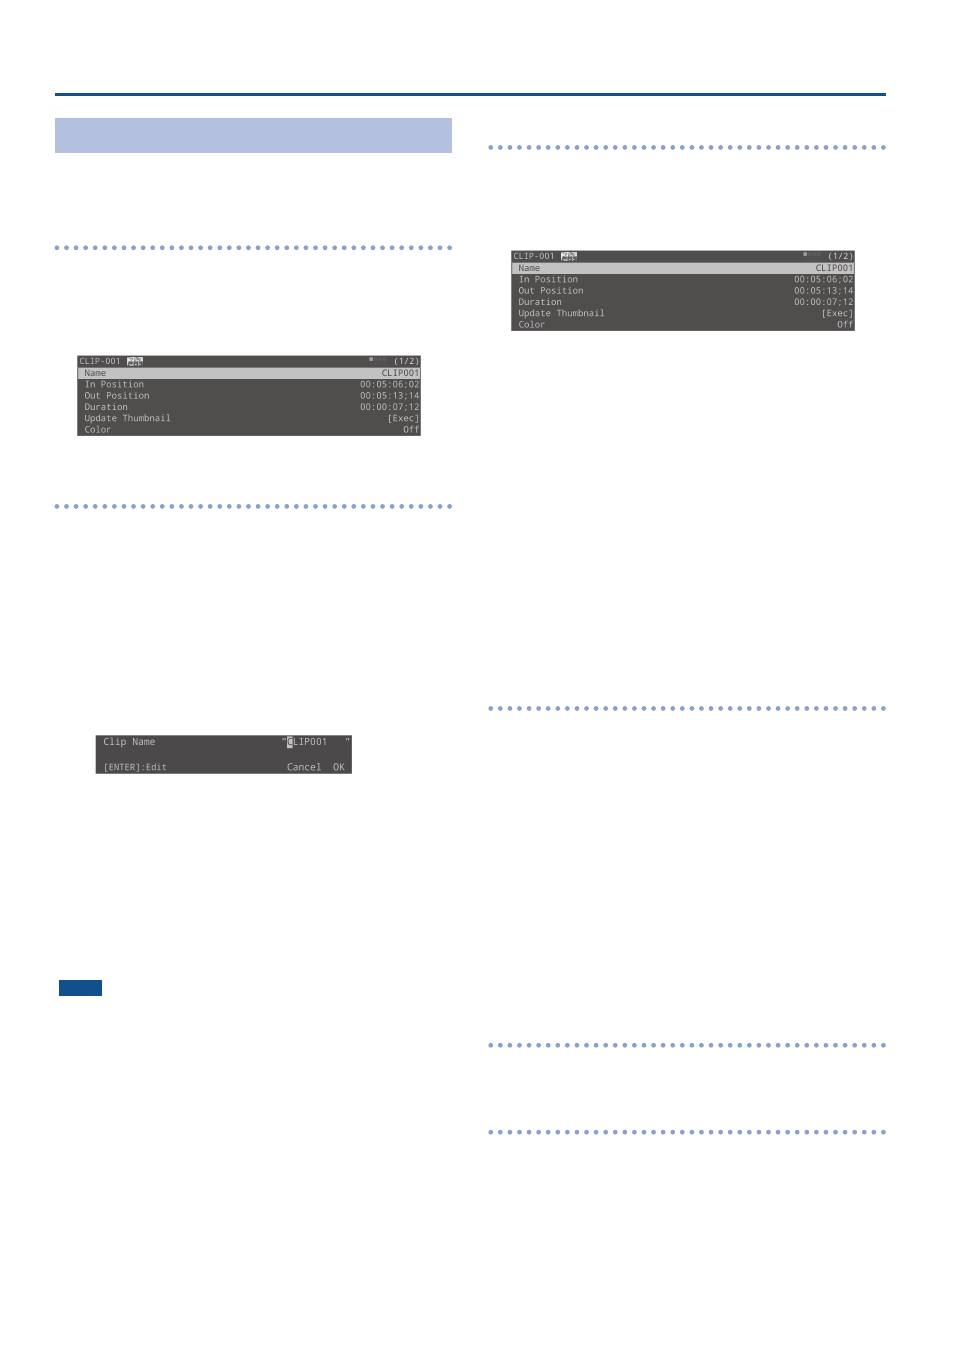
Displaying the CLIP MENU screen
Access the CLIP MENU screen from the CLIP LIST or PALETTE screen.
1 .
Turn the [VALUE] knob to select the desired clip,
and press the [VALUE] knob
The CLIP MENU screen appears.
Editing a Clip’s Name
Clips can be renamed.
1 .
On the CLIP LIST (PALETTE) screen, select the clip to
display the CLIP MENU screen.
2 .
Select “Name” and press the [VALUE] knob.
3 .
Edit the clip name.
* Clip names can contain up to 10 characters.
1 .
Use the [VALUE] knob to move the cursor, and press the
[VALUE] knob.
The cursor blinks.
2 .
Use the [VALUE] knob to edit the character, and press the
[VALUE] knob.
¹
Hold down the [MENU] button and press the [VALUE] knob to
insert a character at the cursor position.
¹
Press the [EXIT] button to delete the character at the cursor
position.
4 .
When you finish entering the clip’s name, use the
[VALUE] knob to select “OK,” and press the [VALUE]
knob.
NOTE
If the clip list is referring to a palette, changing the clip name here
also changes the clip to which it refers.
Changing the length of a clip
You can edit the “In Position” and “Out Position” parameters of a clip
to change its start position, end position and length.
1 .
On the CLIP LIST (PALETTE) screen, select the clip to
display the CLIP MENU screen.
2 .
Use the [
ø
] button and the [JOG/SHUTTLE] dial to
move the recording data to the point you want to
set as the IN point.
3 .
Press the MARKER [IN] button to set the IN point.
* You can’t set the IN point later than the OUT point.
4 .
Using the operations in step 2, move to the position
you want to set as the OUT point.
5 .
Press the MARKER [OUT] button to set the OUT
point.
* You can’t set the OUT point before the IN point.
* You can’t set the OUT point less than one second after the IN point.
* In some circumstances, the IN/OUT points may be slightly off
compared to the positions you specified.
Changing the thumbnail position
You can specify the thumbnail position and change the thumbnail of
a clip.
1 .
On the CLIP LIST (PALETTE) screen, select the clip to
display the CLIP MENU screen.
2 .
Use the [
ø
] button and the [JOG/SHUTTLE] dial to
move the recording data to the position you want
to set as the thumbnail.
3 .
Select “Update Thumbnail” and press the [VALUE]
knob.
The image at the position you moved to becomes the thumbnail.
* In some circumstances, the thumbnail may be in a slightly
different position than the one you specified.
Registering a clip to a palette
This is explained in “Registering a Clip to a Palette” (p. 25).
Sorting a clip
This is explained in “Sorting Clips” (p. 24).