6 transferring files to nugget units, Using windows explorer – Doremi Nugget User Manual
Page 20
3.6 Transferring Files to Nugget Units
You can transfer files directly to the Nugget using Windows Explorer, Drag and Drop, Drop-in
folders or using the Doremi Asset Manager application. Note: Drag and Drop is available for XP
and OS-X only, Vista drag and drop support will be supported in a future release.
Using Windows Explorer
How to transfer clips to a Nugget using Windows Explorer:
•
Select, Shift select or Control select all media files you want to transfer and “right click”
on one of them. Note: For image sequences, it is necessary to select only the first
image.
•
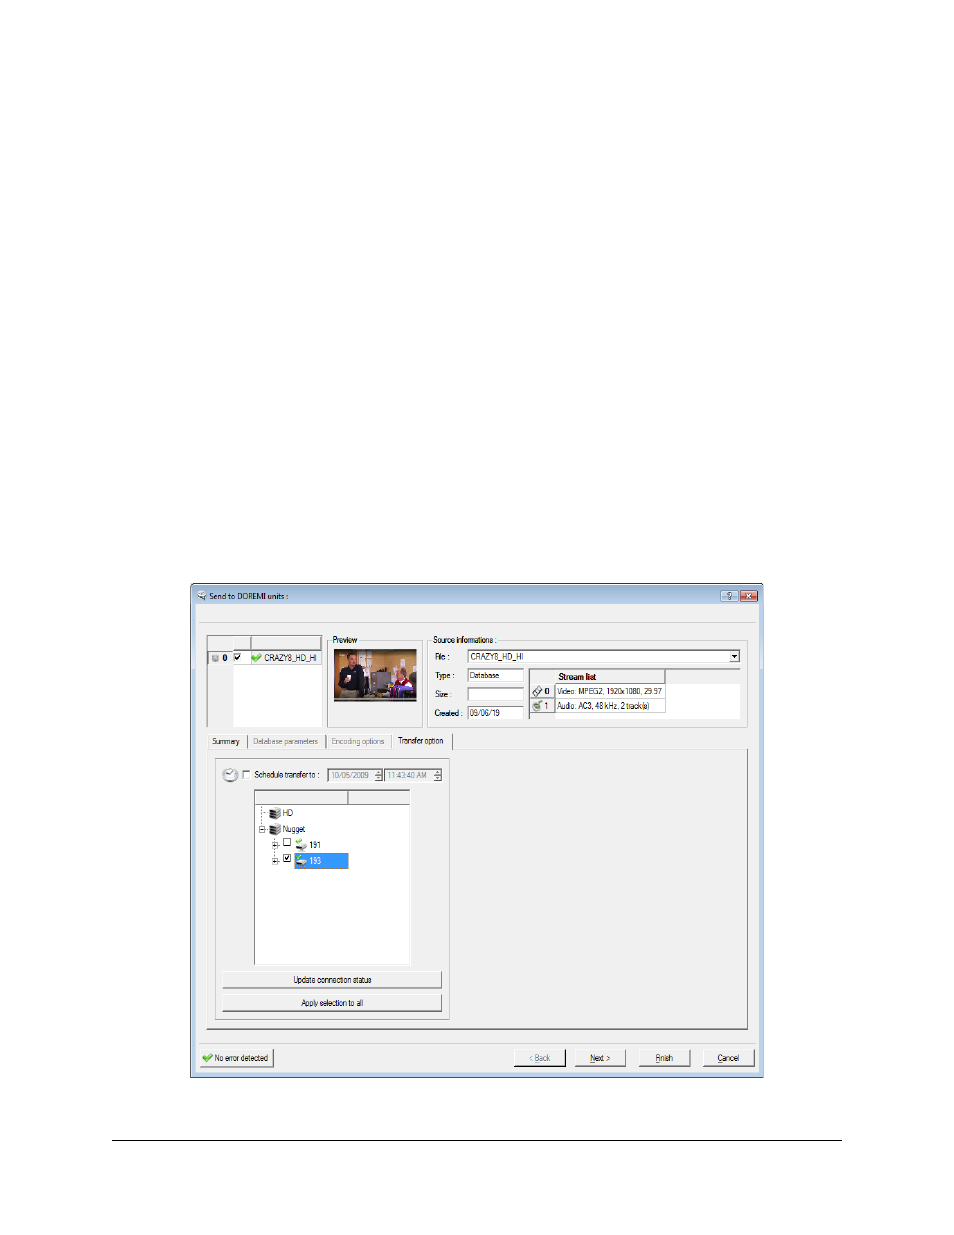
Scroll down to “Send To” and select “Doremi devices”
•
Click on “Transfer options” and select all units to send the files to. Check the box for the
units you wish the files to be transferred to (see “Send to Doremi Devices Window”
below);
•
Click “Finish” to start the transfer. Note: At this stage you can choose to schedule the
transfer instead of starting the transfer immediately. (see Section 3.7 of the DoremiAM
manual)
•
You can see the progress of the transfers under the “Tasks” tab in the DoremiAM GUI.
Once the transfers are complete, the “Clip Database” tab will list all files in the database.
•
All media files will be added to the database before they get transferred to the units.
“Send to Doremi Devices” Window
NUG.OM.000105.DRM
Page 20
Version 3.1
Doremi Labs, Inc.