Attaching the 3-point hitch dr rapid feed chipper – DR Power 3-Point Hitch Rapid-Feed User Manual
Page 19
CONTACT US AT www.DRpower.com or CALL TOLL FREE 1-800-DR-OWNER 15
Attaching the 3-POINT HITCH DR RAPID FEED
CHIPPER
NOTE: The PTO Driveshaft provided with your new machine
is sized to fit a standard category 1 PTO (1-3/8" DIA.
x 6" Spline).
The PTO shaft on the tractor that is to use this
machine must rotate clockwise when viewing the PTO
from the rear of the tractor. If the PTO rotates
counterclockwise, you must have your tractor
modified by installing a gearbox to reverse the
direction of rotation.
The length of the PTO Driveshaft that is included
with your new machine may need to be modified.
See the procedure for checking the PTO Shaft length
needed and modification instructions in this chapter.
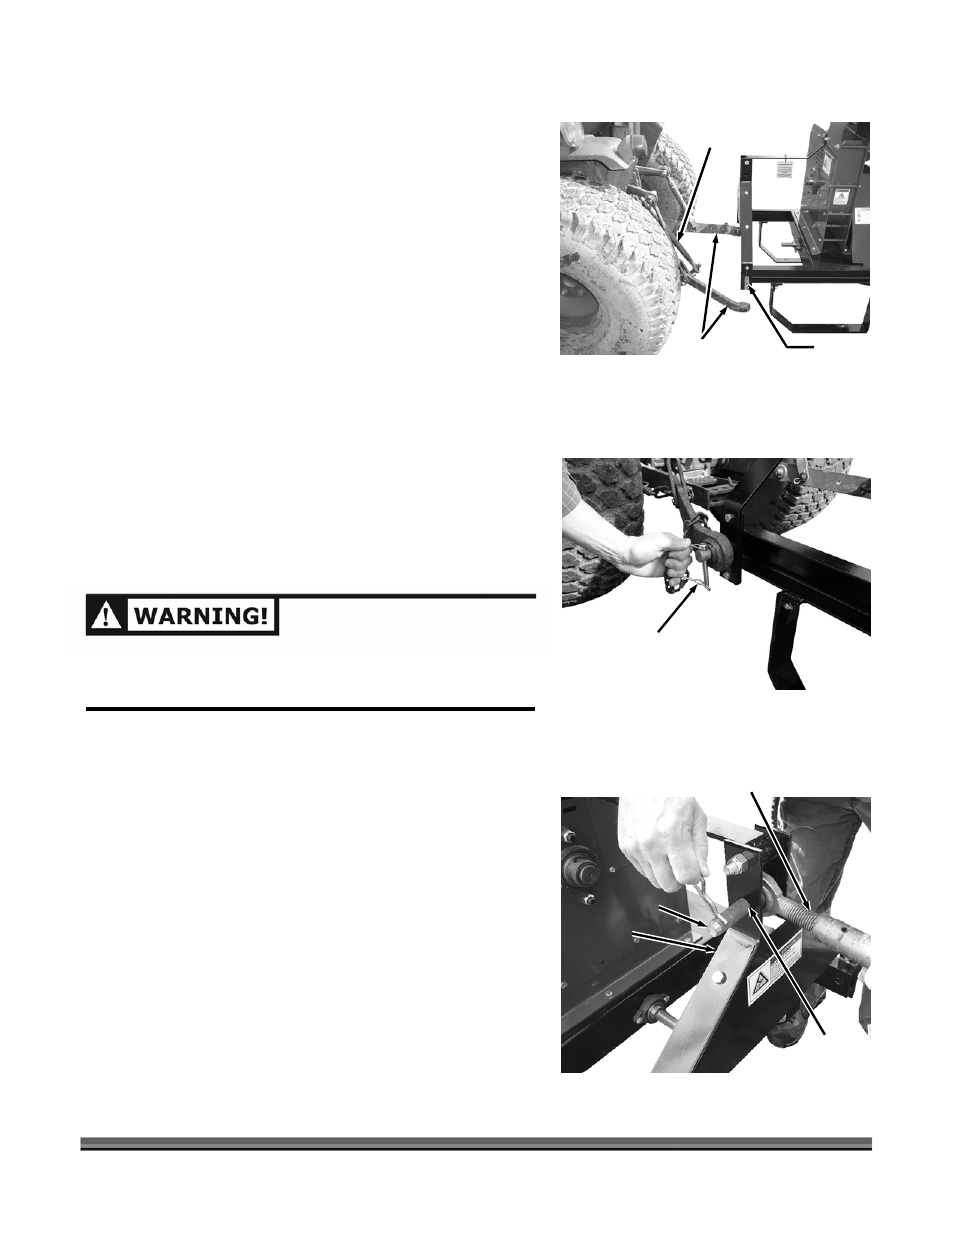
1. Back the Tractor to the Chipper and position the Lower
Draft Arms near the Chipper Hookup Pins (Figure 11).
2. Slide the Lower Draft Arms onto the Chipper Hookup
Pins and secure with Tractor Hitch Pins (Figure 12).
3. Position the Upper Draft Arm inside the Mounting
Bracket and align with the Mounting Bracket Holes
(Figure 13).
4. Insert the Tractor Hitch Pin to secure the Upper Draft
Arm to the Chipper.
Figure 11
Upper (pivot)
Draft Arm
Lower (lifting)
Draft Arms
Chipper
Hookup
Pins
BEFORE PERFORMING THE FOLLOWING PROCEDURE, BE
SURE YOUR TRACTOR ENGINE IS OFF, BRAKE IS SET, AND
THE KEY REMOVED FOR SAFETY.
Tractor
Hitch Pin
Figure 12
Upper (pivot)
Draft Arm
Figure 13
Tractor
Hitch Pin
Chipper
Mounting
Hole
Mounting
Bracket