DR Power 3-Point Hitch Rapid-Feed User Manual
Page 32
28
3-POINT HITCH DR
®
RAPID-FEED™ CHIPPER
Installing and Adjusting the Belt
1. Install the new Belt onto the Sheaves and Idler Pulley.
2. Adjust and tighten the Eye Bolt Nuts so the Tension
Spring measures 4-1/2" between hooks as described
on the previous page.
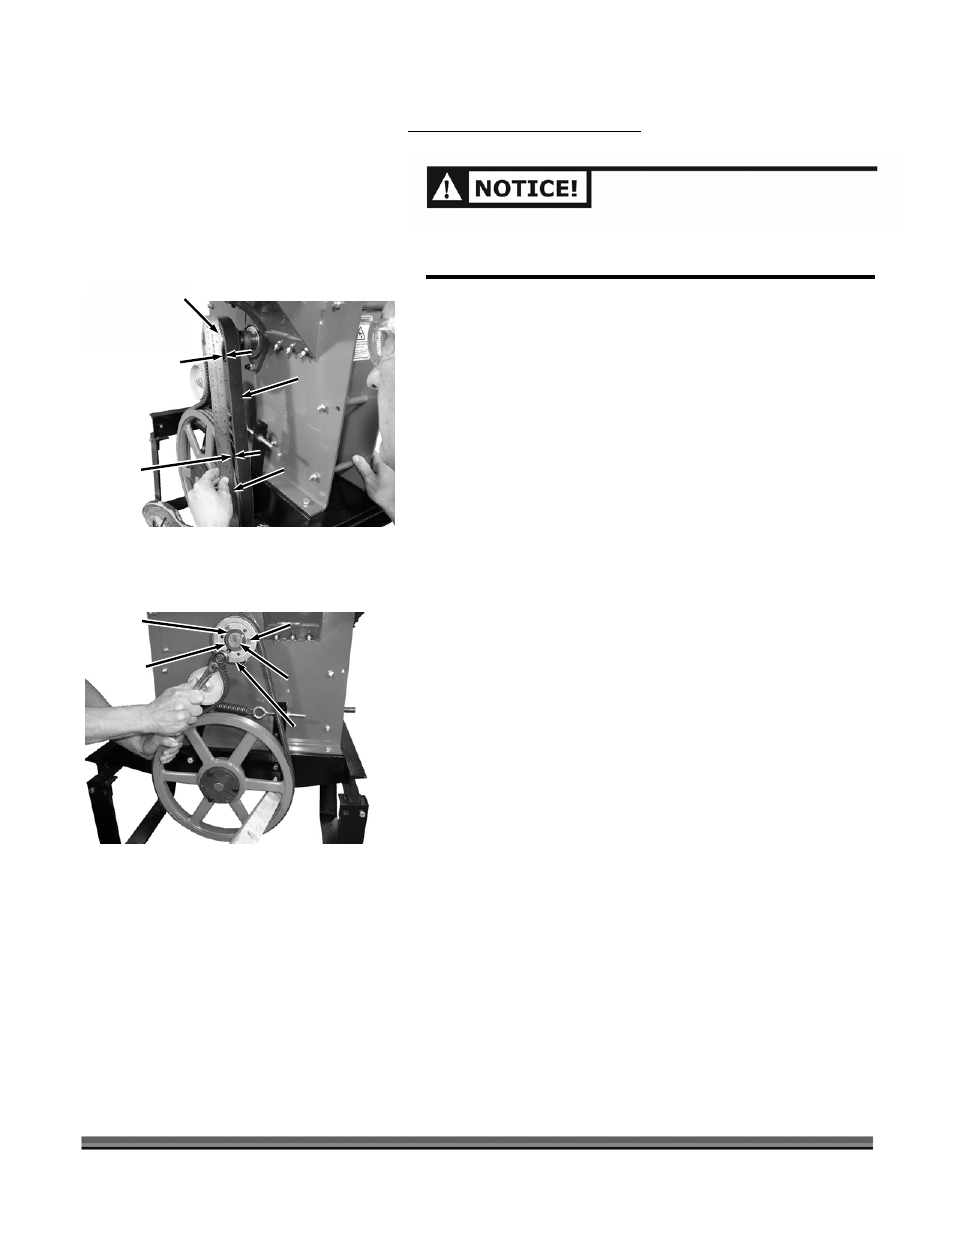
3. Check the alignment of the Belt Sheaves by placing a
Straightedge across the PTO Sheave front face and
resting the other end on the outside diameter of the
Flywheel Sheave (Figure 33).
4. Check the gap from the Straightedge to the Belt near
the Flywheel Sheave and near the PTO Sheave. If the
gap is the same then no adjustment is needed. If the
gap is not the same then adjustment is necessary,
correct the alignment as follows:
a) Loosen the Sheave Bushing Bolt with a 7/16"
Wrench (Figure 34).
NOTE: Place a block of wood into the PTO Sheave Spokes to help
hold the belt to loosening the Sheave Bolts.
b) Remove the three Bushing Retaining Bolts using a
7/16" Wrench.
c) Reinstall the three Bolts in the unused Threaded
Holes adjacent to the three Bushing Retaining Bolt
holes.
d) Slowly tighten the Bolts evenly and alternately (1/4
to 1/2 turn) starting with the Bolt farthest from the
Bushing Saw Slot (this acts as a Hub puller) until the
Bushing releases from the Flywheel Shaft.
e) When the Sheave is loose, remove the three Bolts
and reinsert them into the original Retaining Bolt
holes.
USE ONLY DR BELTS ON YOUR MACHINE. THE BELTS HAVE
BEEN THOROUGHLY TESTED AND PROVEN FOR MANY
HOURS OF USE.
Straightedge On
outside diameter
of Flywheel
Sheave
Figure 33
Belt
Gap
Gap
Straightedge
On front face
of PTO
Sheave
Sheave
Figure 34
3 Bushing
Retaining
Bolts
Sheave
Bushing
Bushing
Saw Slot
Flywheel
Shaft