DR Power 3-Point Hitch Rapid-Feed User Manual
Page 36
32
3-POINT HITCH DR
®
RAPID-FEED™ CHIPPER
8. Remove the dull or damaged Knife and visually inspect the Flywheel Slot and Knife mounting area
and be sure they are clean and that the replacement Knife will be able to mount flush against the
Flywheel.
9. Install a new or sharpened Knife as shown with the Knife edge facing up and towards you and finger
tighten the Allen screws and Lock Nuts (use the new hardware supplied with a new Knife kit) to hold
the Knife to the Flywheel.
10. Using a 7/32" Allen wrench and a 9/16" socket, tighten the center Screw and Locknut, then tighten
the outer Screw and Locknut, and finally tighten the inner Screw and Locknut.
11. Double-check that all three Locknuts on the Allen Screws are tight.
12. Reinstall the two Access Covers.
13. Replace the Belt Guard.
14. Check and if needed adjust the gap between the Knife and Wear Plate (See “Checking and Adjusting
the Knife to Wear Plate Gap” in this Chapter).
Removing and Replacing the Wear Plate
Tools Needed:
• 7/16" Wrench
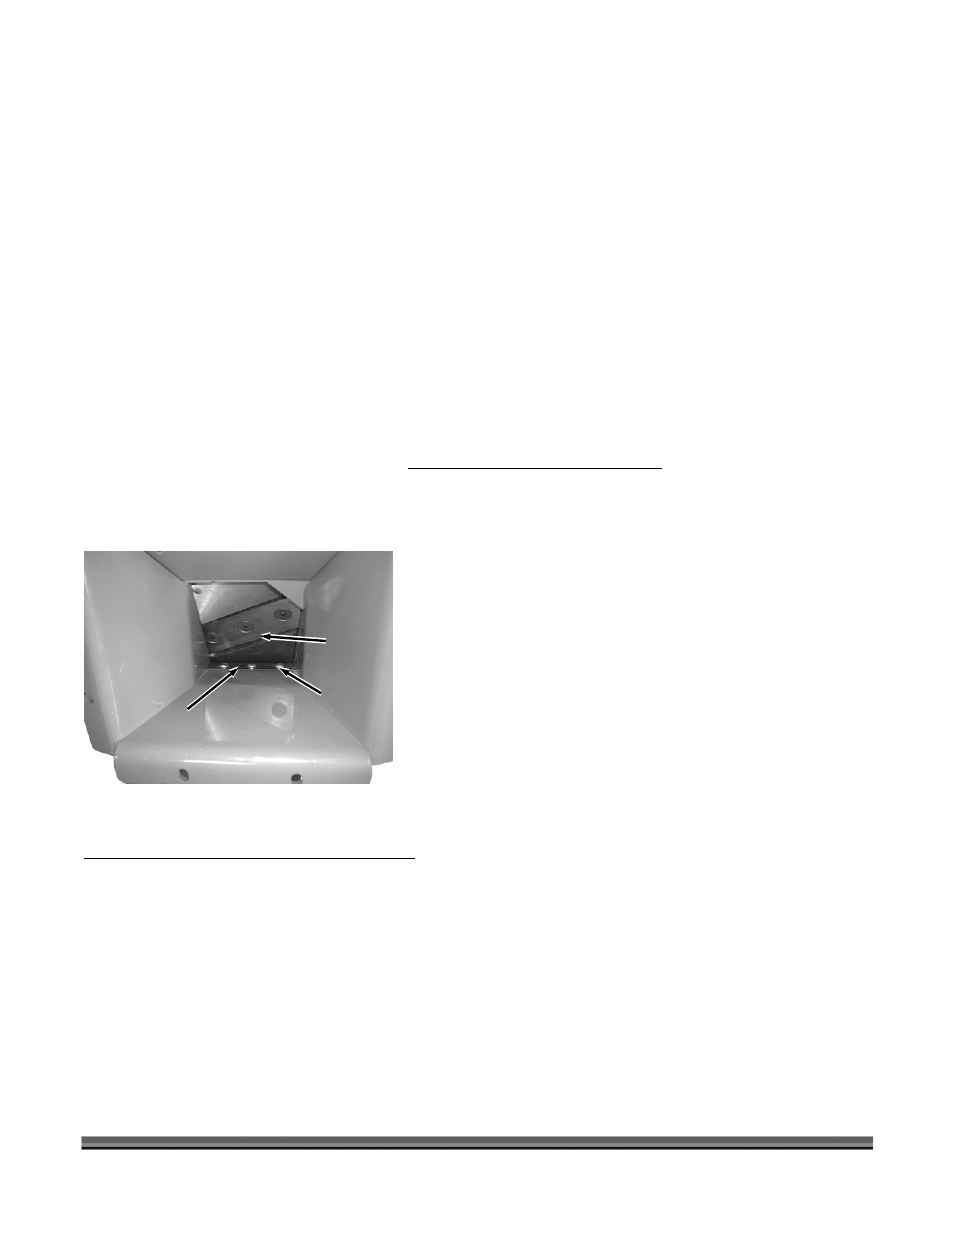
1. Remove the Hopper (See “Inspecting the Chipper
Knife and Wear Plate” in this Chapter)
2. Remove the three Locknuts and Carriage Bolts that
attach the Wear Plate to the Chipper Assembly with a
7/16" wrench and then remove the Wear Plate (Figure
40).
3. Install the new Wear Plate and secure with the three
Carriage Bolts and Locknuts.
NOTE: The Gap between the Knife and Wear Plate must be
adjusted whenever the Wear Plate is removed. See the following
instructions.
Checking and Adjusting the Knife to Wear Plate Gap
When you replace the Knife you must check and set the clearance between the Knife and Wear Plate. Set
this clearance or gap to 1/16" by using the Gap Tool that is supplied with the Chipper and with a new
Knife kit. If the gap between the Wear Plate and the Knife is not set correctly, you will have excessive
vibration when chipping and the Knife will seem to be dull. The Wear Plate should have a square edge
and be free of dents or gouges. The Wear Plate can be hand sharpened (see steps below). Be careful
not to overheat it during the sharpening process. This will change the characteristics of the steel and you
will then have to replace the Wear Plate.
Tools Needed:
• Gap Gauge (provided with Chipper)
Chipper
Knife
Figure 40
Wear
Plate
Carriage
Bolts and
Locknuts