DR Power 3-Point Hitch Rapid-Feed User Manual
Page 34
30
3-POINT HITCH DR
®
RAPID-FEED™ CHIPPER
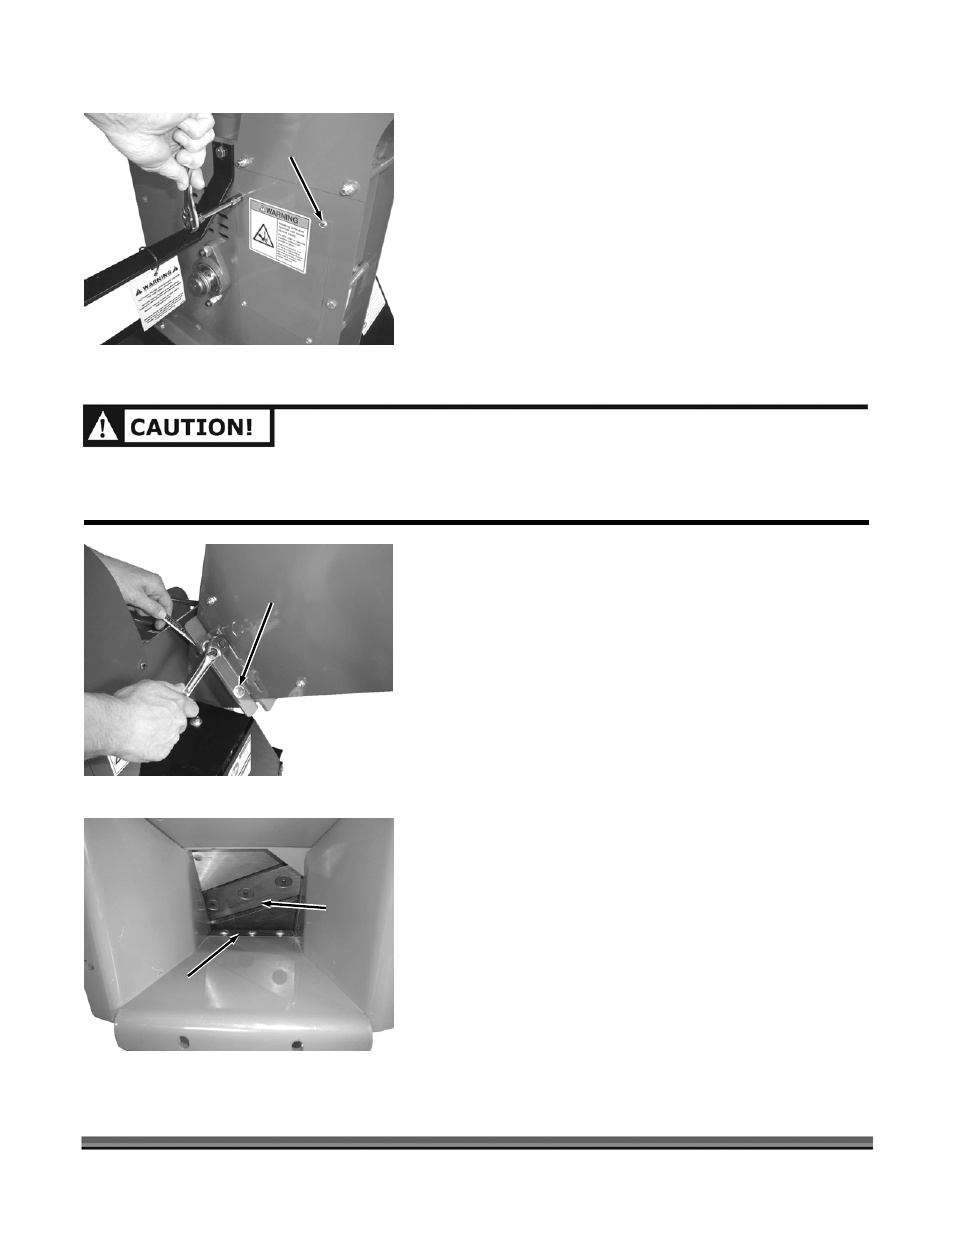
1. Remove the four Screws that secure the Front Access
Cover with a 5/16" wrench and remove the Access
Cover (Figure 35).
2. Rotate the Flywheel with a long stick until the Knife is
visible.
3. If the Knife has visible nicks or damage it must be
sharpened or replaced (see “Removing and Replacing
the Chipper Knife” in this chapter).
4. If the Knife does not appear to have any damage,
replace the Access Cover and secure with four Screws
using a 5/16" wrench.
VISUAL INSPECTION OF THE CHIPPER KNIFE AND WEAR PLATE
EVERY 8-10 HOURS
Tools Needed:
• Two 1/2" Wrenches
1. Have someone support the Hopper as you use two
1/2" wrenches to remove the six Bolts, Washers and
Locknuts that support the Hopper to the Chipper
Assembly (Figure 36).
2. Remove the Hopper from the Chipper Assembly.
3. Use a stick to rotate the Flywheel until the Knife is next
to the Wear Plate.
4. Closely inspect the Chipper Knife and Wear Plate for
nicks or dull (rounded) edges (Figure 37).
5. If necessary, repair or replace the Chipper Knife
and/or Wear Plate per the following procedures. If the
Knife and Wear plate do not need maintenance or
adjustment, replace the Hopper.
Front
Access
Cover
Screws
Figure 35
Bolt, Washer (both
sides) and Locknut
(6 places)
Chipper
Assembly
Hopper
Assembly
Figure 36
Chipper
Knife
Figure 37
Wear
Plate
THE HOPPER SHOULD BE SUPPORTED WHEN THE MOUNTING HARDWARE IS REMOVED.
REMOVAL OF THE HOPPER IS DIFFICULT FOR ONE PERSON. TWO PEOPLE ARE NEEDED FOR THE
HOPPER REMOVAL PROCESS.