Grease fittings – DR Power 3-Point Hitch Rapid-Feed User Manual
Page 30
26
3-POINT HITCH DR
®
RAPID-FEED™ CHIPPER
Grease Fittings
Your RAPID-FEED CHIPPER was greased at the Factory. The operator needs to periodically lubricate the
four Bearings of the Chipper Assembly and the PTO Shaft.
Tools and Supplies needed:
• Flexible hose grease gun
• Lithium grease
• Clean cloth
• 5/32" Allen Wrench
• Thread Lock
1. Remove the Belt Cover (see “Removing, Replacing and
Adjusting the Drive Belt” in this Chapter).
2. Wipe all dirt, etc., from the grease fittings with a clean
cloth.
3. Apply no more than three pumps of quality general-
purpose lithium grease with a hand-pumped grease
gun to each Bearing Grease Fitting (Figure 28), two on
either side of the Chipper Assembly and the two U-
Joint Grease Fittings (Figure 29).
4. Check the Bearing Set Screws for tightness. If they are
not tight then remove them, apply Thread Lock
to the
threads, then reinstall and tighten the Set Screws.
5. Replace the Belt Guard.
Set
Screw
Grease
Fitting
Flywheel
Bearing
Front Chipper Bearings
Grease
Fitting
Set
Screw
Rear Chipper Bearings (under Belt Cover)
Figure 28
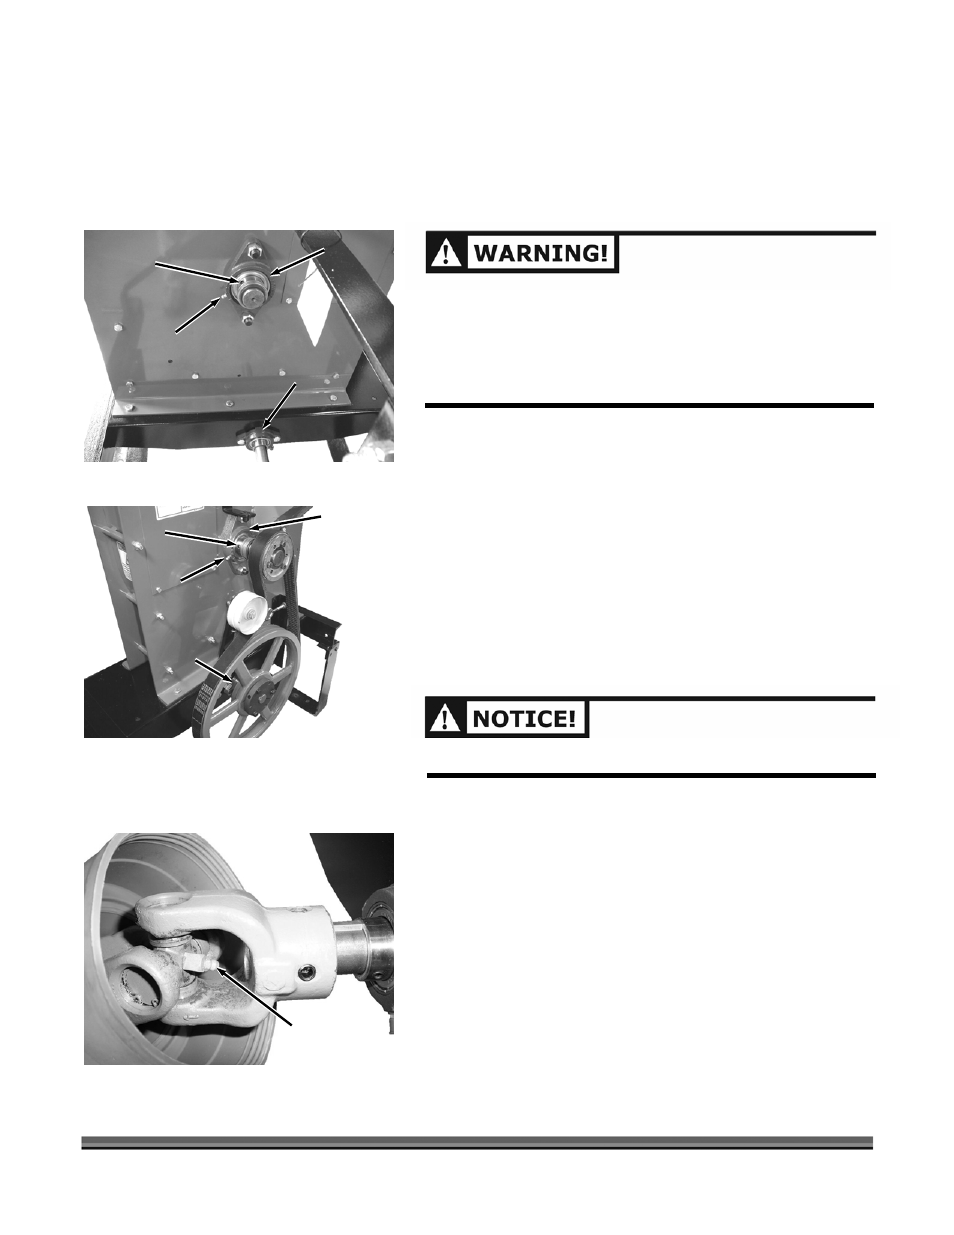
PTO
Bearing
Flywheel
Bearing
PTO
Bearing
OVER LUBRICATION CAN DAMAGE THE BEARINGS.
DISENGAGE PTO, SHUT DOWN THE TRACTOR ENGINE,
REMOVE THE KEY, WAIT FOR ALL MOVING PARTS TO COME
TO A COMPLETE STOP, DISCONNECT THE PTO SHAFT
FROM THE TRACTOR, THEN WAIT 5 MINUTES BEFORE
PERFORMING ANY MAINTENANCE PROCEDURE OR
INSPECTION ON THE CHIPPER.
U-Joint
Grease Fitting
Figure 29