Removing, replacing and adjusting the drive belt – DR Power 3-Point Hitch Rapid-Feed User Manual
Page 31
CONTACT US AT www.DRpower.com or CALL TOLL FREE 1-800-DR-OWNER 27
Belt
Tension
Spring
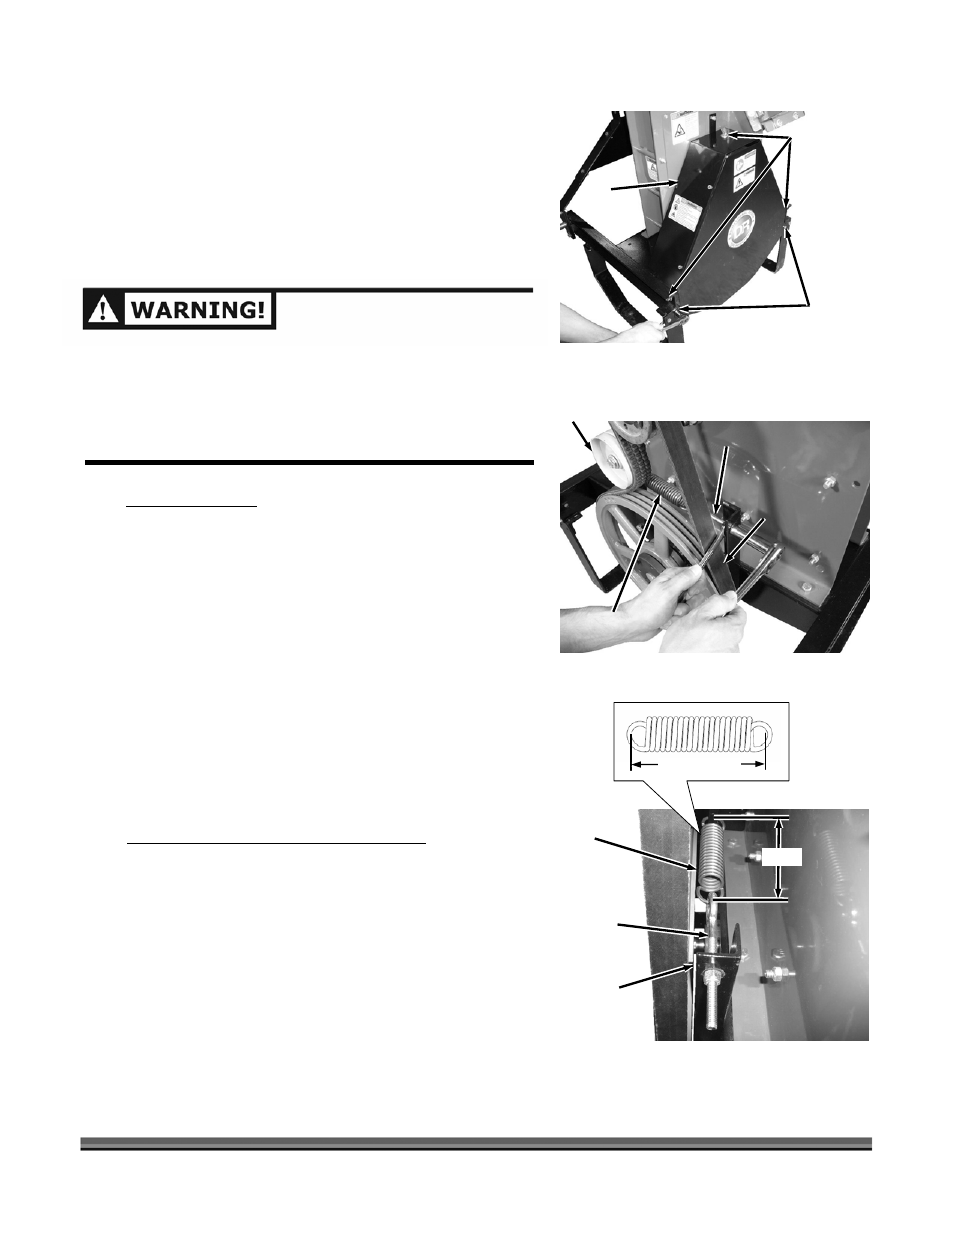
Figure 32
Eye Bolt
4-1/2"
Spring
Mount
Bracket
Measure Here
Removing, Replacing and Adjusting the Drive Belt
Tools Needed:
• Tape Measure
• Two 1/2" Wrenches
• 7/16" Wrench
• Straightedge
Removing the Belt
1. Remove the two Bolts and Locknuts from the bottom
of the Belt Guard using two 1/2" Wrenches (Figure
30).
2. Remove three Bolts, Lock Washers and Flat Washers
from the top and sides of the Belt Guard.
3. Remove the Belt Guard.
NOTE: Before continuing with the next step, check the
measurements as described in “Checking the Belt and
Belt Tension Spring” in the next section below to
determine Belt and Spring condition.
4. Loosen the outer two Nuts on the Tensioner Eye Bolt
until the Belt can be easily removed (Figure 31).
Checking the Belt and Belt Tension Spring
1. Measure the distance from the inside of the Tension
Spring hooks as shown (Figure 32).
2. If the distance between the Tension Spring hooks is
not 4-1/2" then the Eye Bolt must be adjusted until
the measurement is 4-1/2". Loosen the two outside
Nuts, adjust the inner Nut, and then retightening the
outer Nuts until the required dimension is obtained.
Belt
Cover
Figure 30
Bolt and
Locknut
Bolt, Lock
Washer and
Flat Washer
DISENGAGE PTO, SHUT DOWN THE TRACTOR ENGINE,
REMOVE THE KEY, WAIT FOR ALL MOVING PARTS TO COME
TO A COMPLETE STOP, DISCONNECT THE PTO SHAFT
FROM THE TRACTOR, THEN WAIT 5 MINUTES BEFORE
PERFORMING ANY MAINTENANCE PROCEDURE OR
INSPECTION ON THE CHIPPER.
Idler
Pulley
Figure 31
Belt
Eye Bolt
Tensioner
Spring