DR Power 3-Point Hitch Rapid-Feed User Manual
Page 38
34
3-POINT HITCH DR
®
RAPID-FEED™ CHIPPER
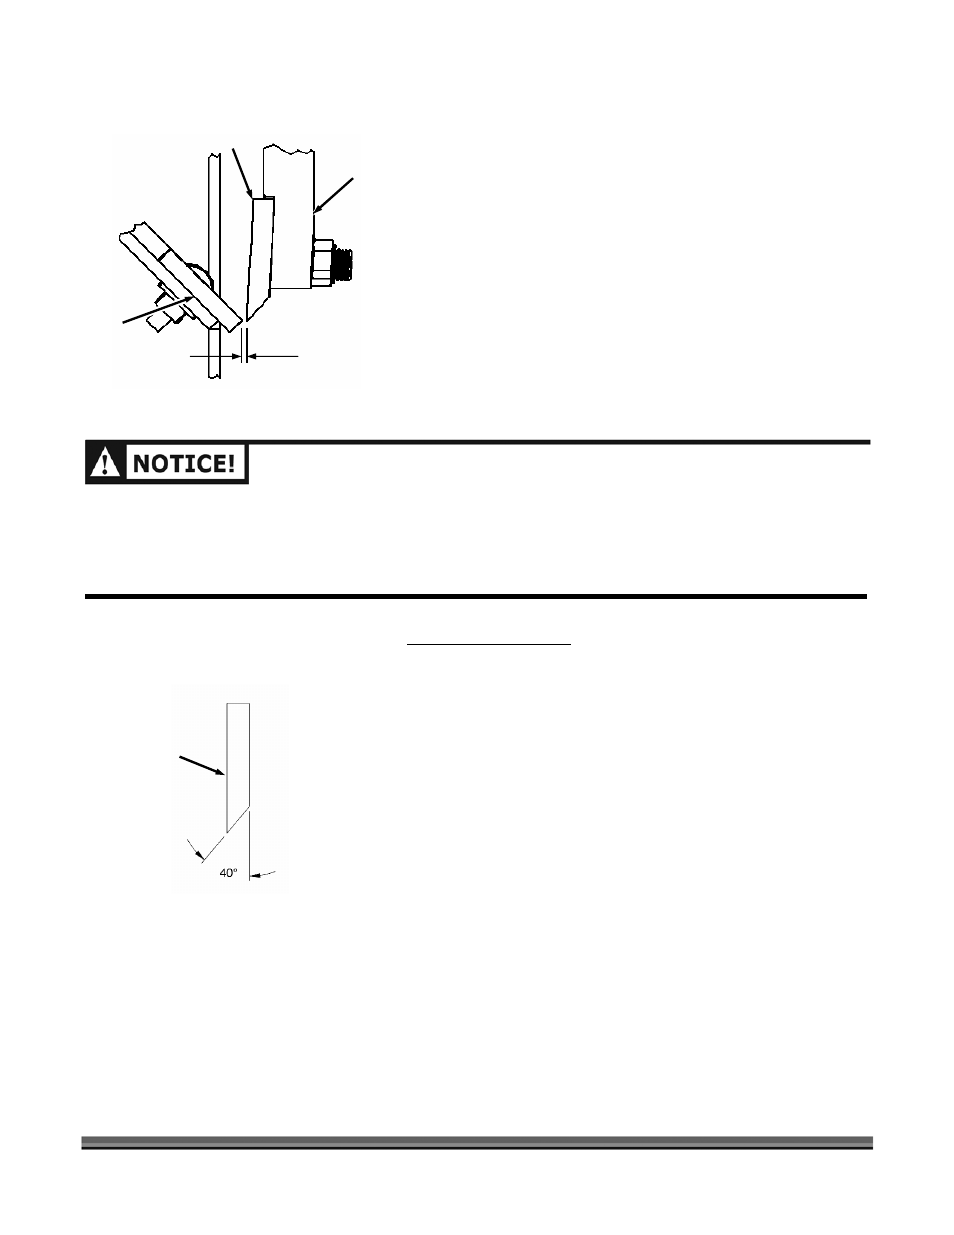
2. Take the Gap Gauge and slide it between the Knife
and Wear Plate (Figure 41). Adjust the Wear Plate
against the Knife Gauge and tighten the Locknuts.
NOTE: See Figure 43 for a more detailed look at the relationship of
the Knife to Wear Plate.
3. Check the adjustment as described in the “Checking
the Gap” in the previous section.
4. Reinstall the Hopper Assembly when finished.
Chipper Knife Sharpening
• You should never attempt to sharpen the Chipper
Knife freehand.
• It is extremely important to consistently maintain the
40-degree angle for proper performance (Figure 44).
• Excessive heat generated during the sharpening
process will damage Knives and weaken the metal. Be
sure not to overheat the Knife during sharpening
because it will shorten the life of the Knife.
• Take the Chipper Knife to a machine shop for proper
sharpening.
• How many times a Knife can be sharpened is
determined by how much material needs to be taken
off to sharpen or to compensate for dents or gouges.
1/16" Gap
(thickness of
Gap Gauge)
Figure 43
Chipper
Knife
Wear
Plate
Flywheel
AFTER ANY KNIFE OR WEAR PLATE MAINTENANCE OR ADJUSTMENT, ROTATE THE CHIPPER
FLYWHEEL BY USING A WOODEN STICK AND WATCH AND LISTEN CAREFULLY FOR ANY UNUSUAL
NOISES, CLICKING OR VIBRATION. IF YOU DETECT ANY OF THESE, INSPECT THE MACHINE FOR
DAMAGE, OR ANY LOOSE PARTS. REPAIR OR REPLACE ANY DAMAGED PARTS AND TIGHTEN ANY
LOOSE PARTS BEFORE STARTING THE DR RAPID-FEED CHIPPER.
Figure 44
Chipper
Knife