Chipper accessories, Extended top-discharge chute – DR Power 3-Point Hitch Rapid-Feed User Manual
Page 43
CONTACT US AT www.DRpower.com or CALL TOLL FREE 1-800-DR-OWNER 39
CHAPTER 7
CHIPPER ACCESSORIES
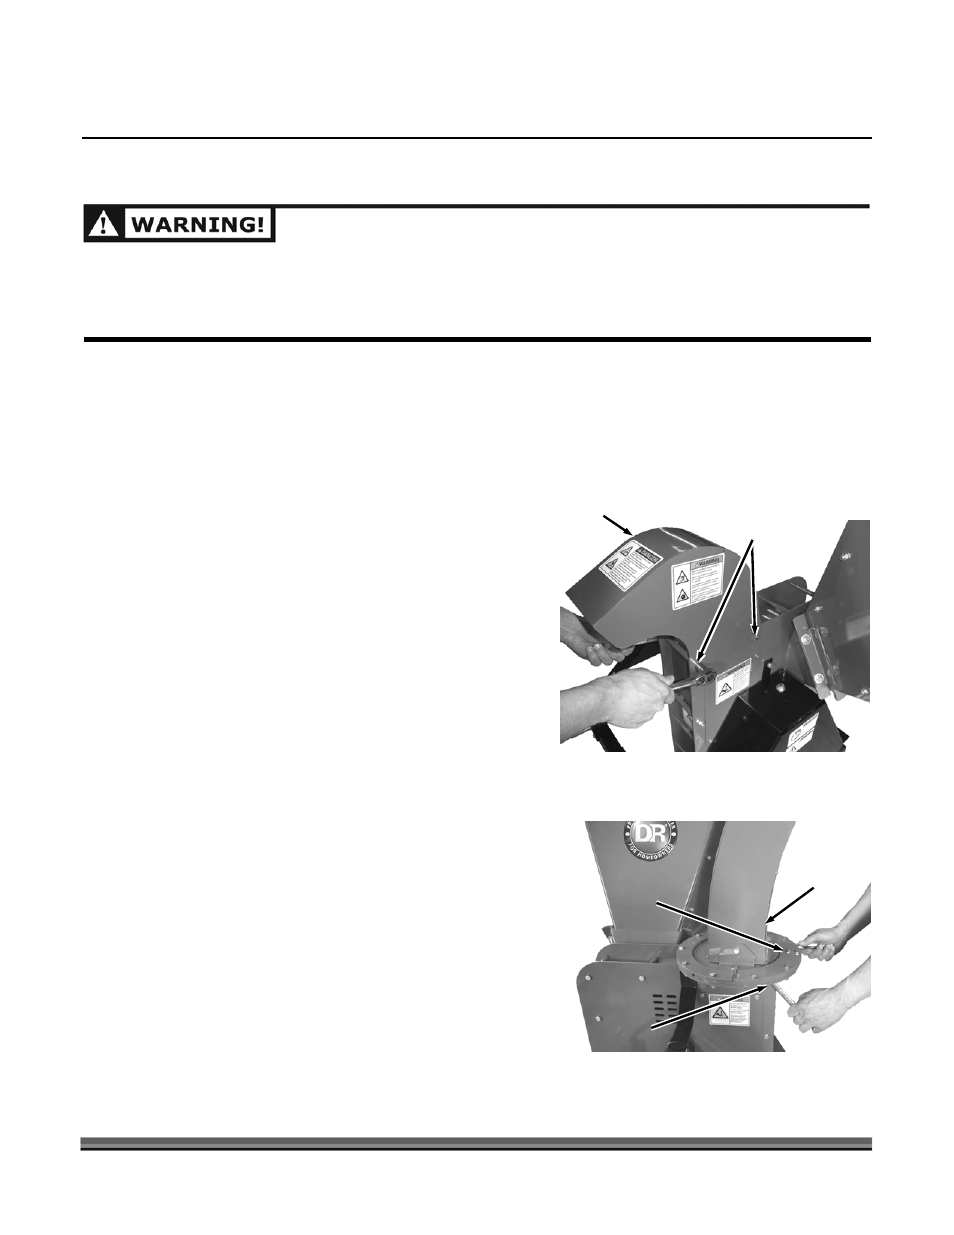
Extended Top-Discharge Chute
The Extended Top-Discharge Chute enables you to better control the direction of the discharged chips
and allows you to direct them into a trailer or truck bed for transport.
Tools Needed:
• Two 1/2" Wrenches
INSTALLATION
1. Remove the two Bolts and Locknuts from the Low
Discharge Assembly with two 1/2" wrenches (Figure
47).
2. Remove the Low Discharge Chute from the Chipper.
3. Position the Extended Top-Discharge Chute onto the
Chipper with the Locking pin on the outside (side
furthest away from the hopper) (Figure 48).
4. Install the two Bolts and Locknuts and tighten with
two 1/2" wrenches.
DISENGAGE PTO, SHUT DOWN THE TRACTOR ENGINE, REMOVE THE KEY, WAIT FOR ALL MOVING
PARTS TO COME TO A COMPLETE STOP, DISCONNECT THE PTO SHAFT FROM THE TRACTOR, THEN
WAIT 5 MINUTES BEFORE PERFORMING ANY MAINTENANCE PROCEDURE OR INSPECTION ON THE
CHIPPER.
Figure 47
Low
Discharge
Chute
Bolts and
Locknuts
Extended
Top-
Discharge
Chute
Figure 48
Locking
Pin
Bolt and
Locknut
(2 places)