Hypertherm Duramax Hyamp Long Handheld Torches User Manual
Page 51
Duramax Hyamp Long Handheld Torches Service Manual 808290
51
4 – Component Replacement
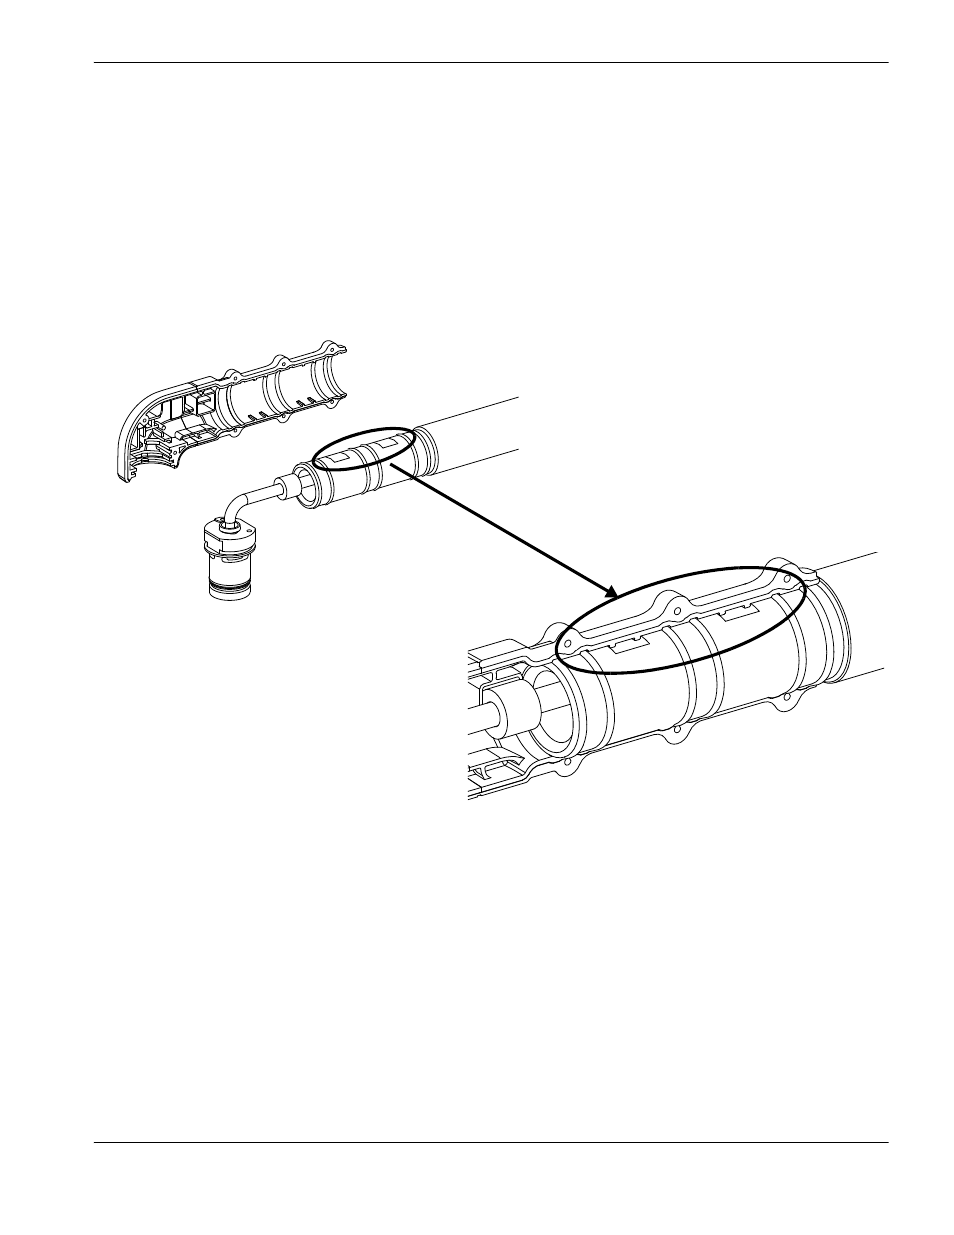
7. Line up the right front shell with the extension tube. The small ribs in the molding of the shell will rest in the flat square
grooves on the extension tube, as shown in
8. Press the torch body and extension tube into the right front shell. Align the torch head with the slot in the shell. See
Figure 10, above.
If the shell does not align with the flat grooves on the extension tube as shown in
Figure 11, grip the extension tube with one hand and the torch head and shell with the
other and then rotate slightly until the shell and tube align properly.
Figure 11
9. Make sure the pilot arc wire is angled toward the gas tube and that the wire terminal is not pressed against the ribs
or plastic housing in the right front shell.
10. Being careful that the front shell does not pinch the wires, align the left half of the shell with the right half. Make sure
the flat grooves on the extension tube align with where the shells meet.
11. Install the front shell screws. Tighten to 15.0 kg∙cm (13 inch∙pounds).
12. If the O-ring on the torch body is dry, lubricate it and the threads with a thin layer of silicone lubricant.
Silicone lubricant is included in several of the replacement kits.
13. Install the consumables.