Install the cap-sensor switch – Hypertherm Duramax Hyamp Long Handheld Torches User Manual
Page 70
70
Duramax Hyamp Long Handheld Torches Service Manual 808290
4 – Component Replacement
Install the cap-sensor switch
1. Lay the right side of the front shell on a flat surface with the inside facing up.
2. Clamp the torch lead in place, with the white wires facing up, to keep the lead from moving.
3. Make sure the consumables have been removed from the torch.
4. Press the new cap-sensor switch into its post hole and onto its mounting post in the shell. (See Figure 31.)
Putting the cap-sensor switch in the shell at this point ensures the switch is positioned
properly before you wrap the new foam strips around the cap-sensor wires.
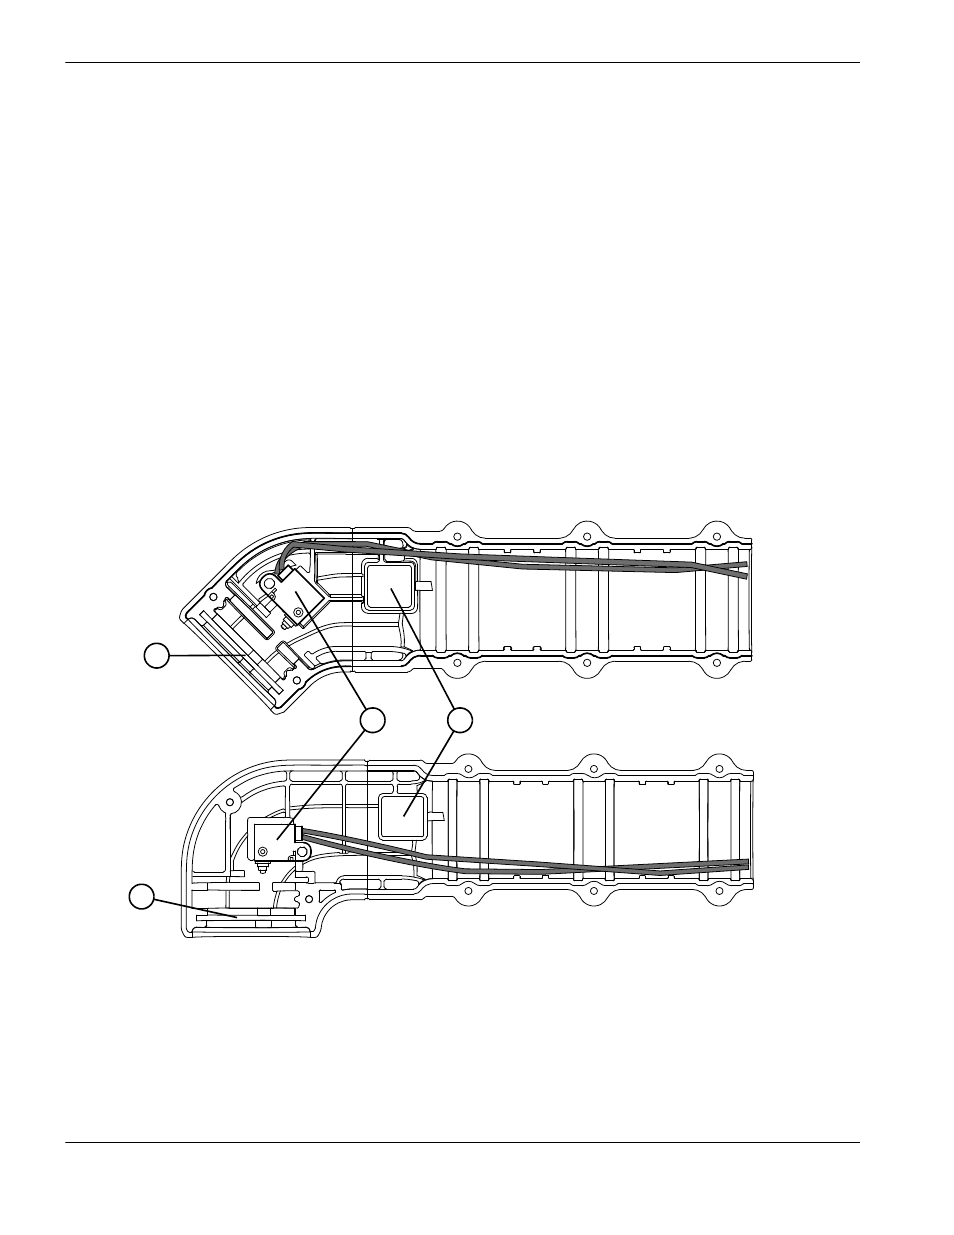
5. Position the cap-sensor wires as shown in Figure 31.
45° torches: Position the wires above the gas tube and above the protective foam that is wrapped around the
gas tube.
90° torches: Position the wires to run under the foam strip and to remain behind the gas tube.
Figure 31 – Wire routing in 45° (top) and 90° (bottom) front shell
6. Press the torch body into the front shell. Align the torch head with the slot in the shell. (See Figure 31.)
1
2
3
1
45°
90°
1
Slot for torch head
2
Cap-sensor switch
3
Slot for foam strip wrapped around the gas tube