Install the start switch – Hypertherm Duramax Hyamp Long Handheld Torches User Manual
Page 56
56
Duramax Hyamp Long Handheld Torches Service Manual 808290
4 – Component Replacement
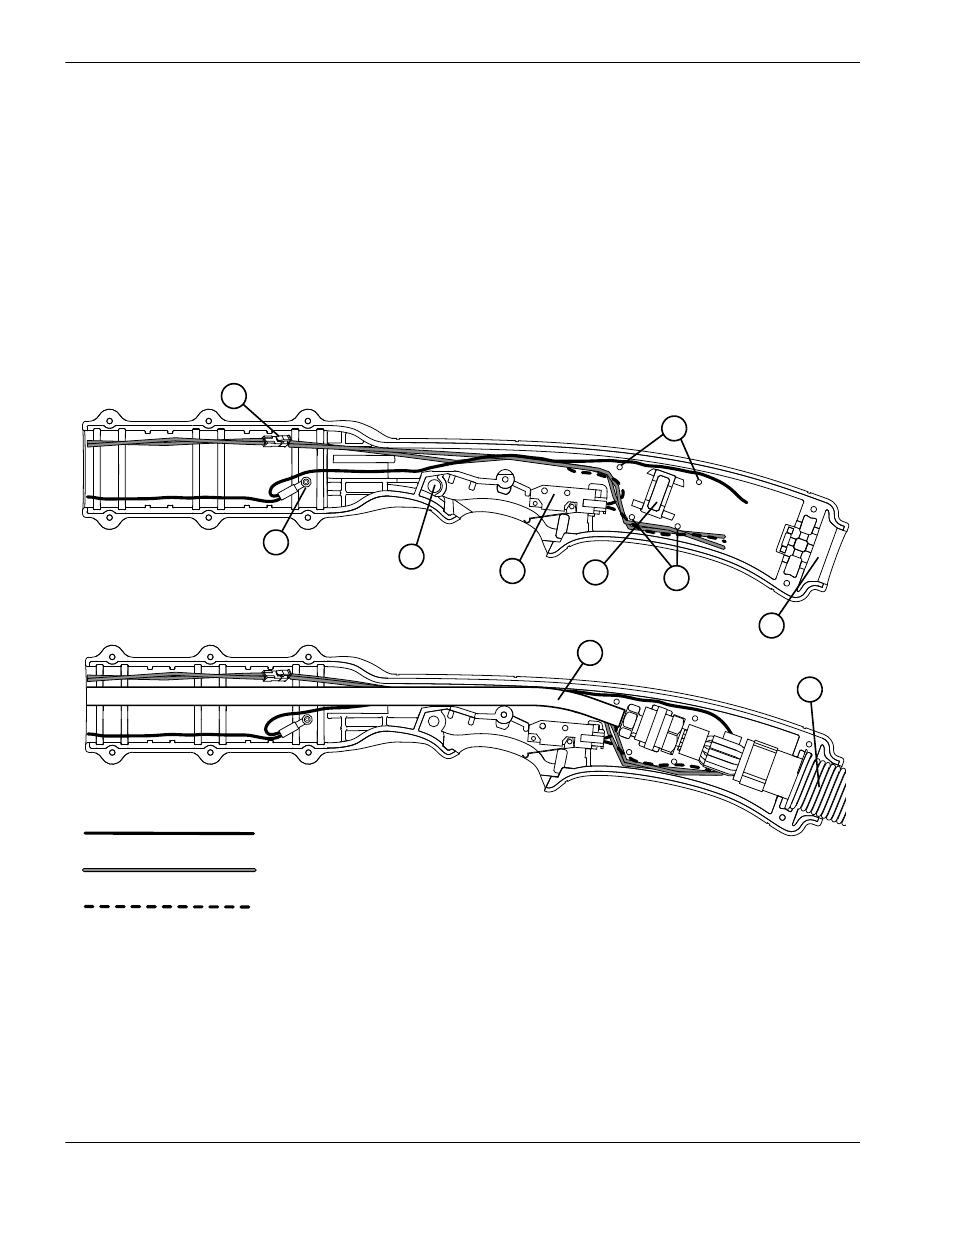
Install the start switch
1. Clamp the torch lead in place, with the white wires facing up, to keep the lead from moving.
2. Connect the new start switch by pushing the mating plug into the socket.
3. Press the new start switch onto the 2 mounting posts in the handle. See Figure 17.
4. Verify the wires are correctly positioned around the 4 posts in the handle, as shown in Figure 17. Make sure the wires
do not run over the gas tube or across the slot for the gas tube fitting’s flange. All 4 wires must sit behind the gas
tube in the handle.
Figure 17 – Wires and start switch positioned in handle with gas tube and torch lead hidden (top) and shown (bottom)
3
Pilot arc wire (red)
Cap-sensor switch wires (blue, orange)
Start switch wires (purple)
5
4
1
2
6
6
7
8
9
1
Cap-sensor switch connector
2
Pilot terminal screw
3
Trigger’s pivot hole
4
Start switch
5
Slot for gas tube fitting’s flange
6
Posts for routing the wires
7
Slot for torch lead strain relief
8
Gas tube
9
Torch lead strain relief