Control panel, Ontrol, Anel – Rena Envelope Imager 3.0 User Manual
Page 12
SECTION 1
GETTING ACQUIANTED
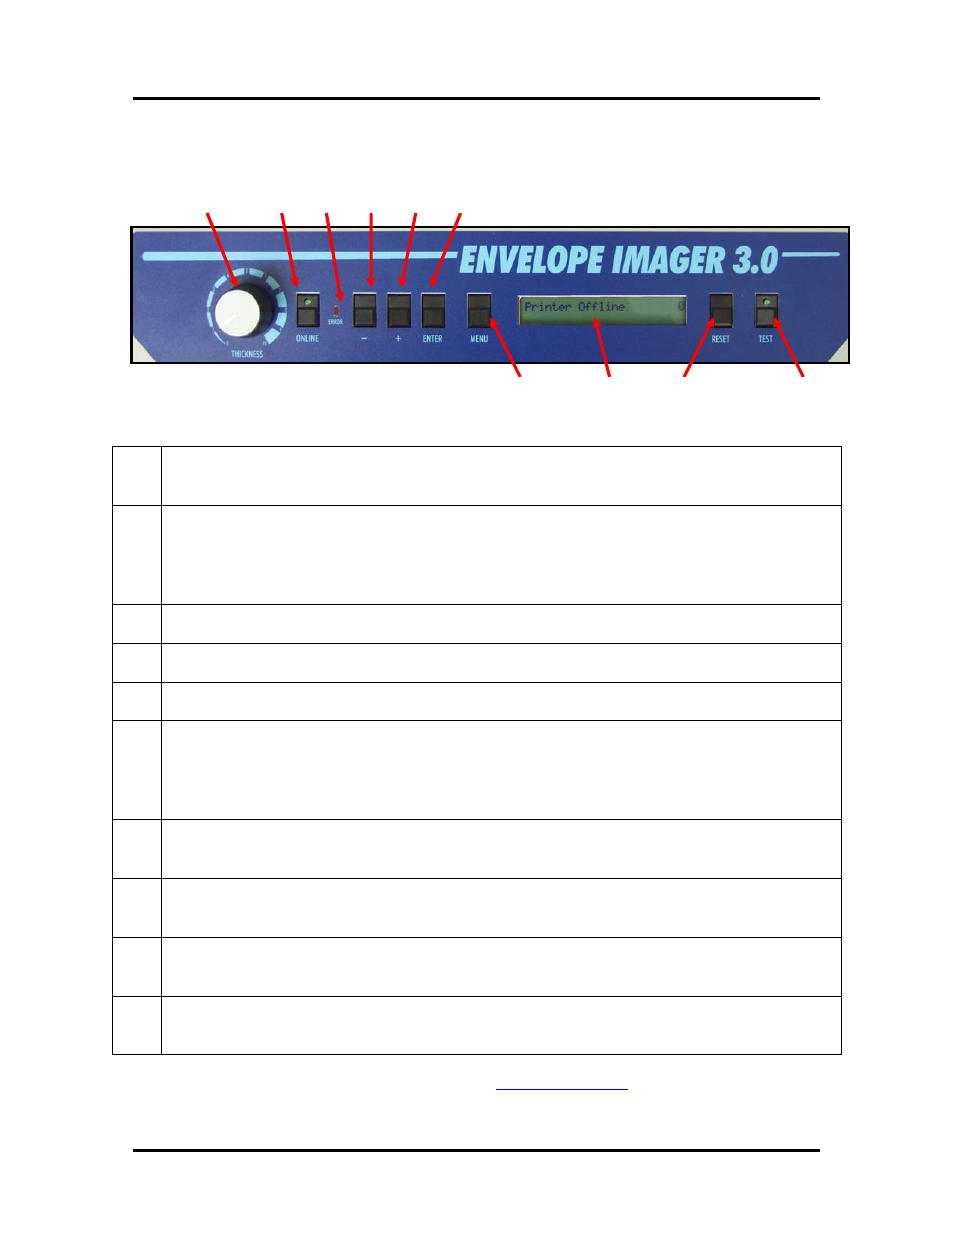
Control Panel
Figure 9
8
10
9
7
6
5
2
3
1
4
1.
MEDIA THICKNESS ADJUSTMENT DIAL– The dial on the right side of the control panel
is used to adjust the height of the print heads to compensate for different media thickness.
2.
ON LINE key – This key is used to put the printer on/off line.
LED “slow flash” = Printer is powered on, but off-line.
LED “on” = Printer is on-line
Note: The printer must be off-line to access the menu modes or TEST print.
3.
ERROR Indicator – This indicator lights when there is a problem with the printing process.
4.
- key – In the menu mode this key will scroll to the previous selection.
5.
+ key –In the menu mode this key will scroll to the next selection.
6.
ENTER key – This key is used to start/stop media feed.
When the printer is placed in any of the menu modes, the ENTER key is used to select the
options available.
When the printer is off-line this key is used to start the Paper Feed function.
7.
MENU key – This key causes the printer to enter the menu mode where several operator
functions can be accessed.
8.
LCD DISPLAY – Indicates the status of the printer including piece count, menus, and error
messages.
9.
RESET key – Holding down this key, until all LED’s light momentarily, will reset the printer
to its normal ready state.
10.
TEST key – Pressing this key will put the printer into the test pint mode (LED on); allowing the
printer’s internal “test image” to be printed.
NOTE: A complete description of the functions and operation of the printer keys
can be found in Section 3 –
.
12
Envelope Imager 3.0/4.0 Operations Rev. 6/7/2007