Printing from microsoft word – Rena Envelope Imager 3.0 User Manual
Page 41
SECTION 3
OPERATING THE PRINTER
Printing from Microsoft Word
If you are not using a specific program designed for mailing applications it is possible to print your mail
pieces using Microsoft Word. This section will cover how to layout a piece and to print from Microsoft
Word.
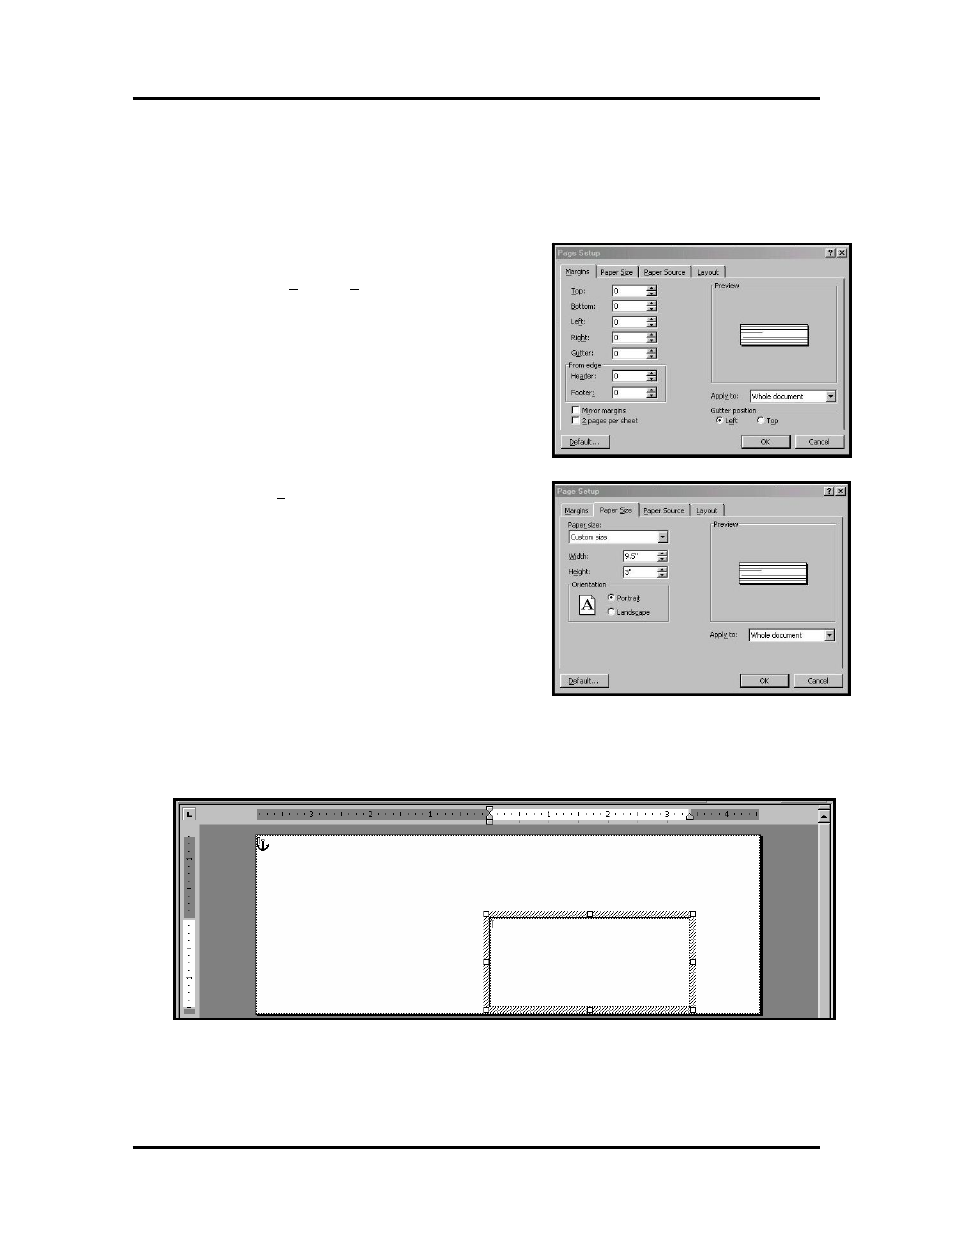
To begin open a new page and turn on the tool bar for Mail
Merge. Under Print, select the Address Printer 6 as the default
printer. Go to Page Setup in the File menu. Set all of the
margins to “0”.
NOTE: The printer must be selected before you do the
setup so that the setting will be registered.
Next, select the Page Size tab and Custom Page. The size of
the layout should be 3-inches high for the Envelope Imager 3.0
or 4-inches high for the Envelope Imager 4.0, by the length of
the piece you are intending to print. In our example, we have
selected the width of a # 10 envelope, 9.5-inches. The
orientation of the piece is always Portrait. The effective
printing area of the Envelope Imager 3.0 is 3-inches by 17-
inches and 4-inche by 17 inches for the Envelope Imager 4.0.
When you have completed this step click OK.
The next step is to create a text box so that you can position the address the proper distance from the lead
edge of the piece. Once the page layout is set, you might want to save it as a template for use later.
When you have completed the steps above the layout for an Envelope Imager 3.0 should look like the one
below.
NOTE: When setting up a layout for the printers, be aware that the printheads are aligned in two banks on
the Envelope Imager 3.0 and these banks can be aligned so that you can print up to 3” wide. The Envelope
Imager 4.0 has four banks of heads that permit a 4” wide print area on your media. Where you position the
banks is dictated by the requirements of the job.
Envelope Imager 3.0/4.0 Operations Rev. 6/7/2007
41