2 – quick start guides – Teac DP-006 User Manual
Page 24
24
TASCAM DP-006
2 – Quick Start Guides
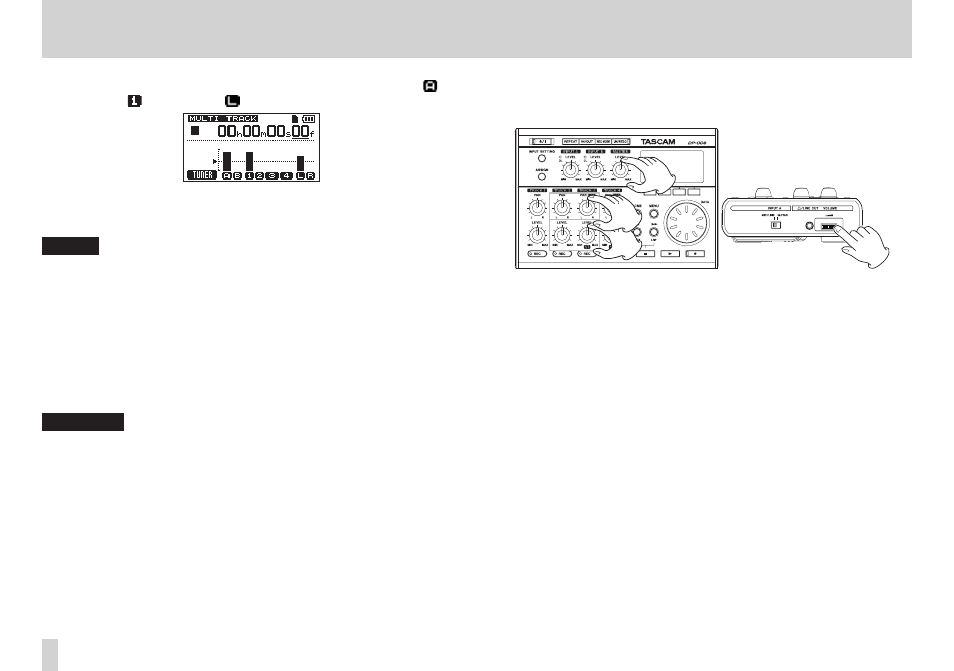
When you sing into internal MIC A, the input level is shown by the
(INPUT A), (TRACK 1) and (left channel) level meters on the display.
Turn up the MASTER LEVEL knob and the VOLUME dial on the left side
of the unit to hear the mic signal through the headphones.
NOTE
•
If the OL indicator continues to light even when the LEVEL knob is turned
down, the mic signal itself is too loud. In this case, if the input source
setting is INT.MIC A-High, change it to INT.MIC A-Mid or INT.
MIC A-Low
. If the input setting is INT.MIC A-Mid, change it to INT.
MIC A-Low
. If the OL indicator continues to light even when set to INT.
MIC A-Low
, move the sound source away from the mic or lower the
volume at the sound source.
•
When the input source is a built-in mic, the signal from the built-in mic
cannot be monitored if the REC indicator of the track that it is assigned to
is not lit.
CAUTION
When using a microphone, always use headphones to monitor. Using
speakers to monitor could result in feedback.
4. After returning to the start of the song (00h00m00s00f), press the Play
(7) button while pressing and holding the Record (0) button to start
recording, and sing along with the already recorded lead and rhythm
guitar parts.
You can hear singing and the recorded guitars playing back on TRACK 2
and TRACK 3.
5. As necessary, use the TRACK 2 and 3 LEVEL and PAN (PAN [BAL]) knobs,
the MASTER LEVEL knob and the VOLUME dial on the left side of the
unit to adjust the monitoring levels and balance.
6. When you are done listening to the recording, press the Stop (8) button
to stop playback.
7. After returning to the start of the song (00h00m00s00f), press the Play
(7) button while pressing and holding the Record (0) button to start
recording, and sing the vocal part.
The Record (0) indicator lights red and the TRACK 1 REC indicator stops
blinking and stays lit.
8. When you are done singing, press the Stop (8) button to stop recording.
9. Press the TRACK 1 REC button to turn off the REC indicator (ending
recording standby).