12 – exchanging data with a computer – Teac DP-006 User Manual
Page 91
TASCAM DP-006
91
12 – Exchanging Data with a Computer
5. When you finish selecting (putting a ✔ next to) the tracks that you want
to export, press the F2 [NEXT] button.
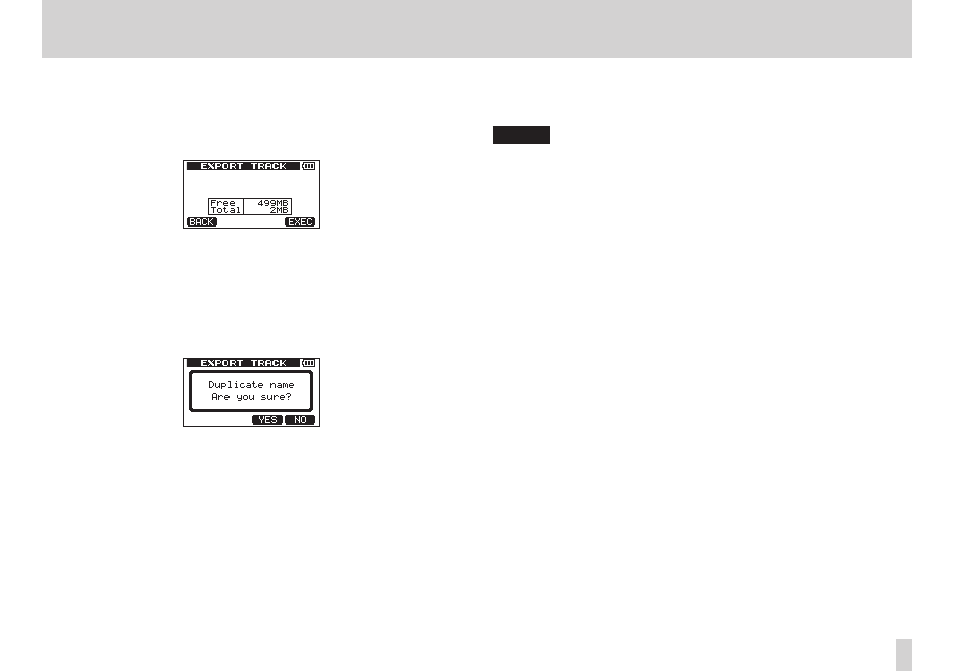
The amount or open space on the FAT partition (which is the destination
for the exported tracks) and the total number of tracks to be exported is
shown.
6. Press the F4 [EXEC] button.
The selected track is exported to the FAT partition with the edited file
name with the “.WAV” extension added as the track file name.
If you have previously exported a track file with the same name (title), a
Duplicate name Are you sure?
(A file with the same name
already exists. Are you sure that you want to overwrite it?) confirmation
pop-up message appears.
Press the F3 [YES] button to overwrite the old file.
Press the F4 [NO] button to cancel the export and return to the file list
screen.
7. Press the HOME button to reopen the Home Screen.
8. Connect this unit to a computer. (See “Connecting with a computer” on
page 84.)
9. Use the computer to copy track files from the WAVE folder on the FAT
partition to the computer.
10. After exporting track files to the computer, remove the USB cable using
the proper procedures and disconnect the unit from the computer. (See
NOTE
•
You can change the name of an exported track file on the computer. If you
do so, use no more than 8 English letters and numbers for the name and
always follow them with the “.wav” extension. Furthermore, do not use
special symbols, for example.
•
Exported files are given names according to their source tracks in the
following manner.
TRACK 1:
“TEX001.WAV”
TRACK 2:
“TEX002.WAV”
TRACK 3 (mono): “TEX003.WAV”
TRACK 3 (stereo): “TEX003S.WAV”
TRACK 4 (mono): “TEX004.WAV”
TRACK 4 (stereo): “TEX004S.WAV”