Resolution, To select the input source – Casio XJ-A142 User Guide User Manual
Page 15
15
To select the input source
1.
Press the [INPUT] key. This will display the “Input” dialog box.
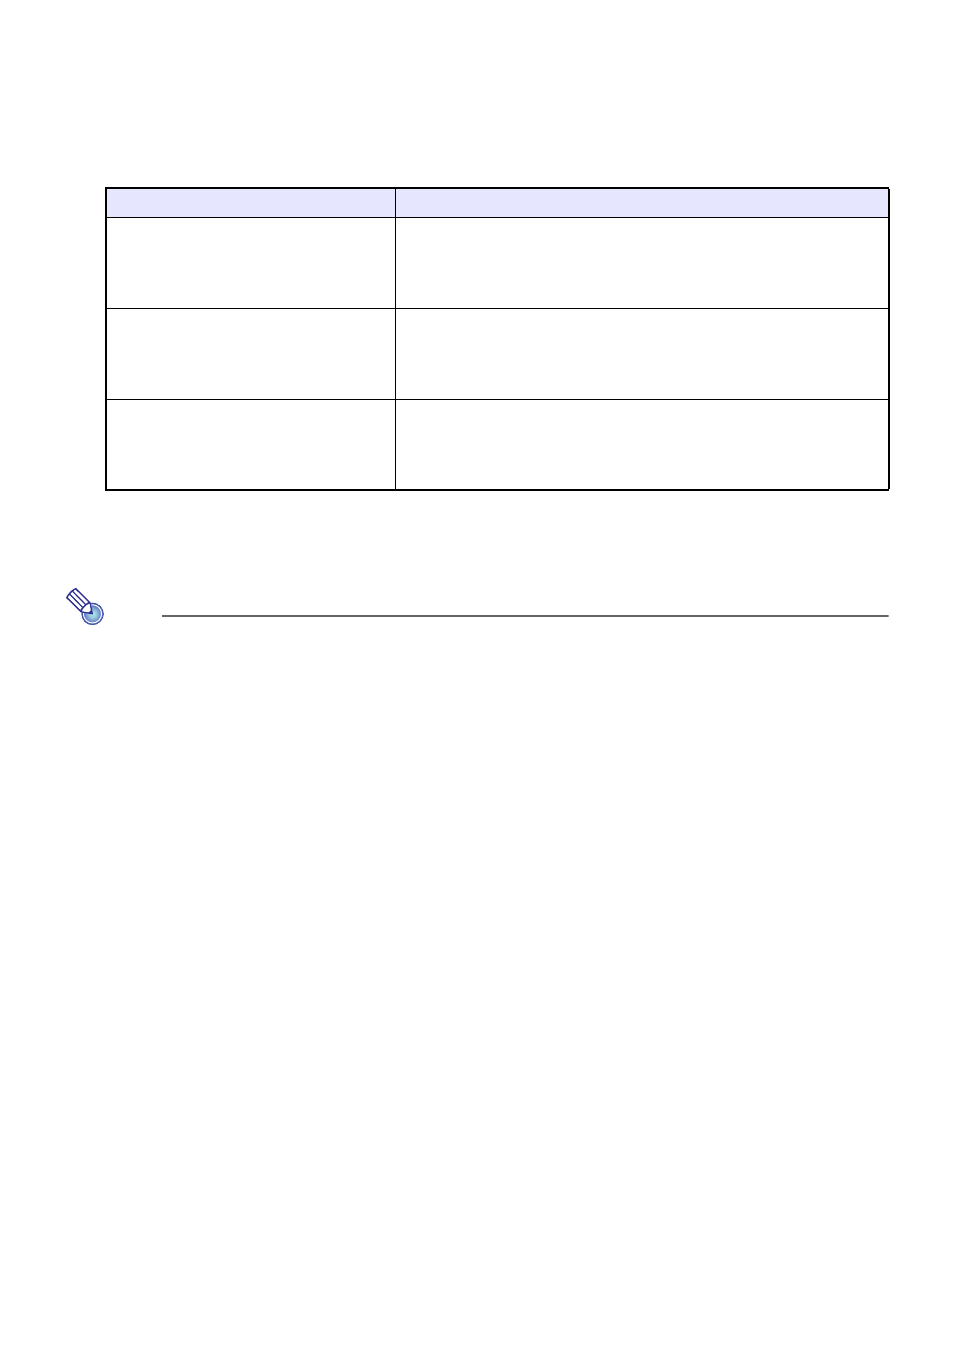
2.
Depending on the input source, perform one of the operations described in the
table below.
z The name of the input source you selected will appear in the upper right corner of the
projection screen for a few seconds.
z The message “No signal input” will appear if no input signal can be detected.
Note
z For more information about the operation required to select Wireless, Network, USB Display,
File Viewer, or CASIO USB Tool as the input source and perform projection, refer to the
following.
Resolution
Depending on the projector model, its video resolution will be fixed at XGA (1024 × 768 pixels) or
WXGA (1280 × 800 pixels). Images may appear coarse, text and other figures may be difficult to read
or a moire pattern may appear when the input signal from a computer does not match the projector’s
video resolution. If this happens, try doing the following.
z Change the computer’s output resolution setting so it matches the projector’s video resolution.
For information about the video resolution of your projector, see “Specifications” in the Setup
Guide. See the user documentation that comes with your computer for details about changing its
settings.
z Change the “Aspect Ratio” setting to “True” (Applies only to models that support WXGA video
resolution). With the “True” setting, the projector projects the input signal at its actual size (1 input
source dot equal to one projector output pixel dot).
For information about configuring the Aspect Ratio setting, see “To change the aspect ratio of the
projected image (ASPECT)” (page 51).
To select this input source:
Perform this operation:
Computer, Video,
S-Video (XJ-M Series), HDMI,
Wireless (XJ-A Series),
Network (XJ-M Series), USB Display
Use the [T] and [S] keys to select the name of the input source you
want to select and then press the [ENTER] key.
File Viewer
1. Use the [T] and [S] keys to select “Viewer” and then press the
[ENTER] key.
2. On the dialog box that appears, confirm that “File Viewer” is
selected and then press the [ENTER] key.
CASIO USB Tool
1. Use the [T] and [S] keys to select “Viewer” and then press the
[ENTER] key.
2. Press the [T] key to select “CASIO USB Tool” and then press the
[ENTER] key.
Wireless or Network: Separate Network Function Guide
USB Display: “Projecting with the USB Display Function (USB Model Only)” (page 43)
File Viewer: “Projecting with File Viewer (USB Model Only)” (page 18)
CASIO USB Tool: “Projecting the Screen Image of a Graphing Calculator (USB Model Only)”
(page 48)