Casio XJ-A142 User Guide User Manual
Page 58
58
Image Adjustment 1 3
Saturation (V)
Use this sub-menu to adjust the color saturation of the projected image. A larger
value increases color saturation.
Image Adjustment 1 3
Tint (V)
Use this sub-menu to adjust the tint of the projected image.
A larger value makes the overall image more bluish, while a smaller value makes the
overall image more reddish. This setting is supported only when the signal is NTSC
or NTSC4.43.
Image Adjustment 1 3
Color Mode
Select one of the following projected image color modes: “Standard
*”, “Graphics”,
“Theater”, “Blackboard”, “Game”.
Image Adjustment 1 3
Color Balance
Select one of the following color balance presets: “Warm”, “Normal
*”, “Cold”.
Also can be used to separately adjust red, green, and blue.
Image Adjustment 1 3
Eco Off Mode
When “Off” is selected for the “Option Settings 1 3 Eco Mode” setting, specify
either “Bright” (brightness priority) or “Normal
*” (hue priority) as the image quality
setting.
Image Adjustment 1 3
Restore Menu Defaults
Return all of the items in the “Image Adjustment 1” main menu to their initial defaults
for the currently projecting image source.
Image Adjustment 2 3
Vertical Position (RCV)
Adjust the vertical and horizontal positions of the input source image in relation to
the target screen.
Image Adjustment 2 3
Horizontal Position (RCV)
Image Adjustment 2 3
Frequency (R)
When vertical bands appear in the projected image while RGB is selected as the
input source, it means that the frequency setting is not correct. When this happens,
use this setting to adjust the frequency manually. If, for some reason, your manual
frequency settings cause the image input from the computer to disappear from the
projection, you can press the [AUTO] key to perform an auto adjust operation, which
should cause the image to appear.
Image Adjustment 2 3
Phase (R)
Adjust the phase of the RGB input signal when the image flickers because the
projector phase and RGB input signal phase do not match.
Image Adjustment 2 3
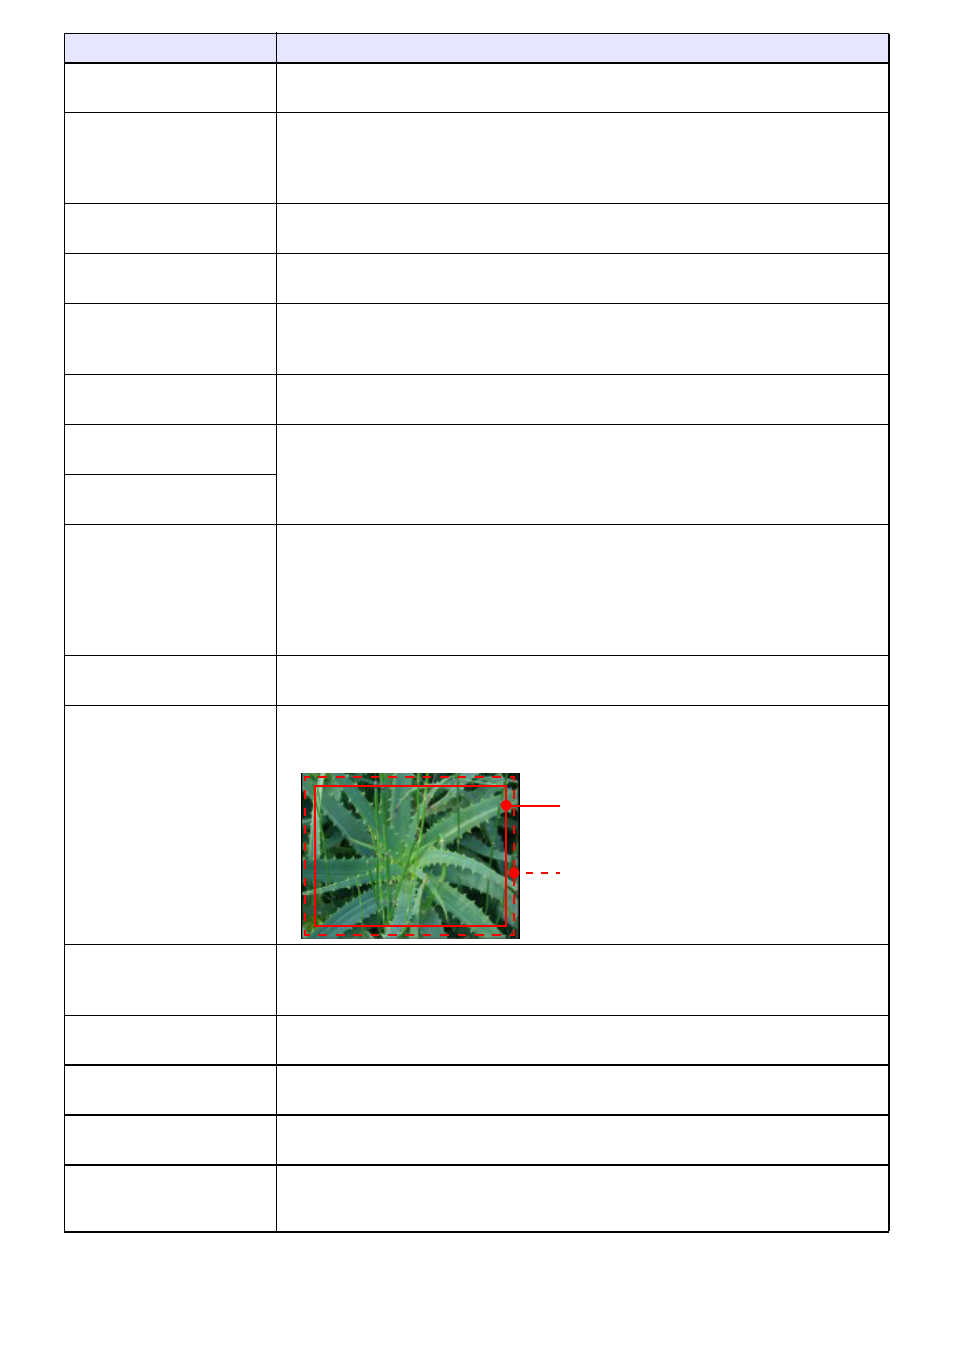
Overscan (CVD)
Adjust the overscan amount for an input video signal within the range of 0% to 5%
*.
The size of the border area displayed on the projection screen depends on the
setting value. A smaller value results in a wider border area as shown below.
Image Adjustment 2 3
Restore Menu Defaults
(RCVD)
Return all of the items in the “Image Adjustment 2” main menu to their initial defaults
for the currently projecting image source.
Volume Adjustment 3
Volume
See “To adjust the volume level (VOLUME)” (page 49) for more information.
Volume Adjustment 3
Restore Menu Defaults
Return the Volume setting to its initial default for the currently projecting image
source.
Screen Settings 3
Keystone Correction
Use this sub-menu to perform vertical keystone correction of the projected image.
Screen Settings 3
Aspect Ratio (RCVHD)
Select an aspect ratio setting for the projected image.
See “To change the aspect ratio of the projected image (ASPECT)” (page 51) for
more information.
Use this menu item:
To do this:
Display range at 5%
Display range at 0%