ProSoft Technology 5104-DNPS-PDPM User Manual
Page 17
PDPM ♦ ProLinx Gateway
Configuration
PROFIBUS DP Master
Protocol Manual
ProSoft Technology, Inc.
Page 17 of 70
June 24, 2013
3 Insert the master you are defining on the bus.
4 Insert DP slaves and assign them to the master.
5 Configure these DP slaves with the actual I/O modules, parameter data, and
so on. Ensure that the right addressing mode has been selected.
6 If using a multi-master network, look at the dependencies/connections
between the devices by selecting one master after the other as actual master
to check your configuration.
7 Select the baud rate and bus parameters.
8 Set up the device assignment that defines how ProLinx SyCon is to
communicate with the devices.
9 Save the configuration.
10 Select the port to be configured and perform the download process to all
devices.
11 Connect the PROFIBUS cable to the device.
12 Start the debug mode to check the communication.
13 Print out the documentation produced by the PROFIBUS system. If
PROFIBUS is running, start with the installation of the application.
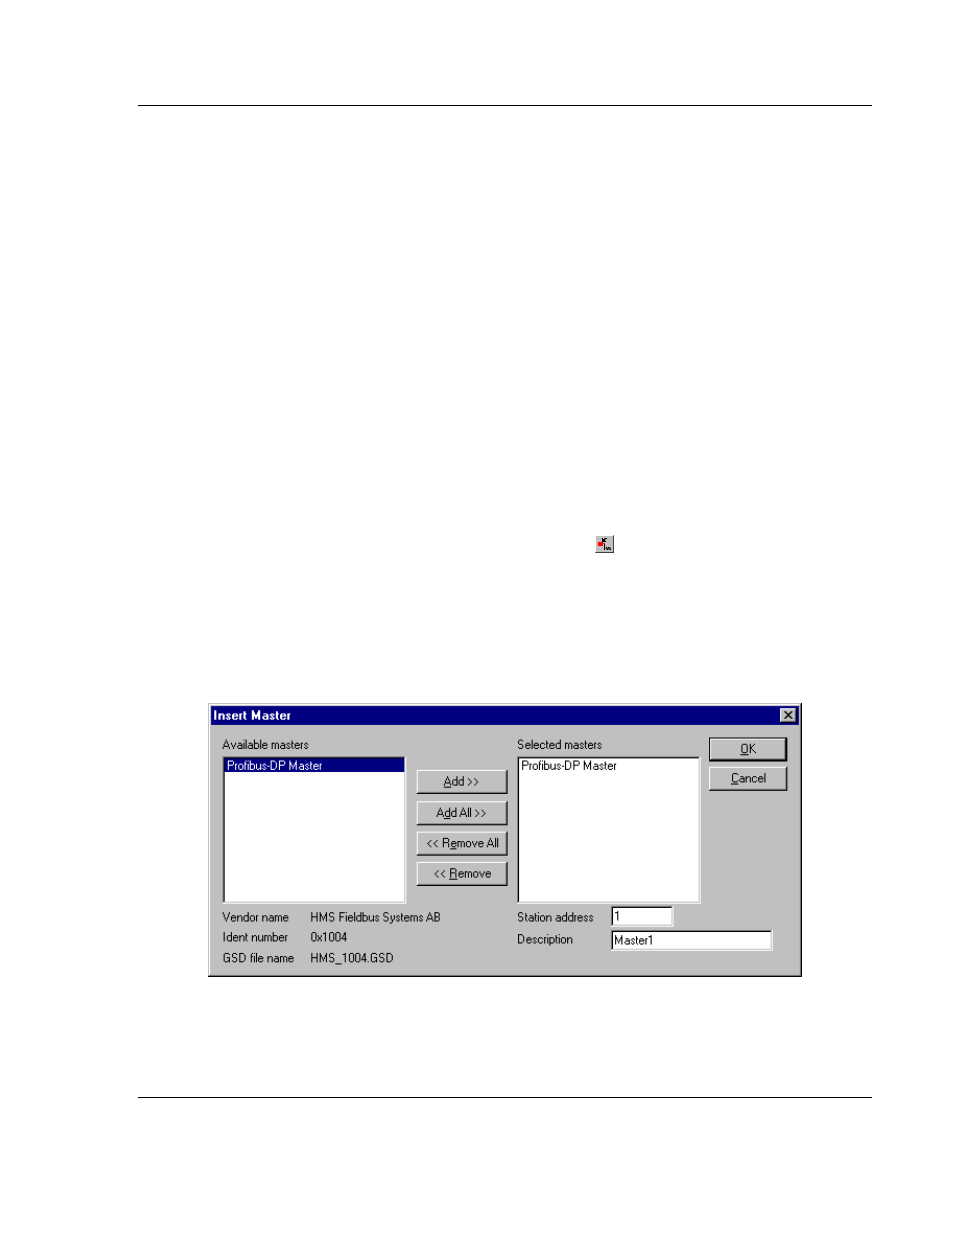
3.1.4 Inserting a Master
To insert a master in the configuration, select the Insert - Master menu to open
the selection dialog box or click the following button:
The mouse cursor changes automatically to the insert master cursor. Click on the
position where you want to insert the new master. A dialog box appears where
you can select one or more masters. You can select different master types
(depending on the vendor brand).
If you chose the ProLinx PROFIBUS Master, the Vendor information is displayed
exactly as shown in the following example:
In this example, a PROFIBUS-DP Master will be added with Station Address 1
and the Description Master 1.