Rear panel – KORG SP-280 Portable Digital Piano (Black) User Manual
Page 6
6
13. Display:
Shows settings, for example, for the Function mode and the metronome.
14. UP/DOWN buttons:
These buttons are used to select a value for the various set-
tings.
15. METRONOME button/LED:
This button is used to start/stop the metronome.
While the metronome is being used, the LED lights up. In addition, hold down
the button to enter the Metronome settings mode, where various metronome set-
tings can be specified.
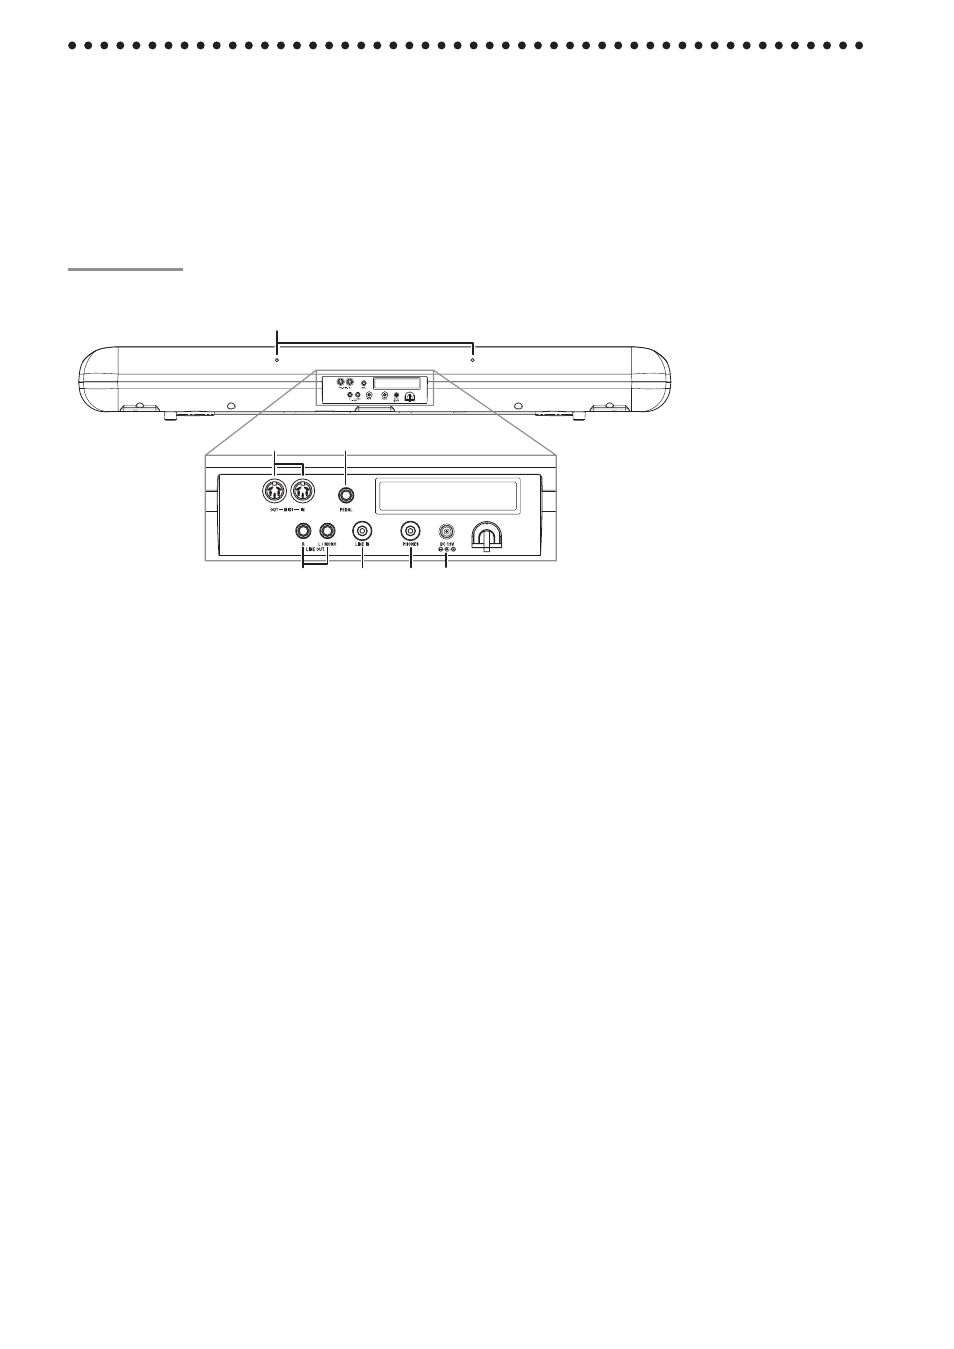
Rear panel
5
4
7
6
2
3
1
1. Music stand holes:
Holes for installing the included music stand.
2. MIDI (IN, OUT)connectors:
Connectors that are used to connect other MIDI de-
vices (sequencer, keyboards, etc.).
OUT:
Data output
(to be connected to the MIDI IN connector of another MIDI device).
IN:
Data input
(to be connected to the MIDI OUT connector of another MIDI device).
3. PEDAL jack:
This jack is used to connect the included damper pedal.
4. LINE OUT (L/MONO, R) jacks:
These are the main audio output jacks. These jacks
are where an external amplifying system would be connected to amplify the sound
from the SP-280. (With a hi-fi system use the AUX or LINE IN connectors). To am-
plify the SP-280 in mono, connect the single L/MONO jack. Use the VOLUME knob
to set the output volume.
5. LINE IN jack:
This is a stereo mini jack for audio input. This jack is used to con-
nect the audio output (AUX Out) of a sound system or other electronic musical in-
strument. Adjust the input volume with the connected device.
6. Headphone (PHONES) jack:
The stereo mini plug of headphones can be inserted.
The same sound from the headphone jack on the front of the SP-280 will be pro-
duced. When the headphone plug is inserted, no sound will be produced from the
speakers.
7. DC 19V jack:
Connect the included AC adapter here.