Avery Dennison Monarch 9906 MonarchNet2 User Manual
Page 30
3-4
MonarchNet2 Operating Instructions
C o n f i g u r i n g t h e P r i n t e r
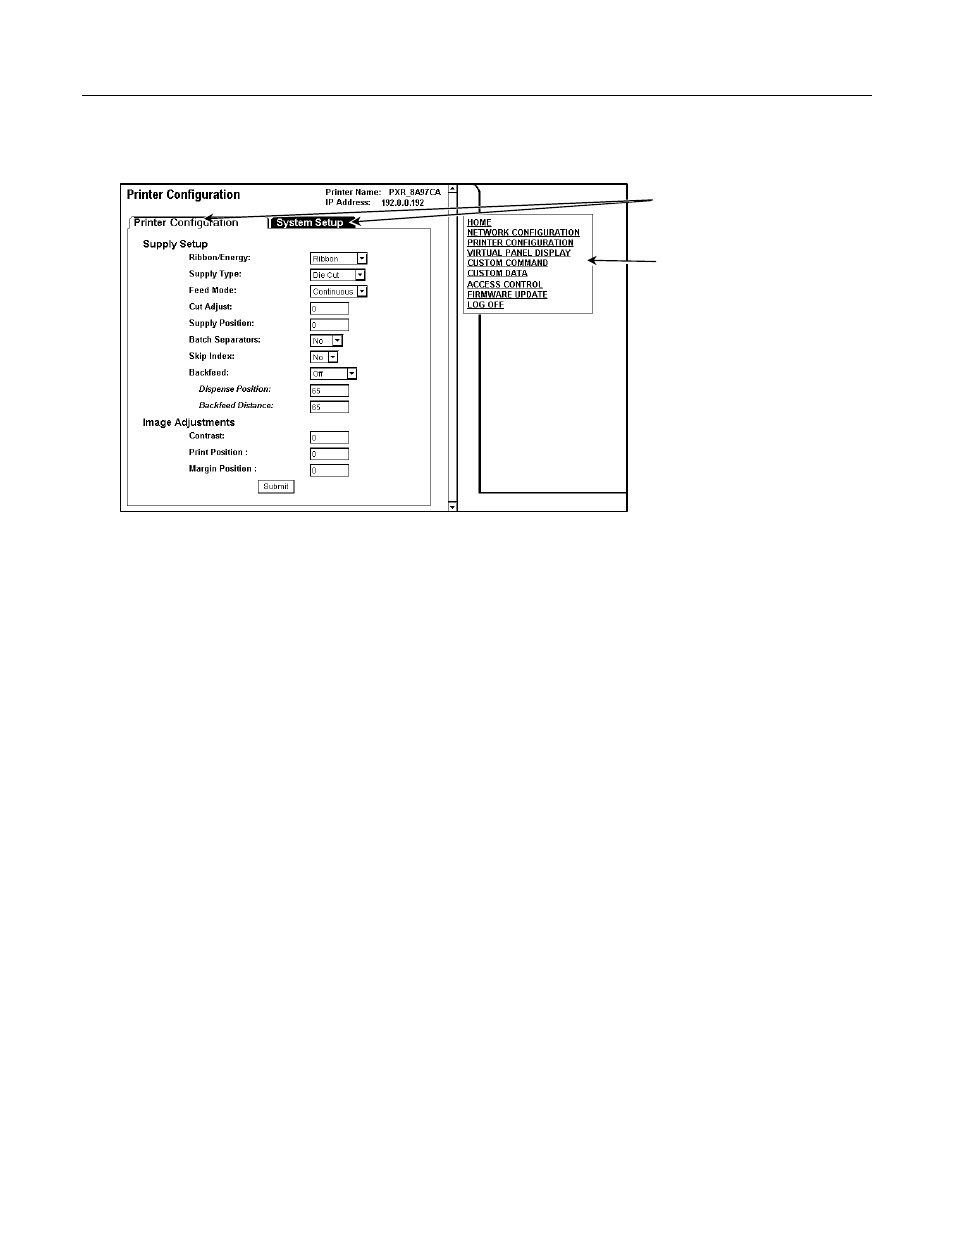
You can configure the printer using your Web browser.
1. From the side Menu Bar, click Printer Configuration.
2. Select one of the following tabs: Printer Configuration or Supply Setup.
Changing the Printer Setup
Only configure the settings required for your network/printer.
Note:
Only the available options for your printer are displayed.
1. On the Printer Configuration tab, set the Ribbon: None, Ribbon, or High Energy.
2. Set the Supply Type: Aperture, Die Cut, Black Mark, or Continuous.
3. Set the Feed Mode: Continuous or On Demand.
4. Enter a value for the Supply Position. The range is –300 to 300. This adjusts the
printer to print at the vertical 0,0 point. Only adjust on initial printer setup.
3. Set the Batch Separators: No, Yes, or Long.
4. Set the Skip Index mode: No or Yes. Skip index allows you to print an image over
multiple labels.
5. Set the Backfeed: Off or On. Backfeed advances each printed label to the specified
dispense position and then backs up the next label to be printed underneath the
printhead.
6. Enter a value for the Dispense Position (range is 50 to 200). This adjusts the
stopping point of the label after it is printed.
7. Enter a value for the Backfeed Distance (range is 10 to 200). This is the amount to
move the label backwards before printing.
8. Enter a value for the Contrast (range is –699 to 699). This adjusts the darkness of
printing on the supply.
T a b s
S i d e
M e n u
B a r