Avery Dennison Monarch 9906 MonarchNet2 User Manual
Page 35
Using a Web Browser 3-9
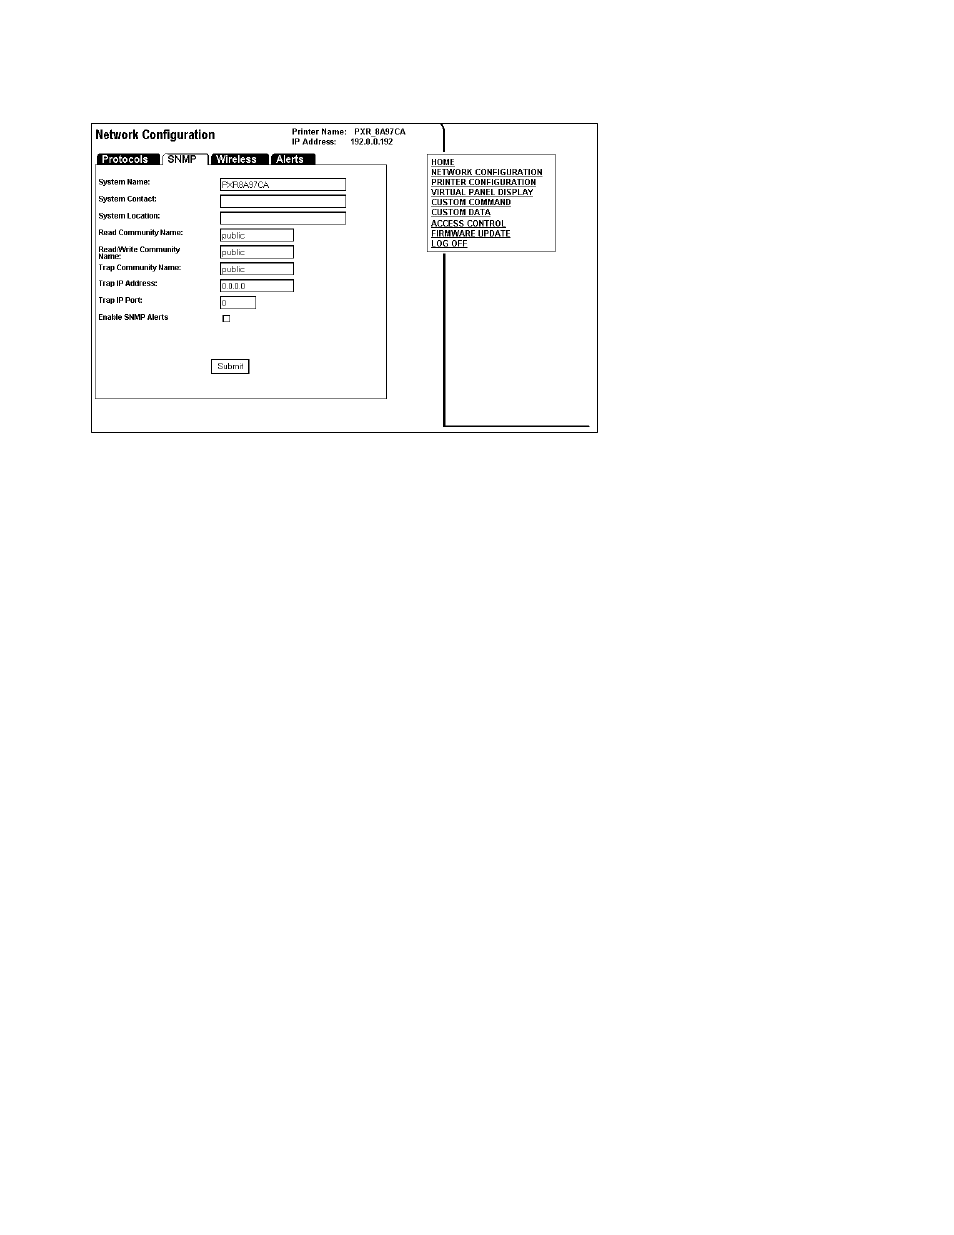
Changing SNMP Settings
Only configure the settings required for your network/printer.
1. Click the SNMP tab to change SNMP settings.
2. Enter the System Name, if it does not automatically appear.
3. Enter the System Contact.
4. Enter the System Location.
5. Verify the Read Community Name and change if necessary.
6. Verify the Read/Write Community Name and change if necessary.
7. Verify the Trap Community Name and change if necessary.
8. Enter the Trap IP Address, if it does not automatically appear.
9. Enter the Trap IP Port, if it does not automatically appear.
10. Enable SNMP Alerts if necessary. Set which alerts you need to receive. See
“Setting Alerts” for more information.
11. Click Submit when you are finished.
12. Click the Protocols tab.
13. Click Save Re-init Network (on the Protocols tab) before any changes take effect.
Even though you submitted your changes on the previous screen, they do not take
effect until you click Save Re-init Network. This process may take a few minutes.