34 vehicle care – Hummer 2010 H3 User Manual
Page 300
10-34
Vehicle Care
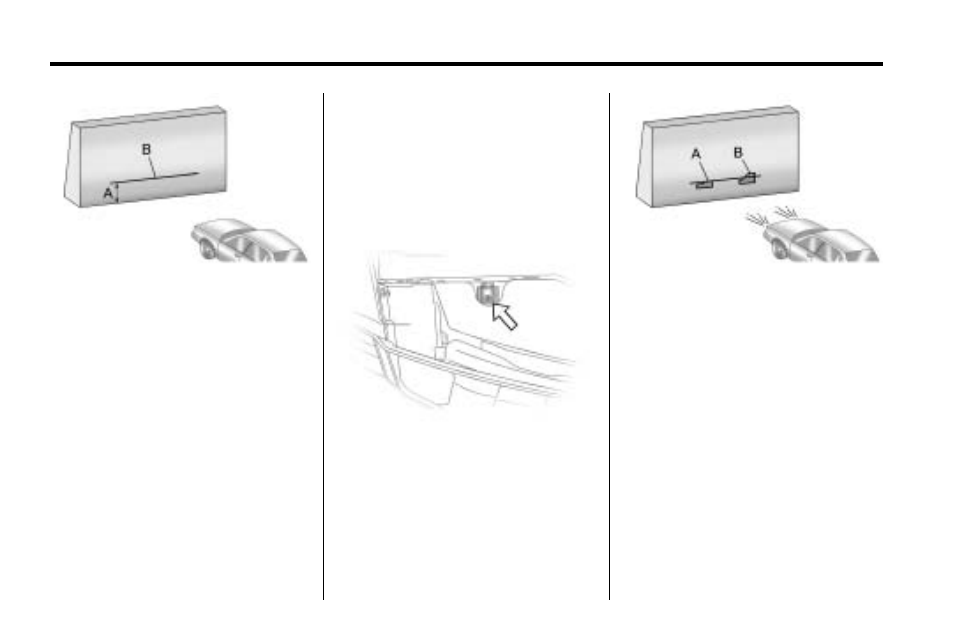
3. At a wall, measure from the
ground upward the recorded
distance from Step 2 and
mark it.
4. Draw or tape a horizontal line
the width of the vehicle at the
wall where it was marked it
Step 4.
Notice: Do not cover a headlamp
to improve beam cut-off when
aiming. Covering a headlamp may
cause excessive heat build-up
which may cause damage to the
headlamp.
5. Turn on the headlamps and
place a piece of cardboard
or equivalent in front of the
headlamp not being aimed. This
should allow only the beam of
light from the headlamp being
aimed to be seen on the wall.
Passenger Side Shown
6. Locate the vertical headlamp
aiming screws, which are under
the hood near each headlamp
assembly.
The adjustment screw can be
turned with an E8 Torx
®
socket
or T15 Torx
®
screwdriver.
7. Turn the vertical aiming screw
until the headlamp beam is
aimed to the horizontal tape
line. Turn it clockwise or
counterclockwise to raise or
lower the beam.
The top edge of the cut-off
should be positioned at the
bottom edge of the horizontal
tape line.
8. Repeat Steps 7 and 8 for the
opposite headlamp.