2) personal logo ii – MacroSystem PIP-Studio User Manual
Page 15
2 . 1
2) Personal Logo II
Since you’ve been given an overview of the
program interface with the first tutorial, we’ll
presume knowledge of the basics and the
instructions will be less detailed than those in
the first. Although you will be using many of
the same functions, you’ll employ different
settings. If you already feel confident about
using PIP-Studio, you can, of course, skip
this tutorial.
First, take another 10-second video scene
(which you will use to represent your entire
film) and insert it into the storyboard. The
second scene should be the same length
and contain footage that you would like to
use as your logo. You can use your initials
again or create another personal logo.
Open the Transition Effects screen and
select “PIP-Studio“ from the list of effects.
Insert the effect between the two scenes.
Using the “x s“ button, set the effect duration
parameter to 10 seconds. Now launch the
program using the “Launch PIP-Studio“
button. In a moment you will see your first
scene as the background picture and your
second scene as an on-screen PIP.
The settings (position, size, etc.) from your
previous tutorial will remain unchanged.
A
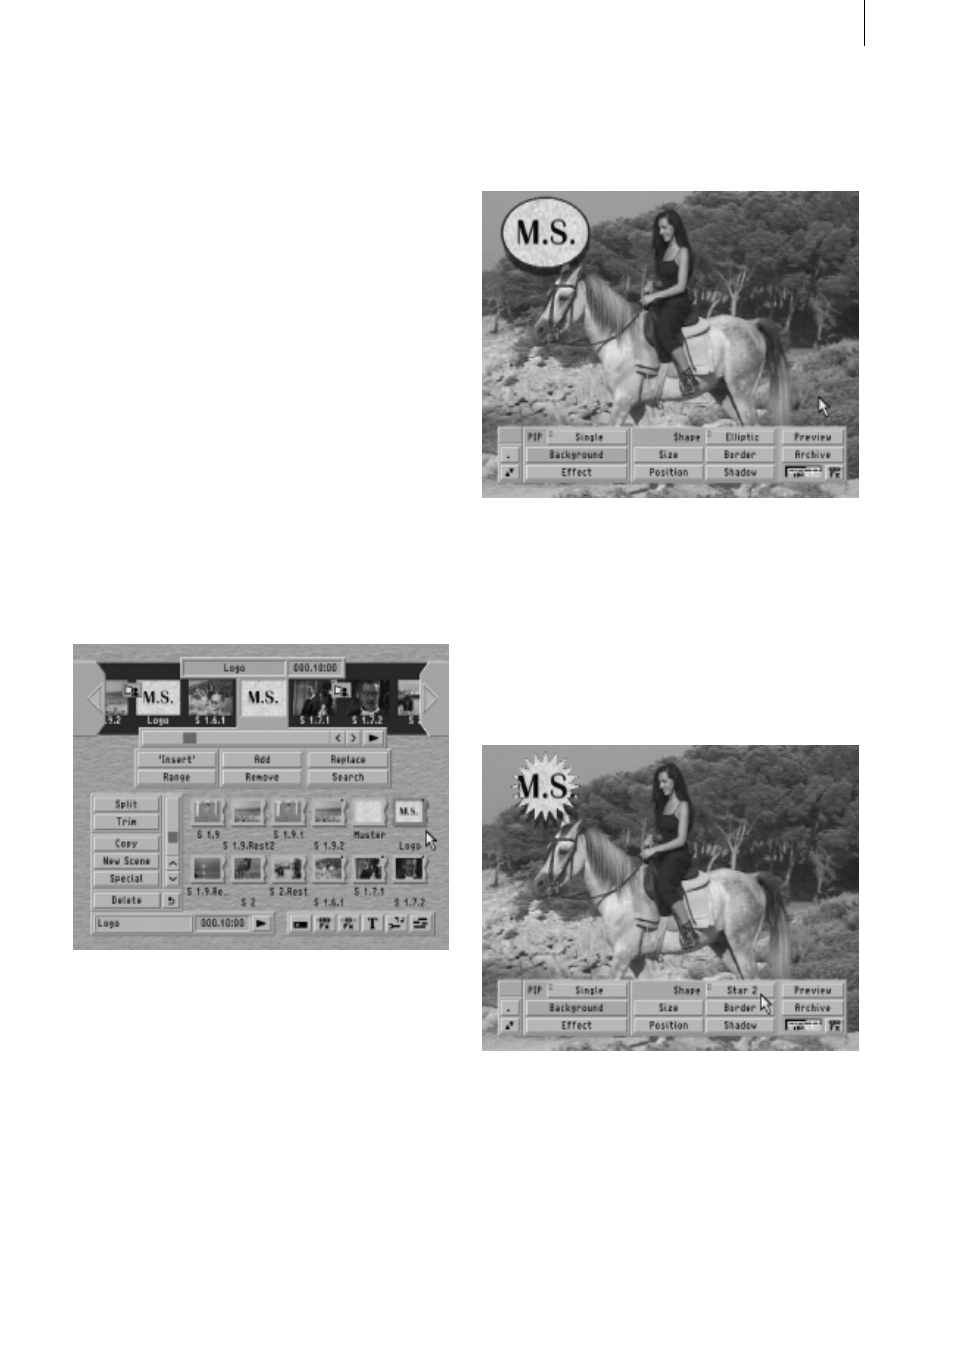
You will see the program toolbar located at
the bottom of the screen. Please make sure
once more that the selection button next to
„PIP“ is set to “Single.“ Now click on “Shape“
to open the selector button and this time
select “Star 2.“ You will see your PIP take on
a star shape after you confirm your selection.
Next, click on “Size“ and set the value to 204
x 168.
Once you’ve confirmed the size, you can
proceed to the “Position” setting. Click on the
corresponding button so you can position the
PIP at the coordinates 580, 100 (i.e. the top
right corner).