MacroSystem PIP-Studio User Manual
Page 22
4 . 2
button in the bottom right corner, and then
open the Shadow menu. In this menu, select
black as the Color, but this time give it an
alpha value of 50% so that the shadow
appears slightly transparent. Now set the
Distance to a value of 3 and the Blur to 10%.
For the Direction, select the fourth from the
top (i.e. falling towards the bottom right).
Once you’ve configured these settings and
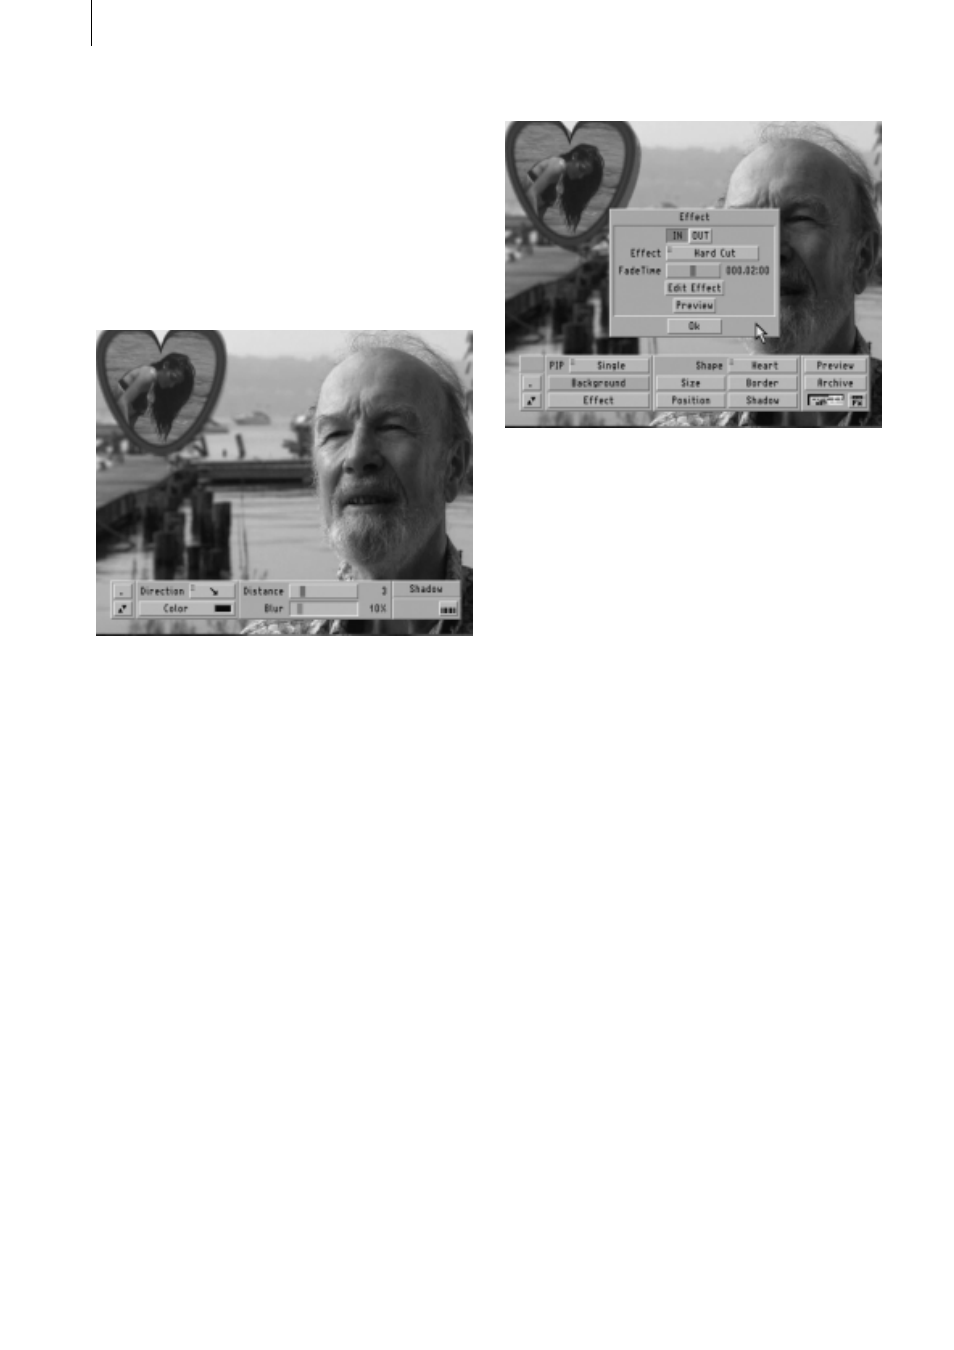
closed the Shadow menu, click the Effect
button located on the left to open the Effect
window where you can determine whether or
not you want to edit the IN or OUT (i.e. the
fade-in or fade-out).
Let’s start with the fade-in. Click on IN to
activate the button (i.e. it turns blue) if it’s not
active already.
Any other settings changes that you make in
this window will now relate to the fade-in.
Click on the Effect selector button to open
the list of twelve different fade-in options. In
this tutorial, use the Fade option. Next, set
the fade-time to 000.02:00 (i.e. to 2 sec-
onds). The total fade-time is made up of the
fade-in time plus the time during which the
effect remains stationary plus the fade-out
time. In this case, the 2-second setting
means that the PIP will fade-in gently for
precisely 2 seconds.
Since you do not want to make any further
changes with the Edit Effect button, you can
proceed to the fade-out settings and activate
the OUT button. In this tutorial, set the same
parameters that you did for fade-in, i.e. the
“Fade” option and a fade-time of 2 seconds.
You’ll notice that for this setting, you now
only have 4 seconds available instead of 6,
since 2 seconds are already taken up by the
fade-in effect.