MacroSystem PIP-Studio User Manual
Page 27
5 . 3
Now that you have configured these settings,
you can start setting the waypoints to define
the path that your second video scene (the
PIP) will later follow within the first video
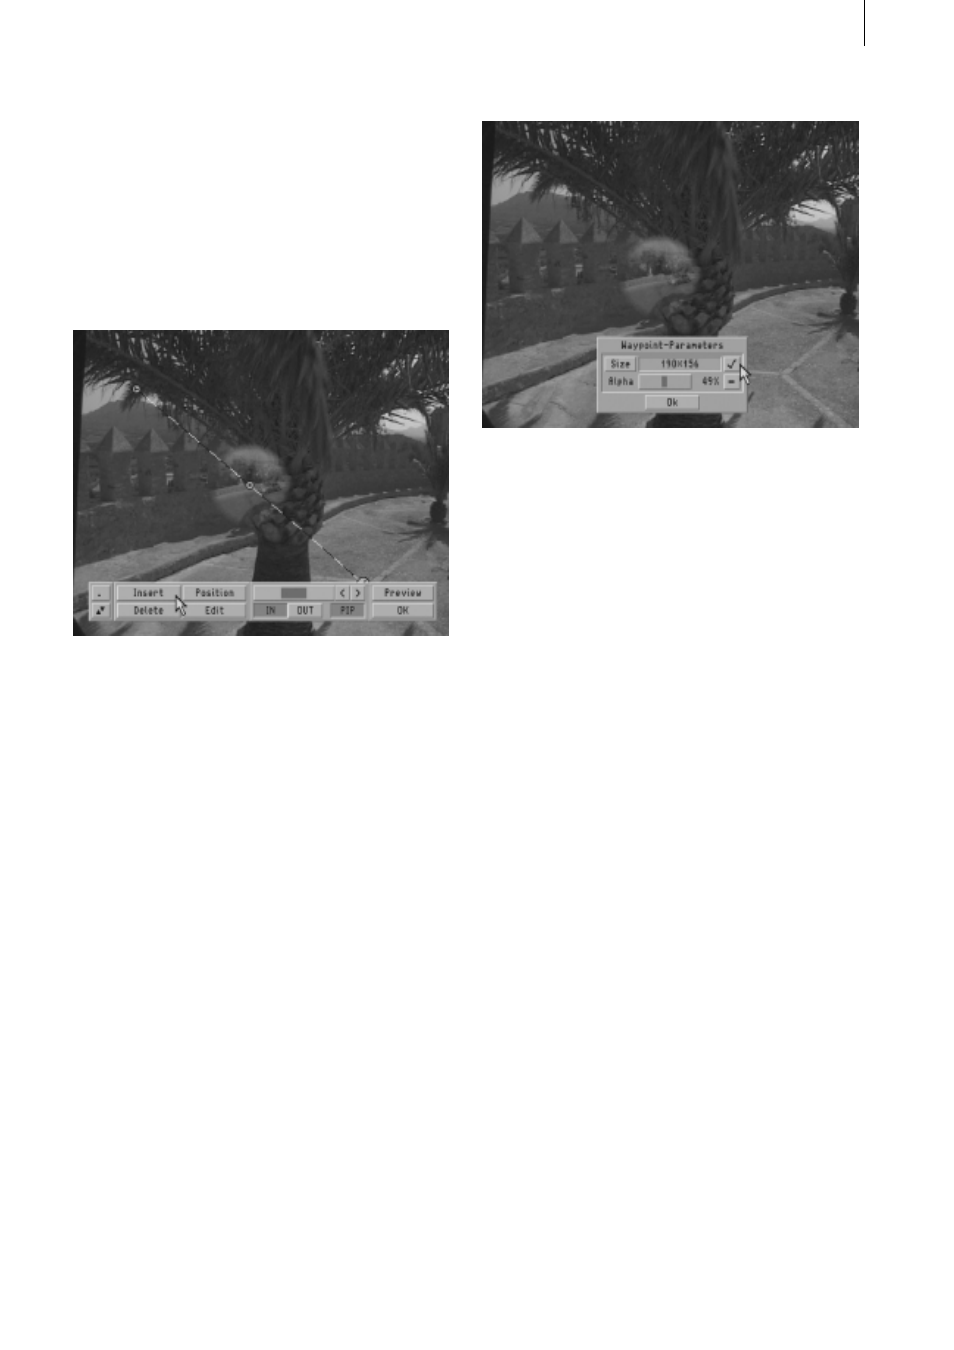
scene. To do so, click on Insert. You’ll see
another waypoint appear halfway between
the two existing points.
So you have now defined the path’s starting
and finishing points diagonally across the
screen and you have positioned a waypoint
in the middle. If you want to configure the
size or the alpha value (i.e. the transparency)
of one of these points, click on Edit to open
the Waypoint Parameters window and in it
edit the currently active (i.e. green) point.
While you are making your settings changes,
only the point that is being edited is visible.
These size and alpha value settings offer you
the advantage of being able to influence how
the size and transparency changes at each
particular point. For instance, activate the
first waypoint (top left) simply by clicking on
it, then click on Edit, leave the currently set
size as it is and set a low alpha value (e.g.
10%).
On the right next to the settings you will see
two yellow boxes containing dash marks. If
you click on these buttons, the dashes will be
replaced by tick marks. The Size or Alpha
button will then be activated therefore allow-
ing you to adjust your settings. The tick
marks for the first and last waypoints cannot
be deactivated since a value has be to en-
tered there or else interpolation will not be
possible.
Now confirm by clicking on OK.
Next, select the last waypoint (i.e. the finish-
ing point), leave the size as it is and set the
alpha value to 100%. These settings will
cause the scene (i.e. the PIP) to move slowly
across the background and display a smooth
transition in size and transparency. The sizes
and alpha values for all the inserted
waypoints will be rendered automatically.