3) moving scenes in front of a background – MacroSystem PIP-Studio User Manual
Page 17
3 . 1
3) Moving scenes in front of a
background
In this tutorial, you’ll learn about one of PIP-
Studio’s more extensive functions - the ability
to display two moving scenes in front of a
background image (we’ll assume that you
have prior knowledge of the buttons covered
in previous tutorials).
Find two scenes that you want to use as
PIPs superimposed on a background picture
and insert them into the storyboard. We’ve
decided to use two wedding scenes, but you
can select any video footage you like.
First, we inserted a scene of a bride and
groom, followed by a scene of a priest. Once
you’ve inserted the required scenes (each
with a length of 5 seconds) into the
storyboard, insert the PIP-Studio effect. The
PIP-Studio effect must be configured to last
the entire length of the scene (i.e. 5 sec-
onds). Now launch the program using
Launch PIP-Studio. In a moment, you’ll see
the priest scene appear as a PIP in front of
the scene of the bride and groom.
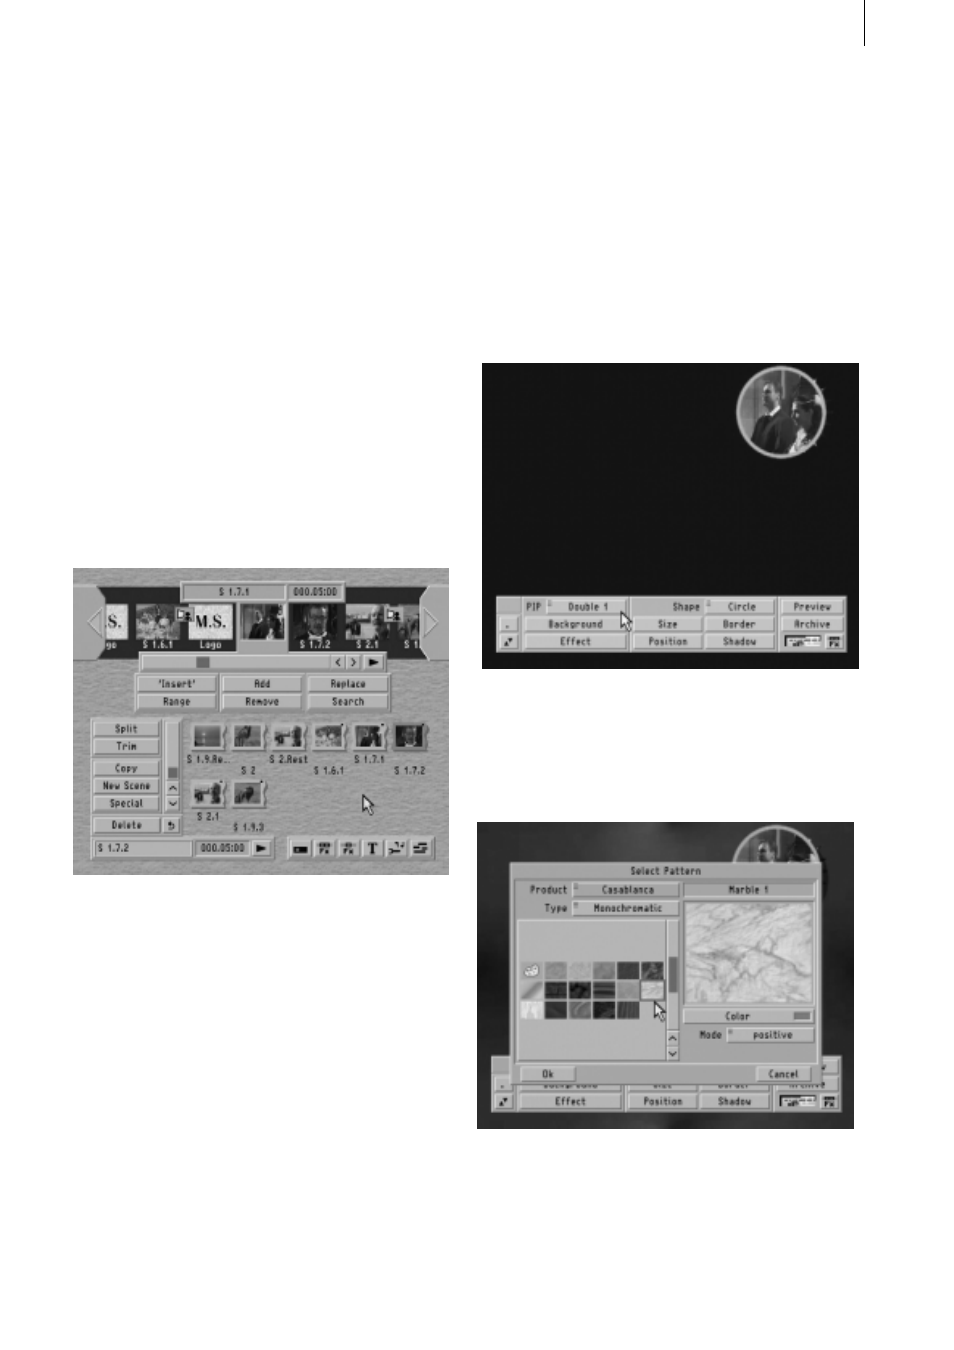
Make sure that the “PIP” selector button is
set to Double 1. Here, “Double” means that
you want two scenes as PIPs in front of a
separate background picture, while the “1”
stands for the first scene; in this case, the
bride and groom.
(Please do not be alarmed if you only see the
bride and groom scene as a PIP once you
change the setting to “Double 1” – the other
scene is simply hidden behind this PIP.)
Now select the ”Background“ button to open
the ”Select Pattern“ window, in which you
can choose a background of your choice.
The Marble 1 background picture that we’ve
chosen can be found by selecting
Casablanca in the Product menu and
Monochromatic in the Type menu. Now