Installation – Montigo RP620 User Manual
Page 11
RP620 Power Vent Indoor Gas Fireplace
Page 11
XG0777 - 122014.1
Installation
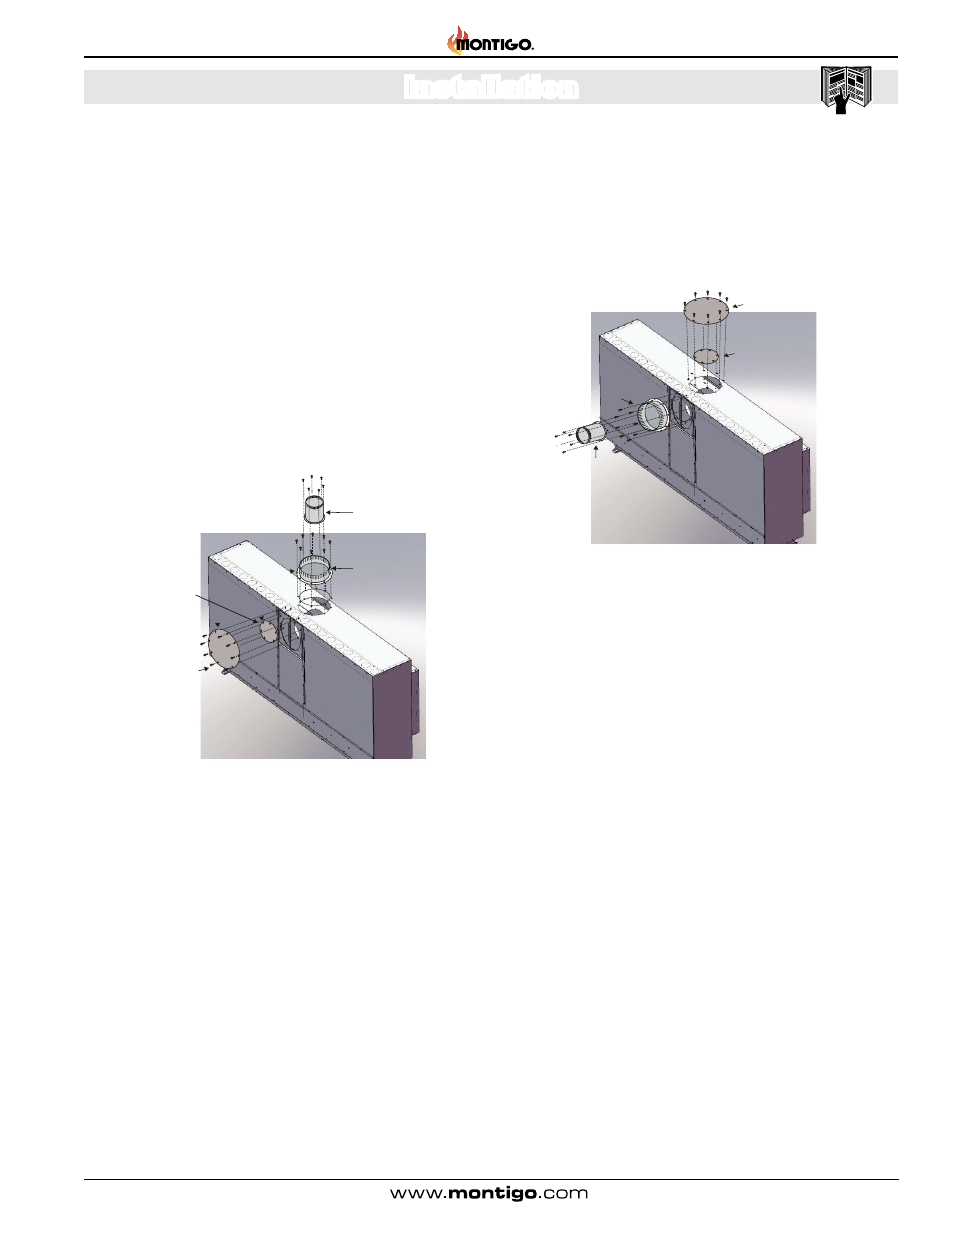
Section 3-1: Converting to Rear Vent
RP-Series units are shipped for Top Vent installations. Follow the
instructions to convert unit for Rear Vent installation.
Section 3-1-1: Converting the Flue
1. Remove the Rear flue cover with gasket (5" and 8") on
the flue outlet, as shown in
Figure 5. ENSURE YOU DO
NOT DAMAGE THE FIBER GASKETS.
2. Remove the Top flue collar (5" and 8") on the flue outlet,
as shown in
Figure 5. ENSURE YOU DO NOT DAMAGE
THE FIBER GASKETS.
3. Install the removed Rear flue cover (5" and 8") to the Top
Vent outlet. Fasten the cover with included hardware, as
shown in
Figure 5a.
4. Install the collars (5" and 8") to the rear vent outlet using
the included hardware, as shown in
Figure 5a.
5. Proceed to Section 3-1-2: Converting Pressure Sensing
Tube and Air Baffle.
5” Inner Flue Collar
8” Outer Flue Collar
8” Flue Cover Plate
5” Flue Cover Plate
(with gasket)
(with gasket)
(with gasket)
(with gasket)
8” Flue Cover Plate
5” Flue Cover Plate
5” Inner Flue Collar
8” Outer Flue Collar
(with gasket)
(with gasket)
(with gasket)
(with gasket)
Note: Read instructions for converting pressure sensing tube, page 12.
You may find it easier to convert the pressure sensing tube at this time .
Figure 5. Flue cover and collar removal, Top Vented fireplace
Figure 5a. Flue cover and collar installation, Rear Vented fireplace