Omnia Audio Omnia.ONE User Manual
Page 11
ix
Omnia.ONE Multicast / DAB / Studio Pro
Quick-Start Setup
We know that you’re probably in a hurry to begin using your new Omnia.ONE. If you have technical expertise and
previous knowledge of audio processor fundamentals, using this Quick-Start guide will get you up and running as quickly
as possible. Please refer to the full User Manual for additional installation and setup information.
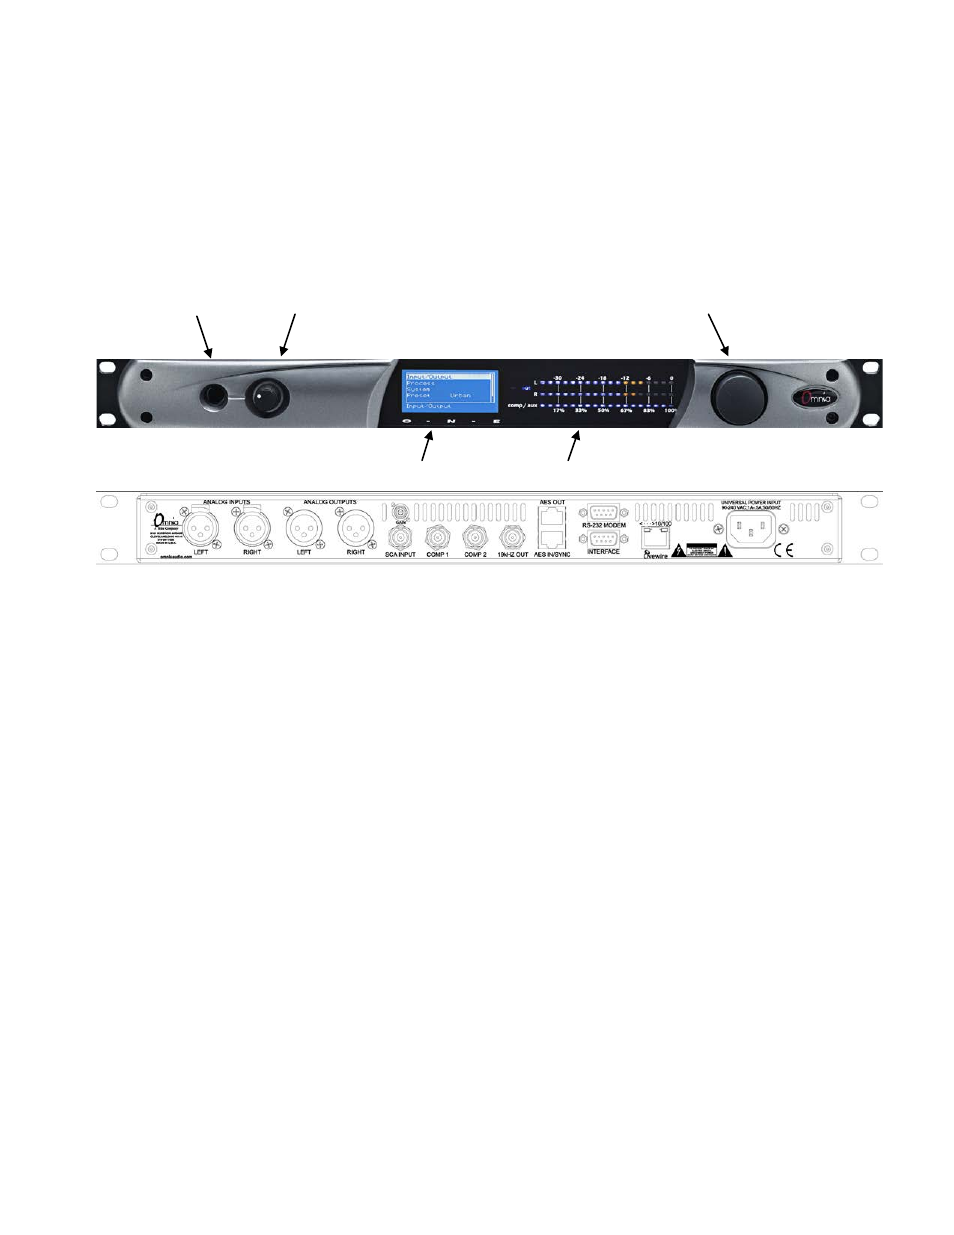
The following illustrations show the location of the various controls and connectors associated with the installation:
Headphone Jack Headphone Level Control
Jog Wheel
Main Menu / G/R Metering LCD Display
Level Meters
1.
Install the Omnia.ONE in the equipment rack using at least two rack screws. If only two screws are used, they MUST
be installed in the bottom holes of the rack ears!
2.
Connect the audio inputs that are appropriate for your installation. The Omnia.ONE accepts balanced line-level
analog audio via the XLR connectors, AES/EBU digital via the bottom RJ-45 jack (using the “StudioHub” standard
pinout) or Livewire.
NOTE: Livewire audio I/O is only to be used if you have an existing Axia or other Livewire system. Otherwise, the
Livewire Ethernet jack can be used to remote control the Omnia.ONE via its built-in webpage interface. See
Appendix C in the full User Manual for details.
3.
Connect the audio outputs in a manner that is appropriate for your installation. Choices are balanced line-level analog
audio via the XLR connectors, AES/EBU digital via the top RJ-45 jack (using the “StudioHub” standard pinout) or
Livewire. All outputs are active simultaneously.
4.
Connect AC power to the unit (there is no power switch!)
5.
Navigate to the Input/Output / Meter Select setting and select Input.
6.
Navigate to the Input/Output / Input / Input Src setting and select the Analog, AES/EBU or Livewire input as
appropriate for your installation. If your audio source is active, you should now see meter activity on the LED
bargraph meters.
7.
While driving the inputs with typical program material at normal operating level, navigate back up to the
Input/Output / Input menu (by highlighting and clicking on the “<-EXIT” option) and adjust the appropriate input
Level control until the peak-reading input bargraph meters are peaking up to at least –15 and up to –12 dBFS or a
little higher.
8.
Navigate to the Input/Output / Output menu and adjust the appropriate control so that the output level is correct for
the equipment that follows the Omnia.ONE.