Omnia.one.sg quick-start setup – Omnia Audio Omnia.ONE User Manual
Page 7
v
Omnia.ONE.SG Quick-Start Setup
We know that you’re probably in a hurry to begin using your new Omnia.ONE.SG. If you have technical expertise and
previous knowledge of stereo generator fundamentals, using this guide will get you up and running as quickly as possible.
Please refer to the full User Manual for additional installation and setup information.
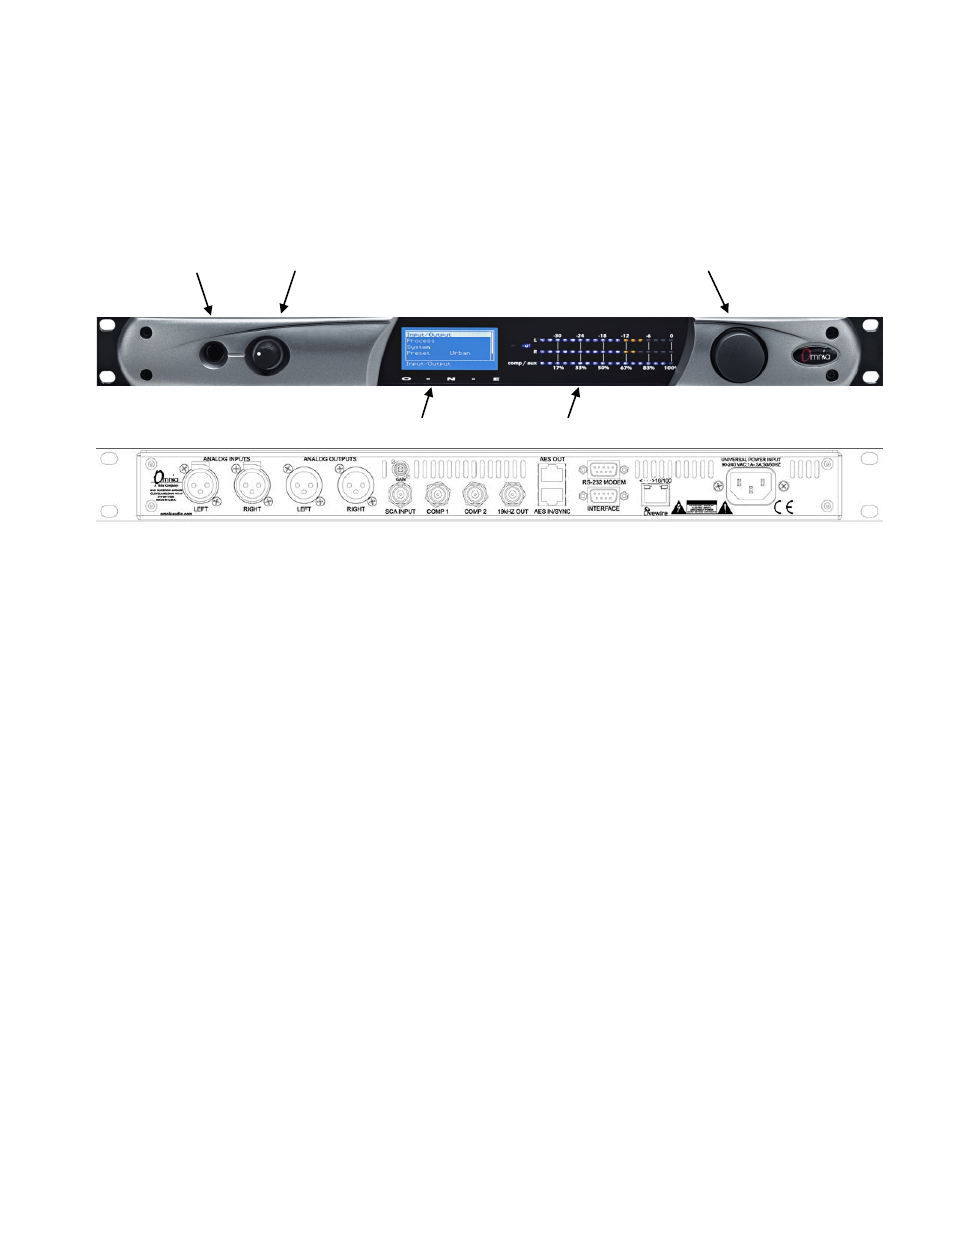
The following illustrations show the location of the various controls and connectors associated with the installation:
Headphone Jack Headphone Level Control
Jog Wheel
Main Menu / G/R Metering LCD Display
Level Meters
1.
Installation: Install the Omnia.ONE.SG in the equipment rack using at least two rack screws. If only two screws are
used, they MUST be installed in the bottom holes of the rack ears!
2.
Connect the audio inputs that are appropriate for your installation. These should originate from an external FM
audio processor and ideally should be pre-emphasized and fully band limited to 16kHz.
3.
Connect the Omnia’s composite MPX BNC output(s) as appropriate for your installation to your FM exciter’s
baseband composite MPX input or composite STL transmitter.
4.
Connect AC power to the unit (there is no power switch!)
5.
Navigate to the Discrete I/O / Meter Select setting and select Input.
6.
Navigate to the Discrete I/O / Input / Input Src setting and select the Analog, AES/EBU or Livewire input as
appropriate for your installation. If your audio source is active, you should now see meter activity on the LED
bargraph meters.
Input Calibration: The Omnia ONE.SG is designed to accept pre-processed audio from an external FM audio processor.
Ideally, this audio should be pre-emphasized and sourced only through a lossless link using Livewire or AES/EBU.
Analog L/R XLR input can also be accepted. Since the Omnia ONE.SG includes a composite clipper, it is very
important to calibrate the input level properly so that when the Composite Clip Drive control is set to 0.0, no
composite clipping is taking place.
7.
Using typical program material, turn up the main clipper drive on your external FM processor temporarily to provide
a more steady “worst-case” level at the input of the Omnia ONE.SG. If using a digital output on the external FM
processor, set its peak output level to -12.0dBFS if possible. If so, set the Omnia’s input Level control in the
Discrete I/O / Input menu to 0.0dB to start.
NOTE: The Omnia ONE SG’s input meters are specially calibrated with higher resolution above -12dBFS for easy and
precise input level calibration. The first yellow LED comes on at -12.1dBFS, the second at -11.9dBFS and
subsequent ones every 0.2dB above that. The composite clip point (with 0.0dB drive setting) is -12.0dBFS.