Omnia Audio Omnia.ONE User Manual
Page 166
147
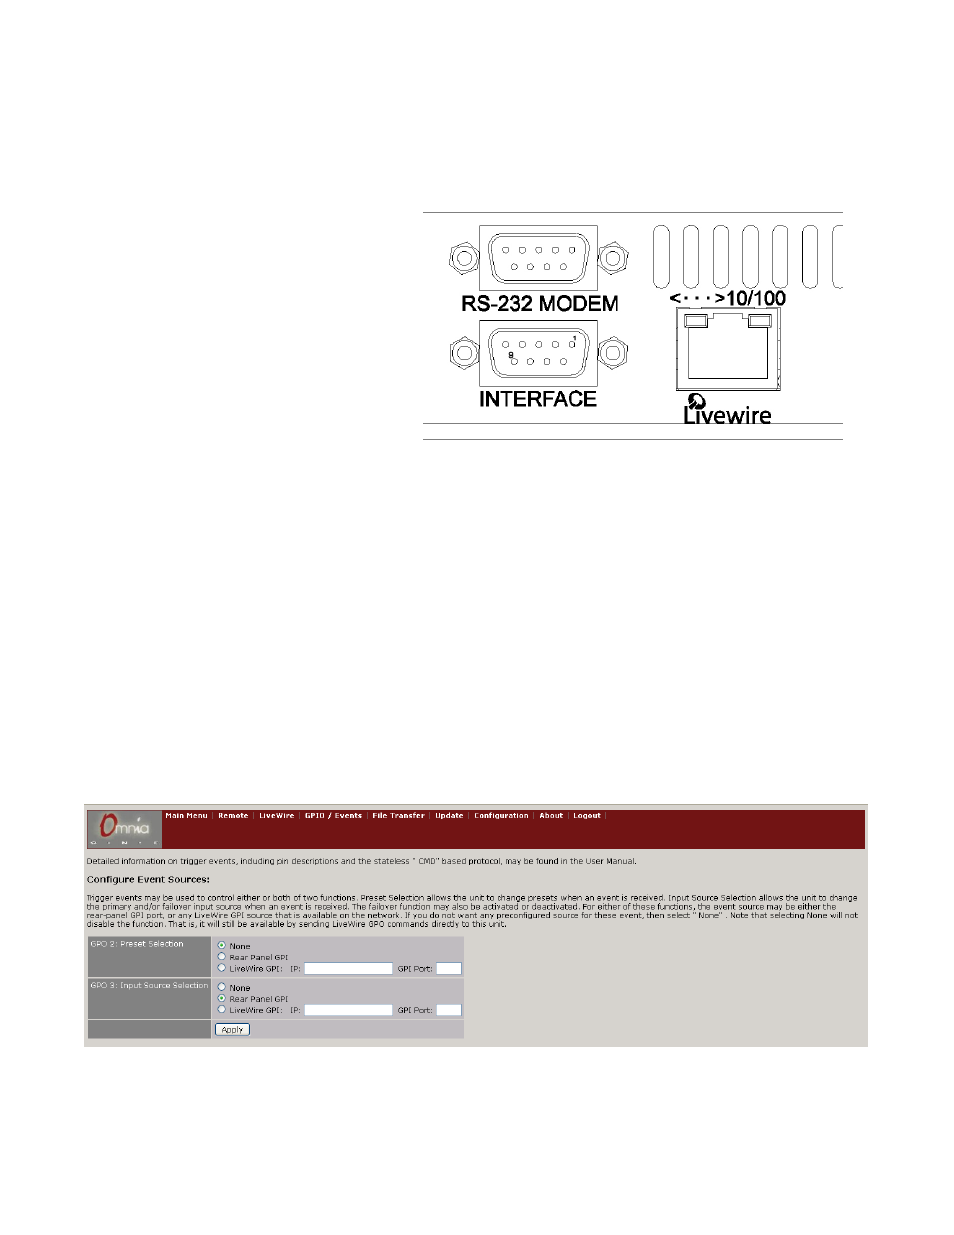
Appendix D: GPI using the “INTERFACE”
connector (New in Version 2.6)
Pin 1: +5VDC Out
Pin 2: In COM+
Pin 3: IN 1: Trigger input #1
Pin 4: IN 2: Trigger input #2
Pin 5: IN 3: Trigger input #3
Pin 6: IN 4: Trigger input #4
Pins 7,8,9: GND
For operation, a voltage must be applied to voltage input on pin 2. The voltage applied to the trigger inputs must never exceed
this input voltage. The voltage source must be capable of supplying up to 40mA. If an input voltage greater than 6V is used,
series resistors are required on each of the trigger inputs. The required value is given by this table:
Input Voltage | Required Resistor
==============================
5 VDC | none
6 VDC | none
12 VDC | 680 ohm, 1/4 Watt
24 VDC | 1.8 kohm, 1/2 Watt
48 VDC | 3.9 kohm, 1 Watt
The +5V power output on Pin 1 may be used as the input voltage. If this is done, the trigger inputs may be tied to 5V or left
floating for a "high" state, and tied to ground for a "low" state.
Currently, only the preset selection and input source selection functions are implemented.
To use, you’ll also need go to the GPIO / Events page in the Omnia’s web interface and select “Rear Panel GPI” from the
“GPO: Preset Selection” or “Input Source Selection” section, then click “Apply”: