Configure proxy mdi – Grass Valley Aurora Browse v.7.0 Installation User Manual
Page 103
April 6, 2010
Aurora Browse Installation and Configuration Guide
103
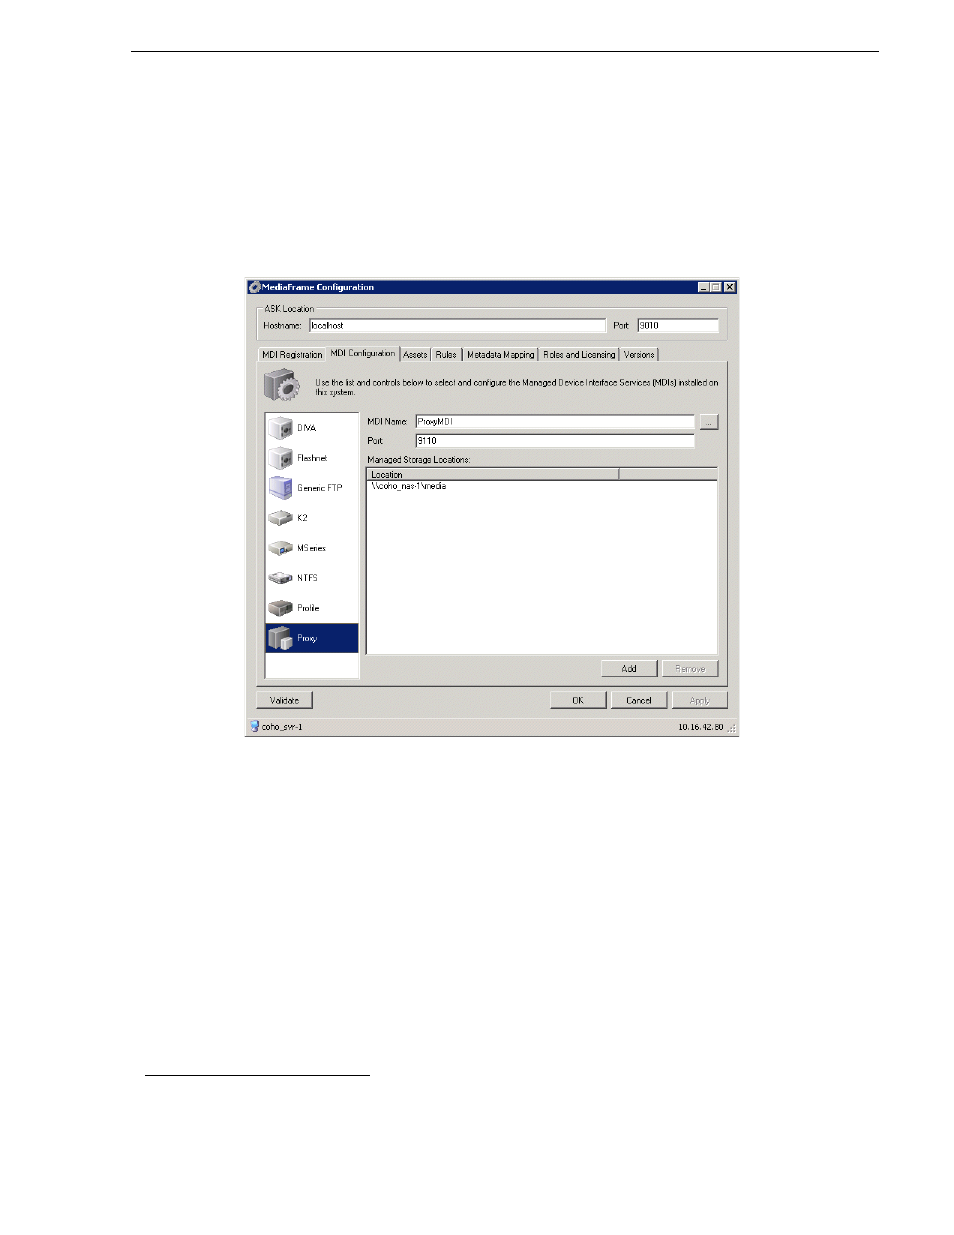
Configure Proxy MDI
Configure Proxy MDI
This page configures the Managed Device Interface (MDI) for the NAS machines that
store the low-res proxy. The system depends on the Proxy MDI to make proxy visible
across the system. For the Proxy MDI, there is but one managed device. This managed
device can have multiple locations. The Media directory on each NAS machine is
entered as a location. Other directories can be entered as locations as well. In this way
the Proxy MDI knows where to look for the low-res proxy.
1. Select
Programs| MediaFrame Config.
Select the MDI Configuration tab
and the
Proxy icon.
2. In the Ask Location hostname field, enter the name of the MediaFrame server. Do
not modify Port 9010. See
“Ports and services mapping” on page 47
.
3. Set the MDI name.
4. Port 9110 is required. See
“Ports and services mapping” on page 47
.
5. To add a storage location, click
Add
.
6. For each Proxy NAS machine, enter the UNC path to the “Media” folder. This is
the location to which the system writes the proxy media.
1
Click
Add
.
7. Click
Apply
or
OK
after you’ve finished making changes.
8. To put changes into effect, start or restart the Proxy MDI Service on the
MediaFrame server.
1. You can define multiple locations on a single NAS machine, but for each location you must enter the complete path.