Nas instructions - serial ata network platform – Grass Valley Aurora Browse v.7.0 Installation User Manual
Page 185
April 6, 2010
Aurora Browse Installation and Configuration Guide
185
NAS instructions - Serial ATA network platform
To verify access from client network machines, choose a machine on the Client
network that can represent a Aurora Browse client PC and that is convenient for
testing. From this machine do the following:
1. Open Windows Explorer and navigate to the media directory on the NAS. You can
do this with the following path:
\\root-nb-nas-1\Media
Verify that Aurora Browse client PCs will have read only rights.
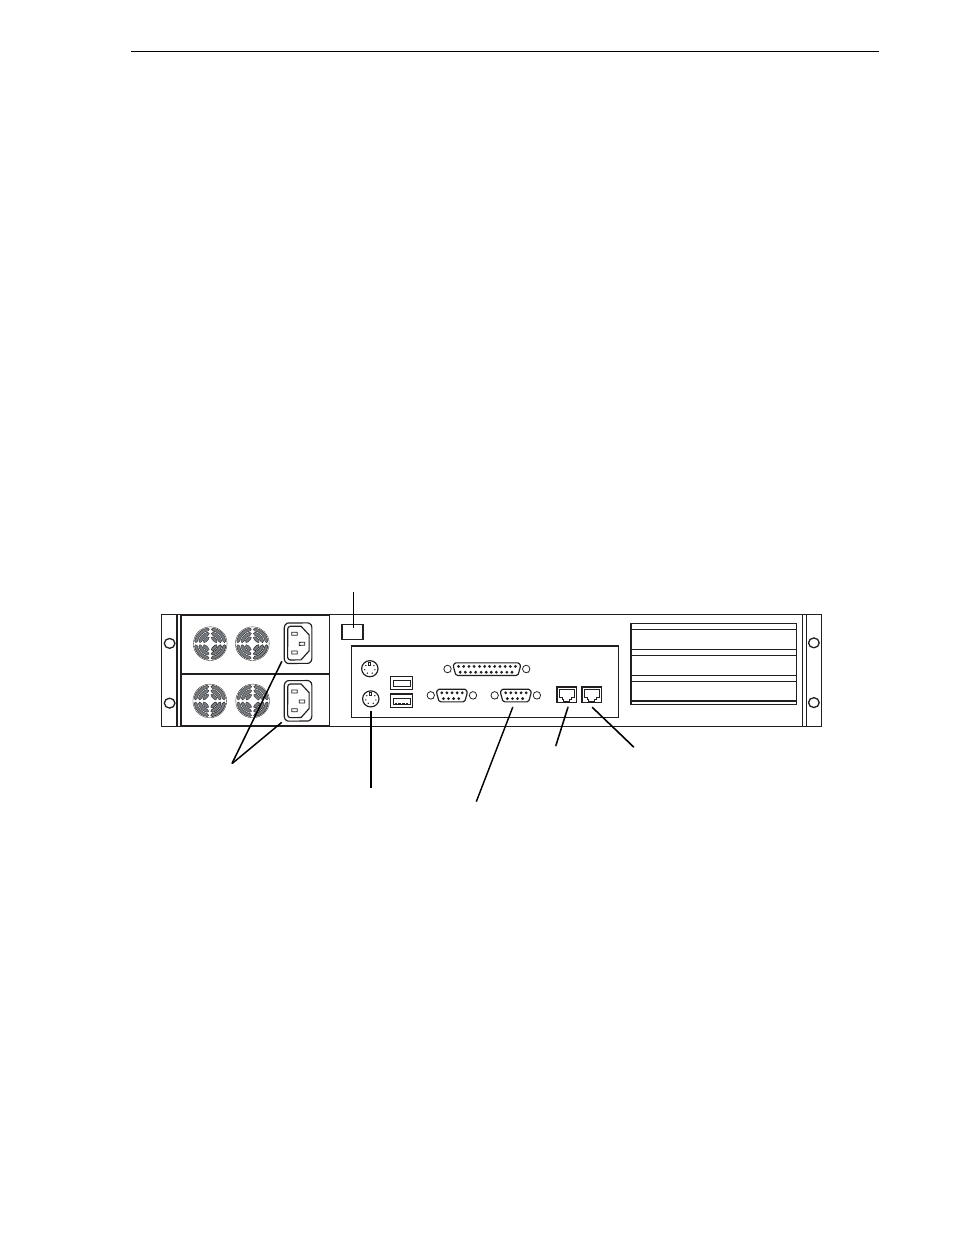
NAS instructions - Serial ATA network platform
For the Network Attached Storage (NAS) unit you have the option of the Serial ATA
network (a.k.a. Ciprico 1700 or DiMedia) platform.
Platform Specifications are as follows:
• Redundant Power Supplies.
• 100BT LAN (x2)
• RAID protected drives
Make cable connections as illustrated.
Power supply units are hot-swappable. If the power supply fails or when power is
cycled, an alarm will sound. To disable the alarm, press the power alarm reset button
to the In position.
Power up the appliance by pressing the small, round On/Standby switch on the front
left of the machine. Once the electrical cables are connected, the system has electrical
power. Turning the On/Standby switch to standby does not remove power. To remove
power, hold down the On/Standby switch for at least five seconds or disconnect the
electrical cables.
LAN Port 0
Power
VGA cable
to KVM
Keyboard/mouse
port to pigtail
to KVM
Power alarm
reset button
(Connect to
Client network)
LAN Port 1
(Connect to
Production
network)