Changing the editing mode, Using quick edit mode, Changing the editing mode using quick edit mode – Grass Valley NewsEdit XT v.5.5 User Manual
Page 145
Changing the Editing Mode
Digital News Production
143
Changing the Editing Mode
The Timeline has three editing modes — Overwrite mode (the default), Splice
mode, and Fit To Fill, a special mode for creating motion effect clips.
For the first edit and for adding one clip after another, you can use either
Overwrite or Splice mode. The difference between these modes is important
when you revise and fine tune your sequence, as described in the table below.
Once you use these modes to edit clips to the sequence in your Timeline, you
can move clips forward or backward within the sequence or use the Trim tool
to trim transitions or to produce split edits.
The NewsEdit editing modes are:
Using Quick Edit Mode
Quick Edit mode switches you to the Source Tool after an edit to the Timeline,
which is good if you prefer to lay down all of your edits and then go back and
review your sequence.
To use Quick Edit:
1. Press
2
to select the Source tool.
2. Click the
Quick Edit
button.
You are now in Quick Edit mode.
To stop Quick Editing, click the Quick Edit button again.
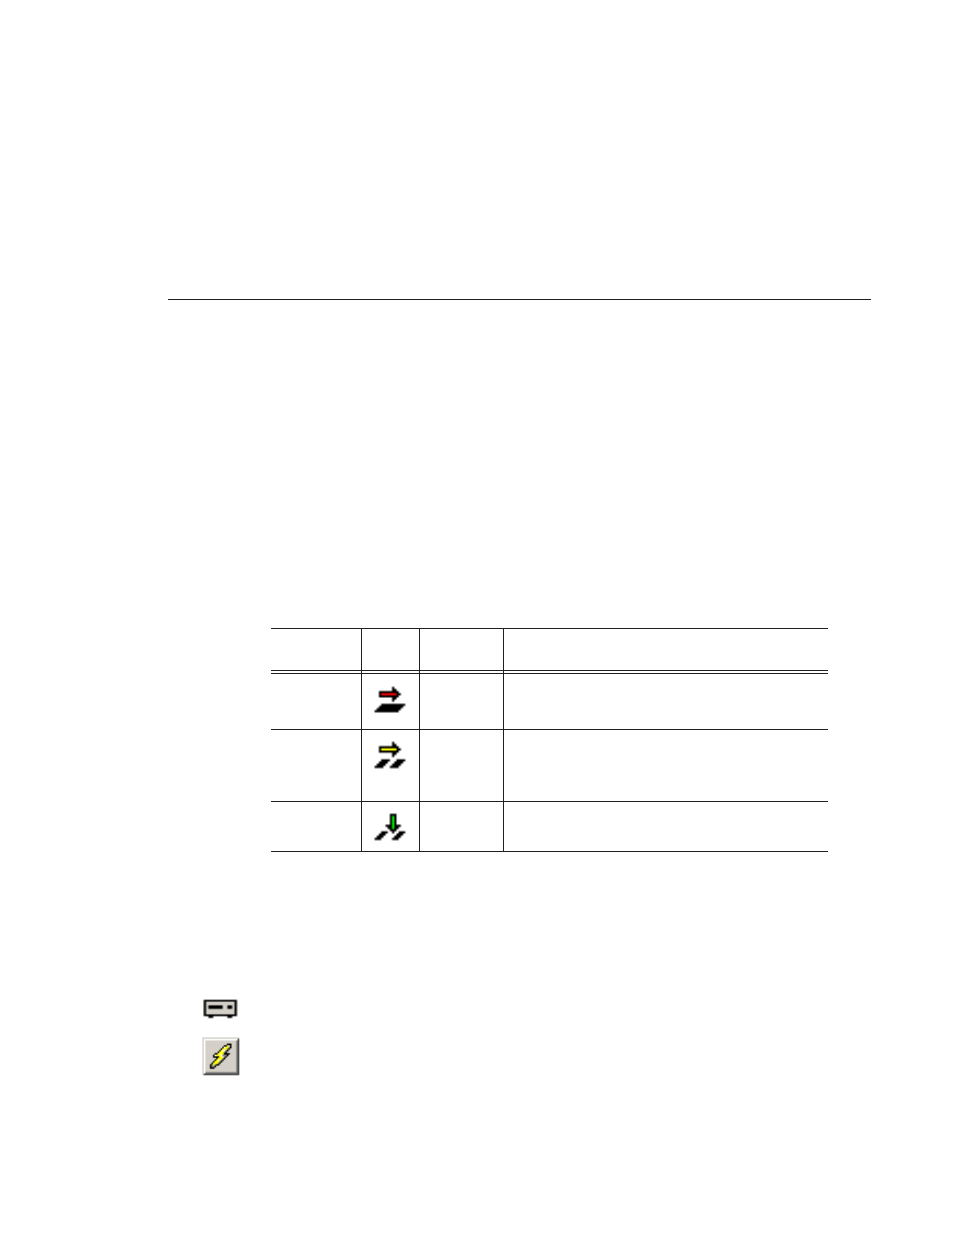
Tool
Icon
Keyboard
Key
Description
Overwrite
F9
Replaces existing sections of a sequence with new
material, leaving the sequence duration unchanged.
Similar to an insert edit in a tape-based system.
Splice
F10
Splices a clip between two existing clips in the
Timeline by moving the two clips apart and inserting
the new clip in between them. All clips after the edit
point move downstream and lengthen the sequence.
Fit To Fill
F11
Fits a clip into a duration you specify in the Timeline.