4 calibrate, Alibrate – Afinia H+1 3D Printer User Manual
Page 24
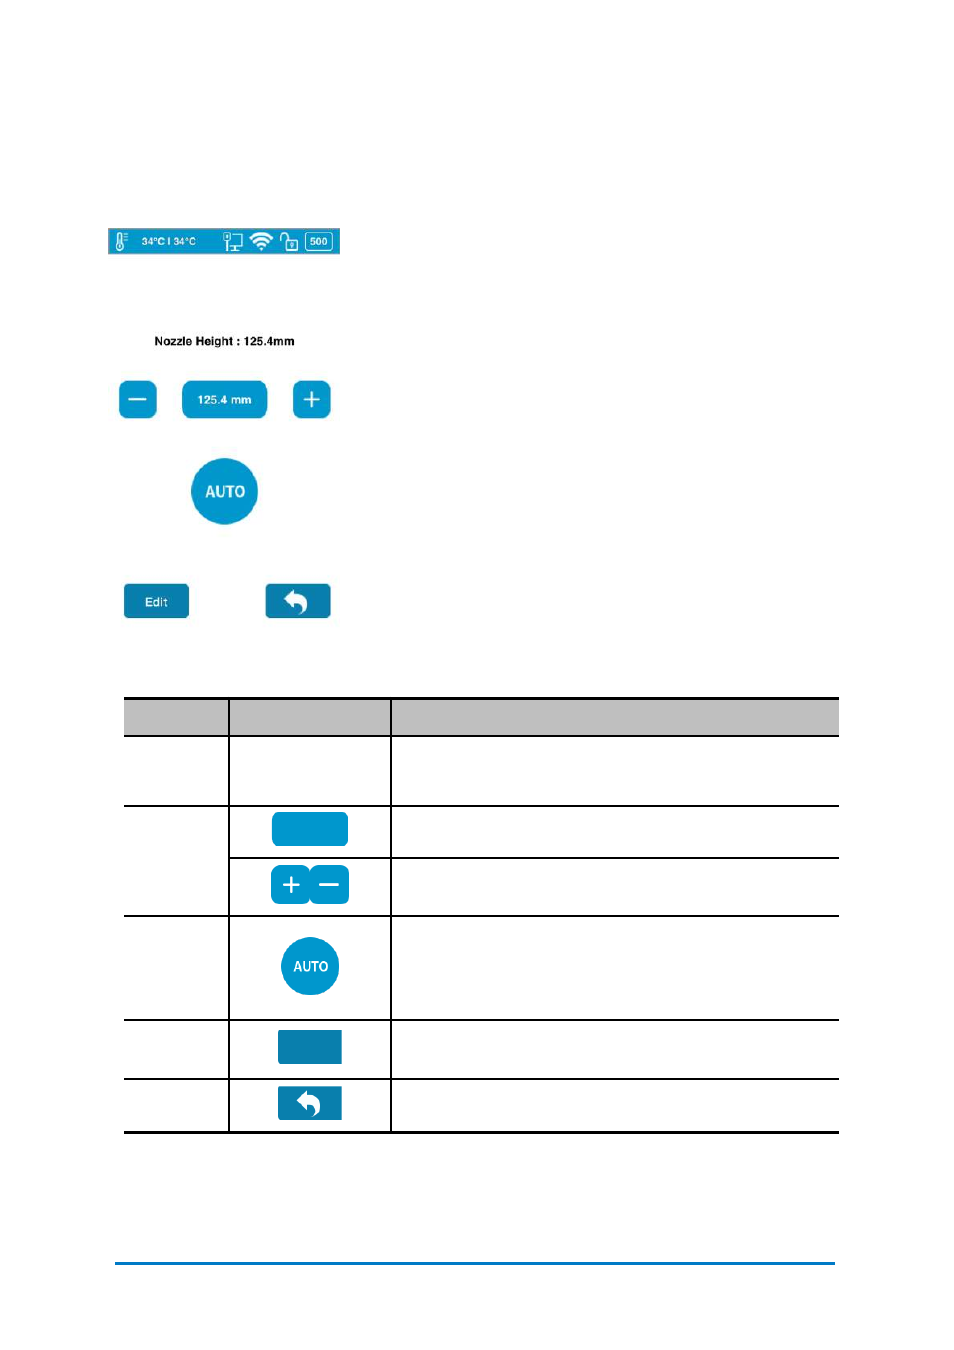
5.4 Calibrate
The nozzle height of a printer is a key parameter that needs properly set before any
print jobs. It can be calibrated manually or set automatically.
Click
Auto
on the touchscreen, the printer will go through
a mechanical process to detect the nozzle height. The
final nozzle height will appear on the screen after the
whole process finishes:
Click
Edit
on the touchscreen, and enter the suitable
value for your printer.
You can also use either +/- button to adjust the value in
the Value Box, and then tap the Value Box to move the
nozzle to the value height you set in the Value Box.
Nozzle Height: is the current printer’s nozzle height.
The default value for the nozzle height for each
Afinia
printer has been set as 0mm before leaving factory floor
for safety reasons. Therefore, calibration is the
mandatory step prior to your first print.
Table 5.7 Calibration Icon Description
Name
Icon
Description
Nozzle
Height
Nozzle Height : 125.4mm
The actual nozzle height.
Live
Nozzle
Height
Indicating the present nozzle height.
Using +/- to adjust the nozzle height manually.
Auto
The printer will start detecting the nozzle height
automatically.
Same as Nozzle Detection in software.
Edit
To edit the nozzle height by inputing numbers
manually.
Exit
Exit Calibration section and back to main menu.
20.0 mm
Edit
Contact
Afinia 3D
23
Figure 5.6
Calibrate