Afinia H+1 3D Printer User Manual
Page 44
2.
Manual calibration
Although the Auto Calibration is always the easiest way to calibrate the
H+1
,
some
experts in 3D printing always prefer manual calibration over automatic to
have full
control of the whole process.
Afinia
Studio provides the manual calibration
process
in the software.
a.
Open
Afinia
Studio on your computer,
b.
Click
Build
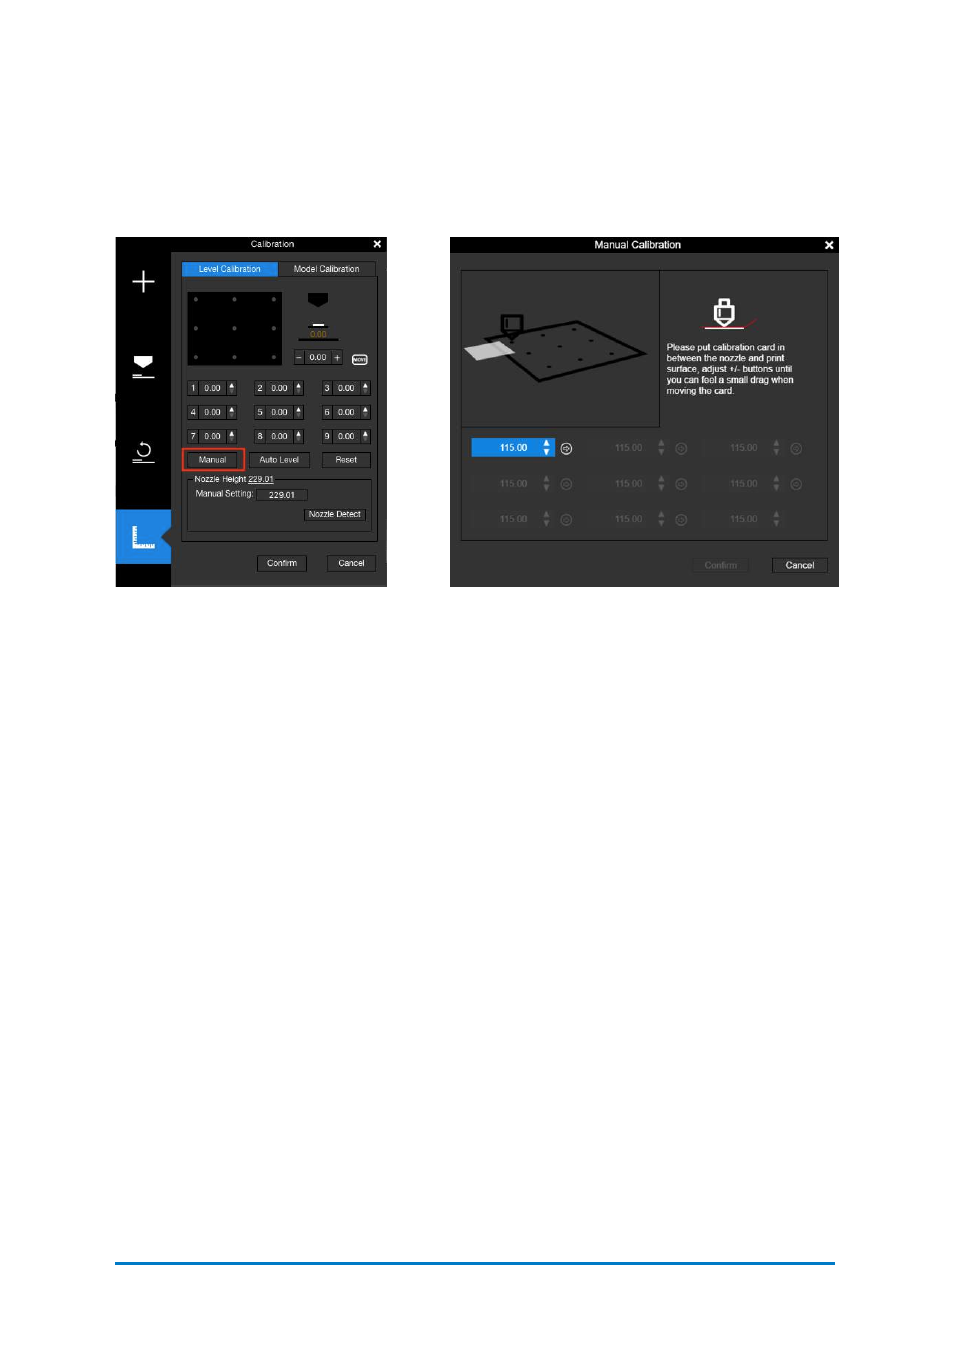
, click Maintenance, and then click Manual.
c.
Place the Calibration Card (Find the card in the accessories that comes with the
machine) between the nozzle and the print surface, follow the instruction in the
software to finish the manual calibration process.
d.
The software will guide you go through 9-point calibration process, and measure
the offset of each point.
e.
Adjust the nozzle height using the up/down button at each point, and use the
calibration card as the medium between the nozzle and the surface. The ideal
distance between the nozzle and the surface is between 0.1-0.2mm, and you will feel
a small drag when moving the calibration card if the distance is right. When the
height is right for the point, click the arrow on the right of the up/down button, the
software will save the offset for the point, and move the print head to the next point.
f.
Make sure all 9 points will have the same degree of drag, so that all 9 points will
have the same distance to the surface.
g.
Once the 9-point measurement is finished, click the
Confirm
button to finish the
whole process.
Contact
Afinia 3D
43
Figure 6.19
Manual
Figure 6.20
Manual Calibration