Afinia H+1 3D Printer User Manual
Page 46
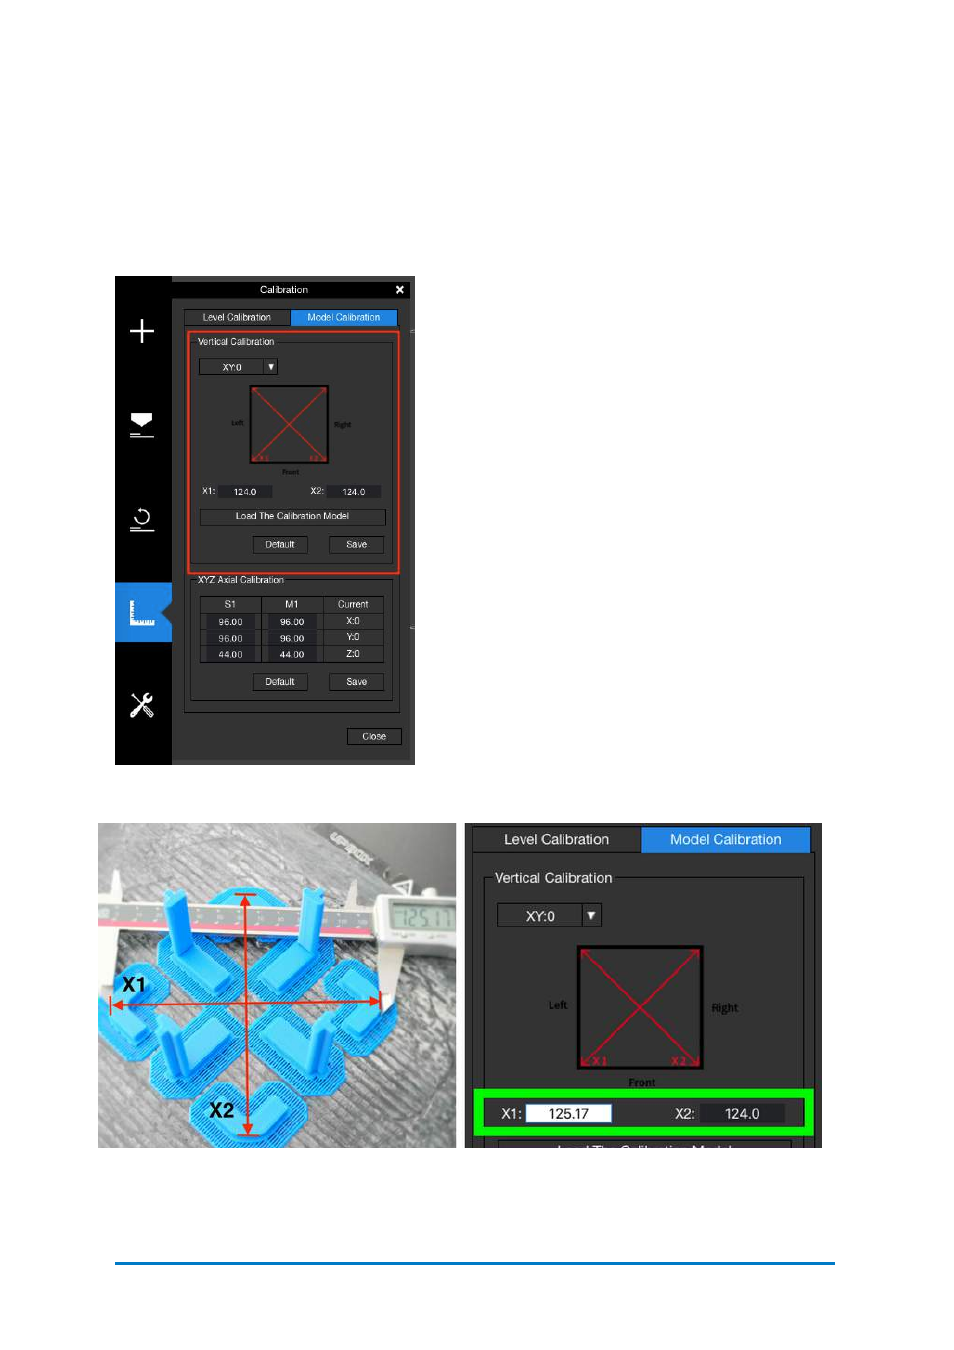
3. Model Calibration
Model Calibration – Vertical Calibration
Vertical Calibration. The main purpose of Vertical Calibration is to ensure all three
axes are perpendicular to each other in order to guarantee consistent, high-quality
prints.
a.
Find the
VC.stl
in the installation directory of
Afinia
Studio. Load it in
the Afinia
Studio
software, and
follow the normal process to print
it.
b.
After the model printing is done, take out the
build surface with the printed model on it. Don’t
remove the object from the surface. The printed
model includes 4 corners, and 4 L-shapes.
c.
In the
Afinia
Studio Software, find
Model
Calibration
. Click
Default
before entering any
new values into the edit fields.
d.
Perform X/Y measurements. Use a thin ruler
or a Vernier scale to measure the diagonal
length of the printed model from one corner to
the opposite corner, as shown in the figure
below for X1. Then, do the same for X2. Enter
the values for X1 and X2 into the software.
Contact
Afinia 3D
45
Figure 6.22
Vertical Calibration
Figure 6.23
X/Y Axis Calibration