6 calibration, Alibration – Afinia H+1 3D Printer User Manual
Page 42
6.6 Calibration
Calibration for
H+1
is an important step to make sure the printer is
functioning
well
and is able to generate good quality prints.
Calibration includes two steps: platform leveling adjustment, and nozzle height
detection,
Platform Leveling Adjustment is the process of making sure the build platform is
leveled, so that every layer printed is leveled, which is essential to guarantee good
quality prints.
Nozzle height refers to the perpendicular distance between the tip of the nozzle and
the build platform. This value will be used to control the print head’s movement, and
the accuracy of this value is greatly affecting the print quality and success rate of a
print job.
Before the machine
was
shipped out from the factory, the nozzle height was set to
0. therefore, it is mandatory to calibrate the machine to get the correct nozzle
height before the first print.
It is not necessary to do the calibration every time before each print. If you see
issues like warping, support being hard to remove or model not sticking to the build
plate, it is very possible that the calibration is needed.
6.6.1.Auto Calibration
Auto Calibration is an automatic process
that, once triggered, will automatically adjust
the leveling of the build platform, and detect
the nozzle height without any human
involvement. You can start the process
either from the touchscreen, or from the UP
Studio software.
Auto Calibration from Touchscreen
Go to the touchscreen on the
H+1
, click
Calibration
, and press
AUTO
. The printer
will start the process of calibration.
Follow
the instructions on the display and wait
until
the process finishes.
Auto Calibration from
Afinia
Studio
Software
1.
Open
Afinia
Studio on your computer,
2.
Click
Build
from the menu on the left,
3.
Click
Initialize
, and wait for the
initialization process finishes
4.
Click
Calibration
, and
Auto Leveling
.
Follow the instructions on the screen,
then wait
for the calibrating process
to
finish
.
Contact
Afinia 3D
41
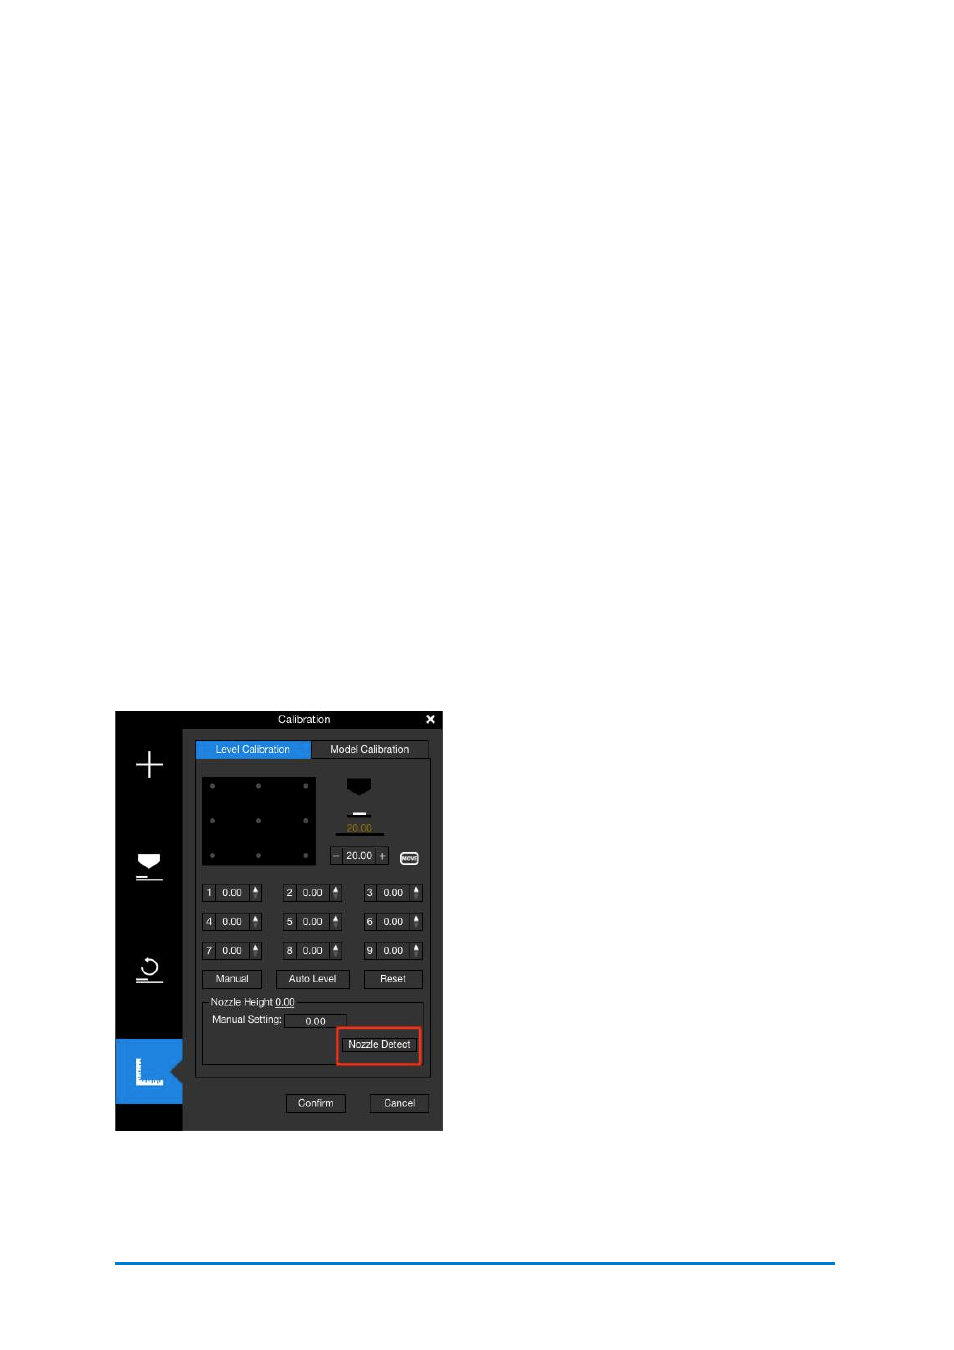
Figure 6.17
Nozzle Detect