Afinia H+1 3D Printer User Manual
Page 47
e. Click the Confirm button to complete the X/Y axis calibration. The software will
round those values to the nearest tenth.
f. Click the dropdown menu in the upper left to shift to X/Z mode. X/Z calibration
requires measurement of the L-shapes.
Only one L-shape is needed to do the measurement, but all the L-shapes are
needed to check in order to find the right one.
First, remove all the L-shapes from the build plate and peel them off the raft.
Rememer the position of each L-shape on the build plate when peel them off the
build plate.
Place them in a position on a table that matches their original position on the print
surface – right for right, front for front, etc.
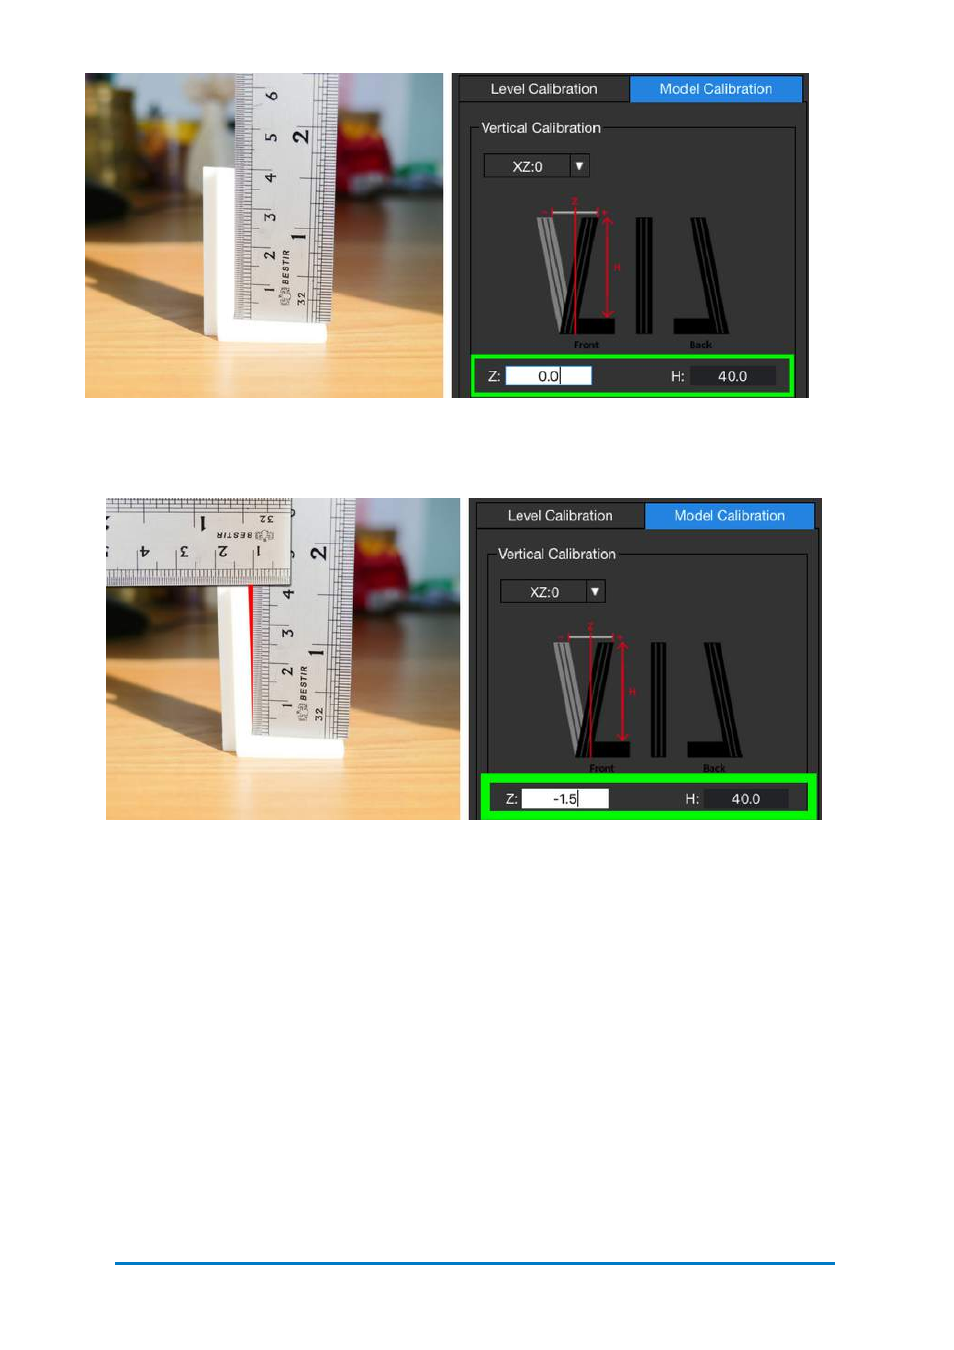
Use a right angle ruler as shown in the following Figure and push the ruler against
the corner of each one of the L-shapes. If the angle of the corner of the L-shape is
90 degrees, move to the next L-shape. Continue this process with each L-Shape.
Contact
Afinia 3D
46
Figure 6.24
X/Y Axis Calibration
Figure 6.25
Obtuse Angle, Z value will be negative.