Cuemix fx, Motu smpte setup – MOTU Track16 - Desktop Studio FireWire/USB 2.0 Interface User Manual
Page 21
I N S T A L L I N G T H E T R A C K 1 6 S O F T W A R E
21
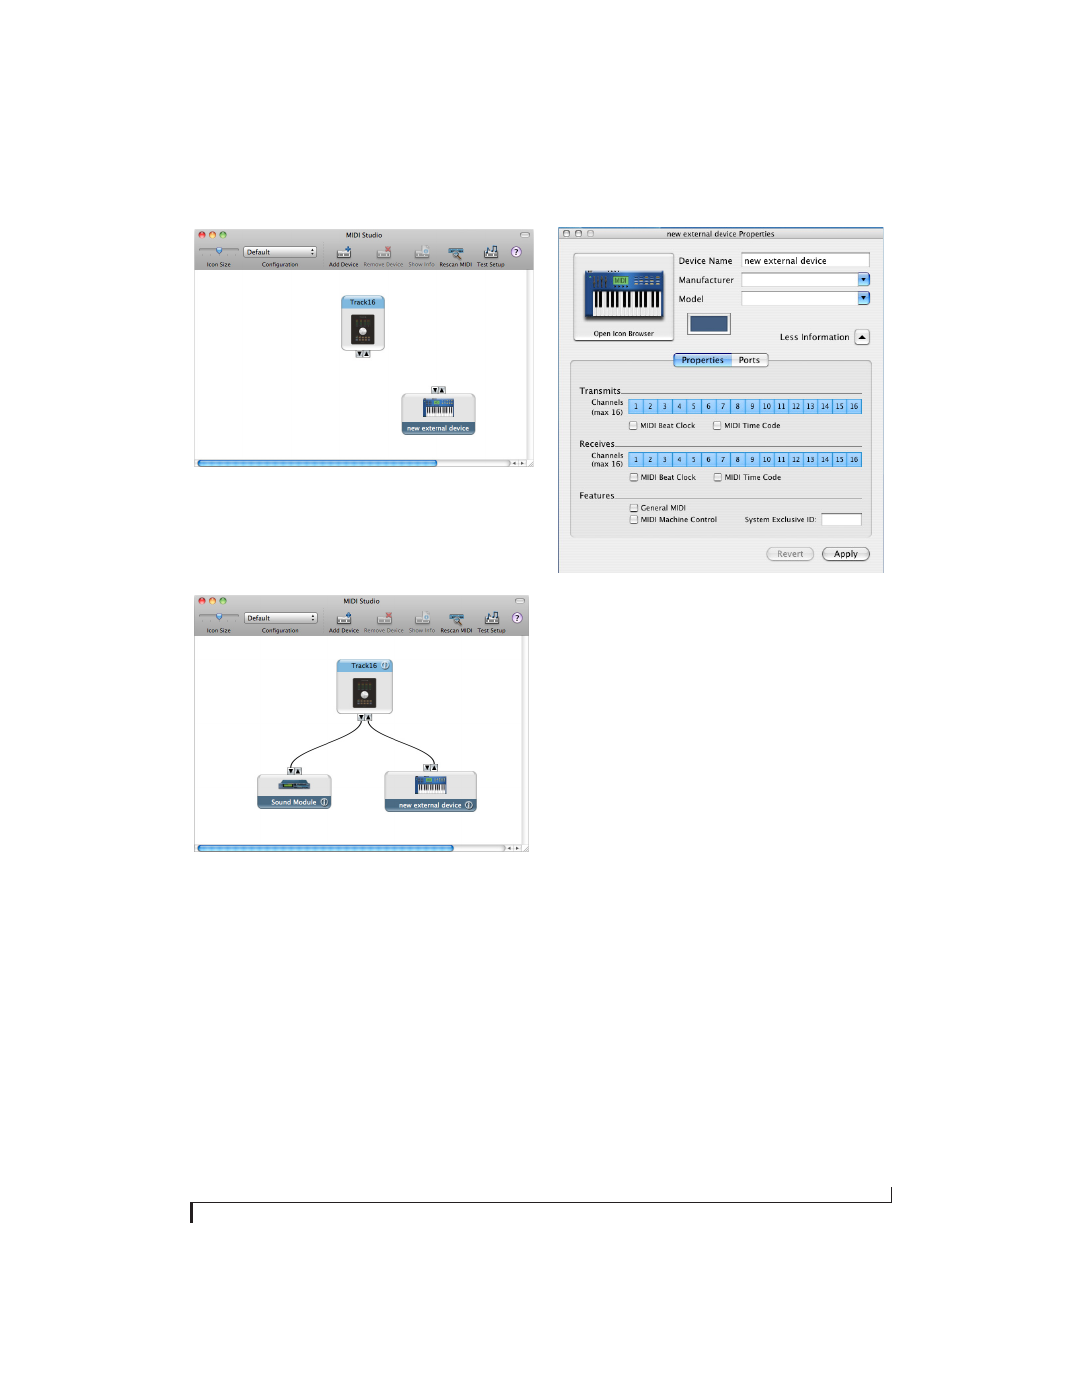
Figure 3-2: Adding a MIDI device.
2
Drag on its input and output arrows to draw
connections to the Track16 that match its physical
connection.
Figure 3-3: Connecting devices to the Track16. In this example, a
controller keyboard is connected to the Track16’s MIDI IN, and a
sound module is connected to the Track16 MIDI OUT.
3
Double-click the device to make settings, such
as input and output channels, that further describe
the device.
Figure 3-4: Device settings.
4
Repeat the above steps for each MIDI device
connected to the interface.
5
When you are finished, quit Audio MIDI Setup.
Your configuration is automatically saved as the
default configuration, and it is shared with all Core
MIDI-compatible software.
CUEMIX FX
CueMix FX (available in the Applications folder)
provides control over the Track16’s no-latency
CueMix FX on-board mixing, effects processing,
an instrument tuner, a full-featured oscilloscope,
and other audio analysis tools. For details, see
chapter 9, “CueMix FX” (page 57).
MOTU SMPTE SETUP
MOTU SMPTE Setup (available in the
Applications folder) software provides a complete
set of tools to resolve the Track16 to SMPTE time
code, and to generate SMPTE for striping,
regenerating or slaving other devices to the
computer. For details, see chapter 10, “MOTU
SMPTE Setup” (page 103).