The meters tab, The reverb tab, Enabling reverb – MOTU Track16 - Desktop Studio FireWire/USB 2.0 Interface User Manual
Page 77
C U E M I X F X
77
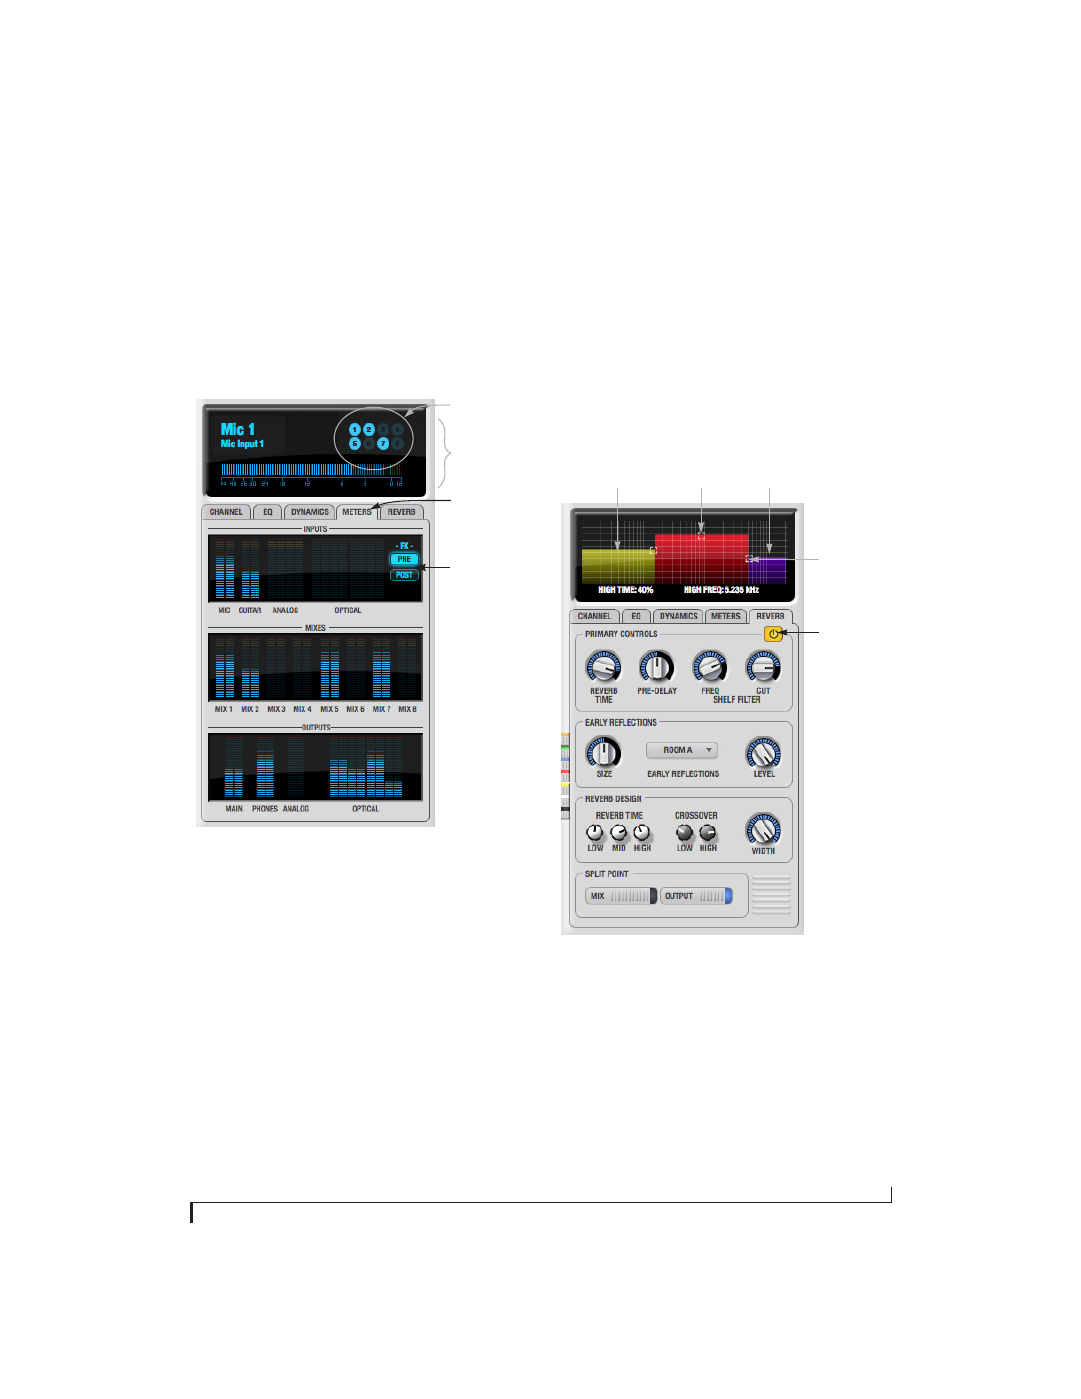
The Meters tab
The
Meters
tab (Figure 9-22) serves as a
comprehensive meter bridge for all inputs, outputs
and mix busses in the Track16. This tab gives you a
“bird’s-eye” view of all signal activity in the
Track16; it is ideal for confirming your signal
routing programming and for troubleshooting.
Figure 9-22: The Meters tab.
Channel meter display
The
channel meter display
(Figure 9-22) provides a
long-throw meter for the input or output that
currently has the focus in the Input/Output tabs.
Bus activity LEDs (inputs only)
The
Bus activity LEDs
(Figure 9-22) are present
only for inputs. See “Input meter and bus activity
LEDs” on page 67.
Pre/post processing switch
The
pre/post processing
switch (Figure 9-22) affects
all input meters (and the meter in the channel
meter display above the tab, if this area is
displaying an input meter). Click
Pre
to view levels
before
any input channel processing besides trim;
click
Post
to view levels
after
all channel processing
(EQ, compression, M/S decoding, L/R swap, etc.)
The Reverb tab
The
Reverb
tab (Figure 9-23) provides access to the
Track16’s single, global reverb processor, which
provides high-fidelity reverberation and graphic
control over its parameters.
Figure 9-23: The Reverb tab.
Enabling reverb
Use the enable/disable button (Figure 9-23) to turn
the reverb processor on or off. Since reverb uses
considerable DSP resources, it is best to leave it off
when you are not using it.
Meters tab
Bus activity LEDs
(inputs only)
Pre/post
processing
switch
Channel meter
display
Reverb
enable/disable
Mid band reverb
time handle
Crossover
handle
Low band
(yellow)
High band
(purple)