Xcp-ac-300, Fan module, Xc-sfan – Xtramus MCS-2160 V1.9.2 User Manual
Page 34
2.2.3.2. XCP-AC-300
Steps for installing a XCP-AC-300
Installing a XCP-AC-300 into
MCS-2160 is quite simple. First of all,
attach the Power Module into the
respective slot of MCS-2160 and
push the handle of the Power Module
into the slot. After the Bracket of the
Power Module reaches the
MCS-2160, lock the captive screw
into MCS-2160 as shown by arrows 4
and 5.
Note: The XCP-AC-300 doesn’t
support hot swap. Please don’t
remove Power Module during
System operation.
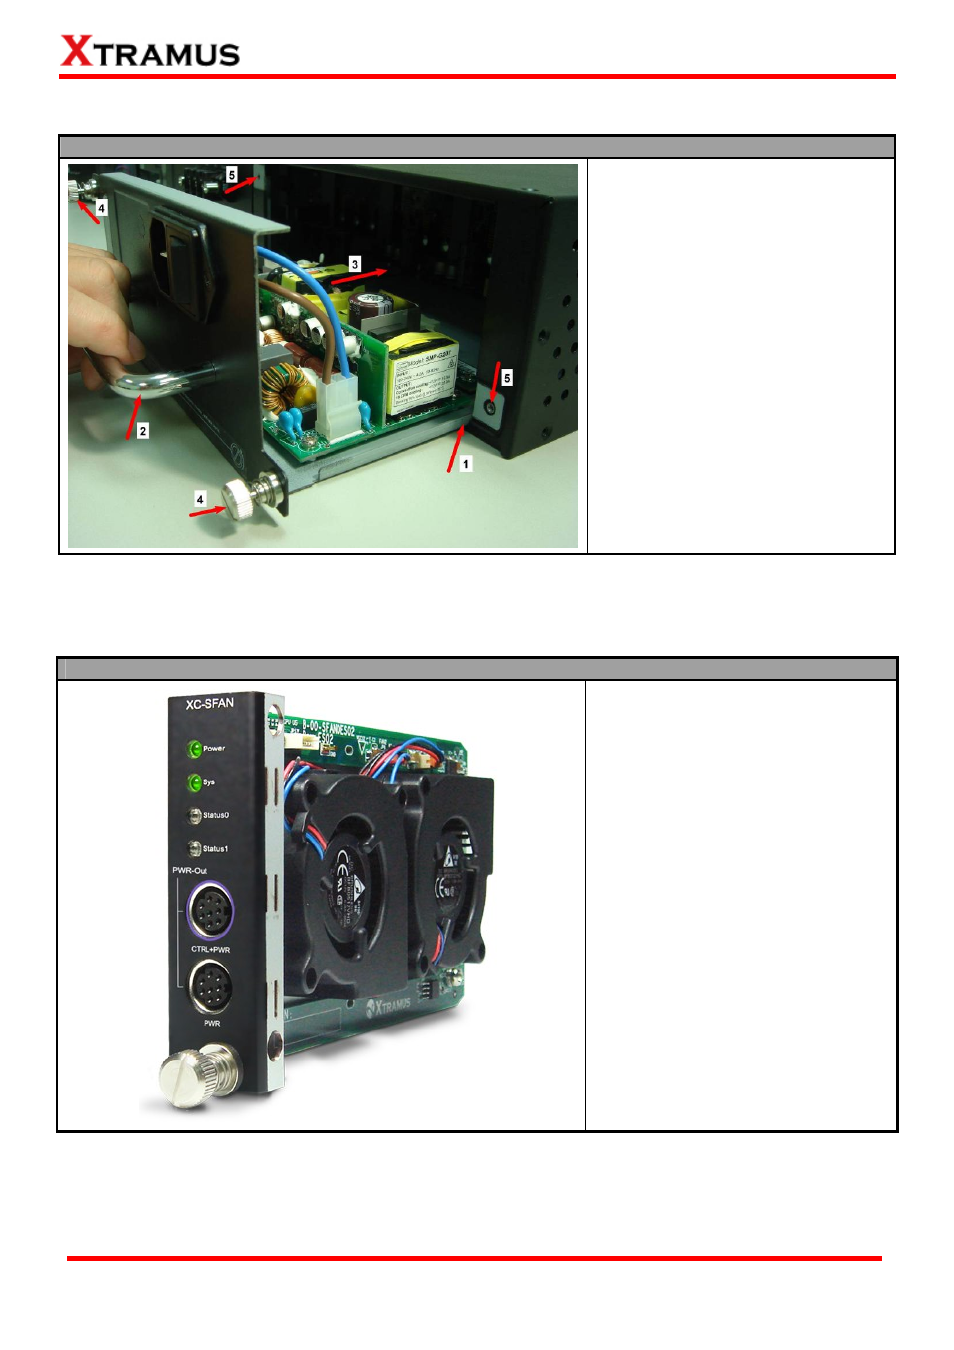
2.2.4. Fan Module
2.2.4.1. XC-SFAN
Steps for installing the XC-SFAN
The XC-SFAN comes with your
MCS-2160 chassis, and shall be
installed on the Fan slot located on
the far left side of MCS-2160 chassis.
This module card provides ventilation
for the MCS-2160 chassis.
Also, XC-SFAN’s CTRL + PWR and
PWR ports are designed to provide
power source and gather information
for MCS-FANT fan tray. When
connecting XC-SFAN to MCS-FANT
fan tray, please do so by connect to
MCS-SFAN’s CTRL + PWR port to
MCS-FANT’s CTRL + PWR port, and
XC-SFAN’s PWR port to MCS-FANT’s
PWR port.
If you cross connect between CTRL +
PWR port and PWR port of XC-SFAN
and MCS-FANT, MCS-2160 will be
seriously damaged.
34
E-mail: [email protected]
Website: www.Xtramus.com
XTRAMUS TECHNOLOGIES
®