GAI-Tronics LE200, LE200-FSR, LE200-FLR Page/Party Line Extenders User Manual
Page 31
Pub. 42004-701L2F
M
ODEL
LE200
S
ERIES
W
ALL
-M
OUNT
P
AGE
/P
ARTY
®
L
INE
E
XTENDERS
P
AGE
29 of 50
f:\standard ioms - current release\42004 instr. manuals\42004-701l2f.doc
04/09
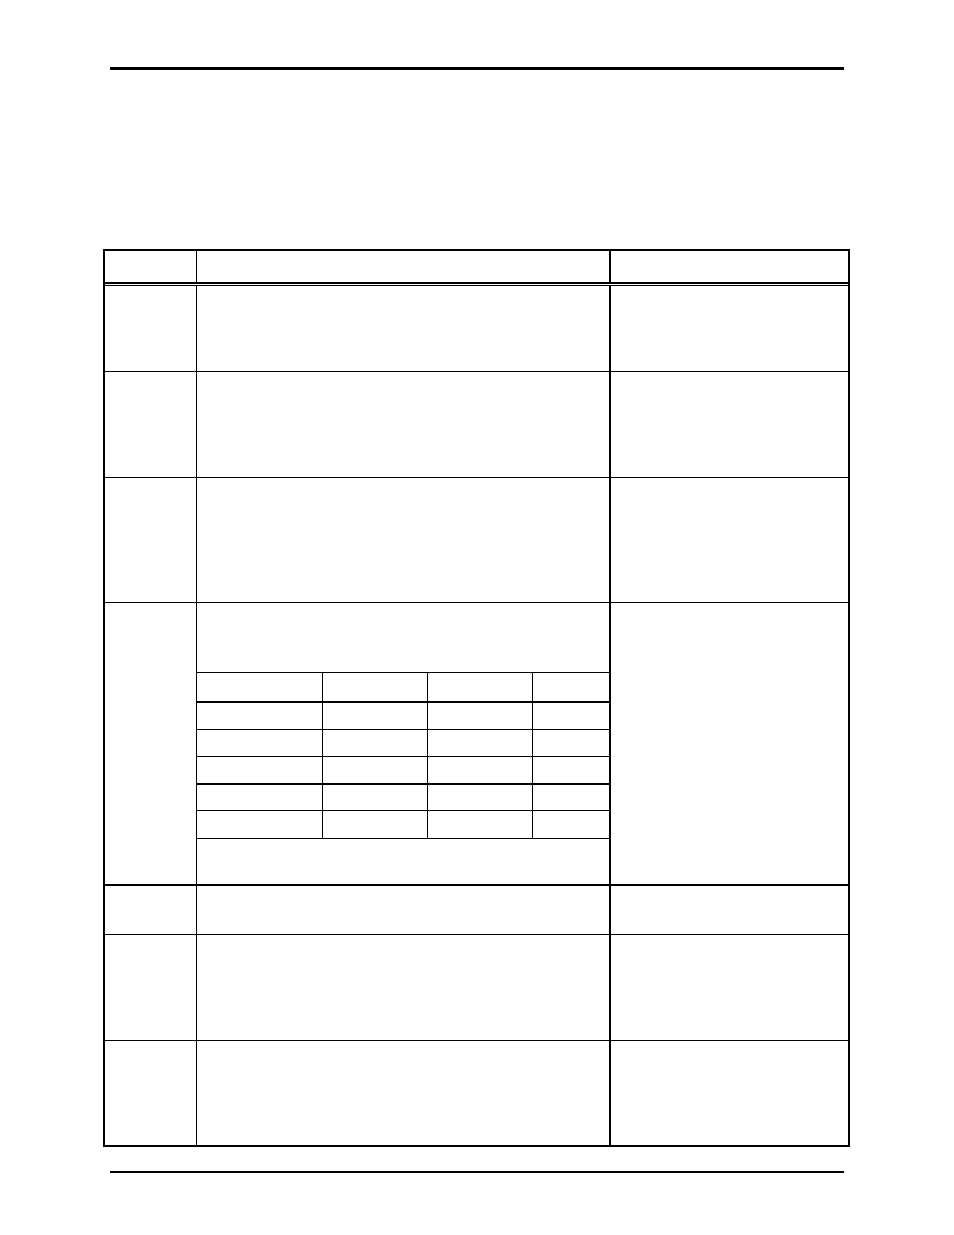
Fiber Optic Modem Set-Up (Models LE200-FSR and LE200-FLR)
The Fiber Optic Transceiver contains a 9-position DIP switch on the front panel that is marked SET
UP.
These switches must be set according to the following table to insure proper operation of the Model
LE200-FSR or LE200-FLR Line Extender.
Table 34. Front Panel DIP Switch Settings Model 9637/T1 or Model 9637/E1
Switch # Function
Correct Setting
1
Sets the signal encoding format:
• UP or OFF – B8ZS (T1 only); HDB3 (E1 only)
• DOWN or ON – AMI
UP or OFF – B8ZS (T1);
HDB3 (E1)
2
Enables the TAOS test mode:
• UP or OFF – Normal operation
• DOWN or ON – Unit will transmit all logic ones
from the data port
UP or OFF – Normal operation
3
Enables Local Loopback Test Mode:
• UP or OFF – Normal operation
• DOWN or ON – Used only for testing purposes. The
data input is looped back to the data output. Use the
front panel toggle switch to enable the loopback test.
UP or OFF – Normal operation
Switches 4–6 are the Line Build-out selection for T1.
They must be set according to the twisted pair cable
length between the data port and the LE200 Main PCBA.
Length S4
S5
S6
0–133 feet
OFF
ON
ON
134–266 feet
ON
OFF
OFF
267–399 feet
ON
OFF
ON
400–533 feet
ON
ON
OFF
534–655 feet
ON
ON
ON
4, 5, 6
This feature is not available for E1. However, switches
must be in the OFF position for proper operation.
T1 S4
S5 S6
0–133 feet OFF ON ON
E1 S4
S5 S6
Not used OFF OFF OFF
7
Not used for T1 or E1 but must be OFF for proper
operation.
OFF
8
Selects between Biphase-M and Biphase-L optical
clock/data encoding:
• UP or OFF – Biphase M encoding
• DOWN or ON – Biphase L encoding
UP or OFF – Biphase M
encoding
9
Master/Slave Switch (T1 only):
• UP or OFF – Master
• DOWN or ON – Slave
Not used (E1)
DOWN or ON – Slave (T1)
UP or OFF (E1)