Installation, Mounting – GAI-Tronics LE200, LE200-FSR, LE200-FLR Page/Party Line Extenders User Manual
Page 9
Pub. 42004-701L2F
M
ODEL
LE200
S
ERIES
W
ALL
-M
OUNT
P
AGE
/P
ARTY
®
L
INE
E
XTENDERS
P
AGE
7 of 50
f:\standard ioms - current release\42004 instr. manuals\42004-701l2f.doc
04/09
Installation
ATTENTION
Installation should be performed by qualified service personnel only in
accordance with the National Electrical Code or applicable local codes.
Mounting
1. Unlock the front door of the enclosure using a screwdriver by rotating the lock a quarter turn
counterclockwise, and open the front door, which is hinged on the left.
2. Disconnect the ribbon cables and the ground wire connections from the interior rear panel. Remove
the four bolts that hold the rear panel in place, and set this assembly and the bolts aside in a safe
location.
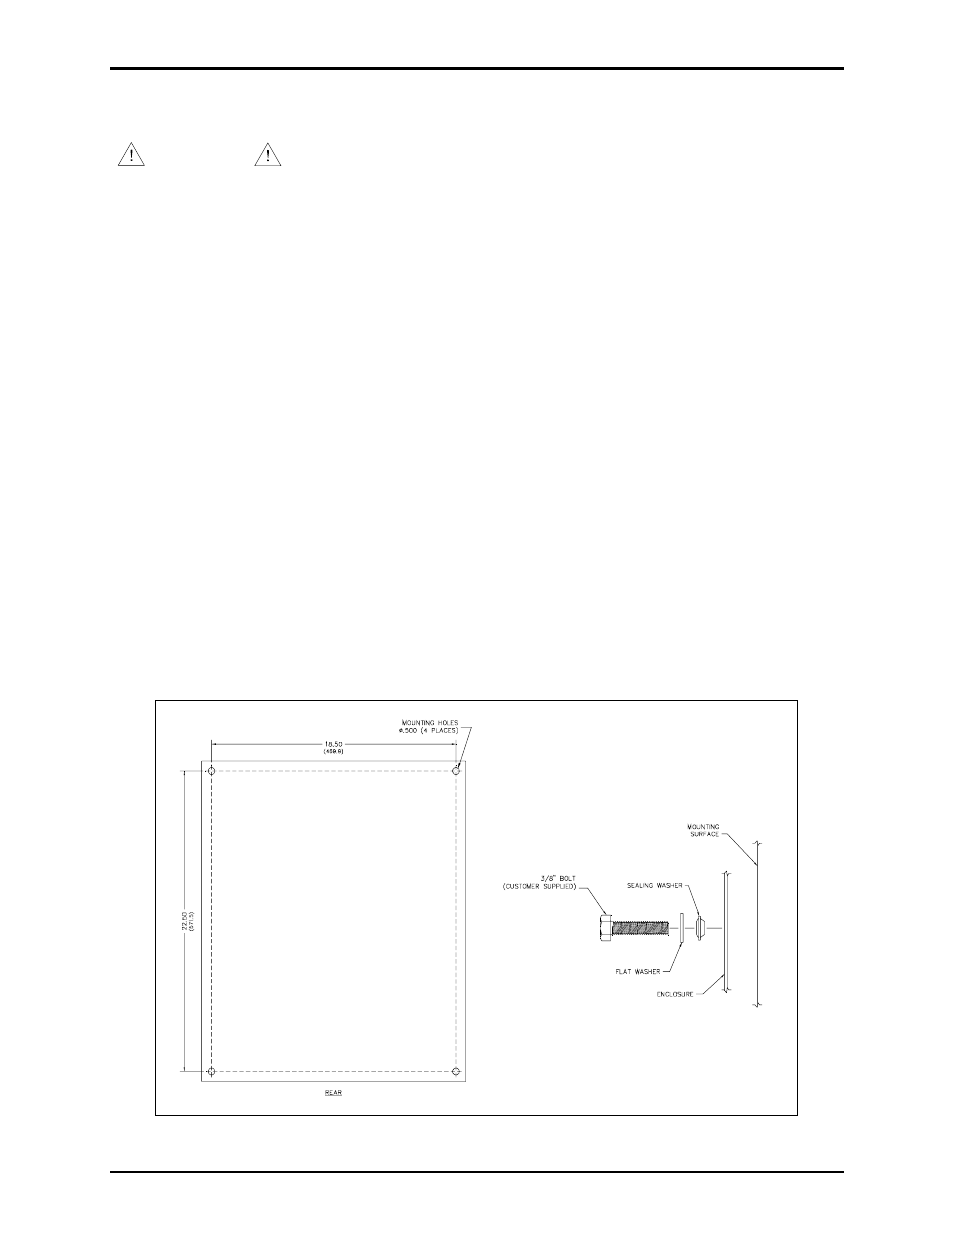
3. Position the enclosure on the mounting surface. The enclosure provides four 0.50-inch mounting
holes. Secure it with four 3/8-inch diameter bolts of the appropriate lengths for the mounting surface,
flat washers and nuts. To ensure proper sealing and enclosure protection rating, use the provided
sealing washers. Install the sealing washers inside the enclosure with the tapered cone against the
enclosure and then add the flat washers. See Figure 6 for installation details.
4. Prepare the enclosure for cable entry. For example, if conduit is installed, create an access hole using
a metal hole punch that is equivalent in size to the conduit diameter.
5. Re-install the rear panel assembly using the four bolts removed previously. Re-attach the ribbon
cable connectors and the ground wires.
6. Pull the cables into the enclosure, and make connections per the wiring section.
7. Complete the installation by closing the front door and relocking the enclosure.
Figure 6. Mounting Details