Skutt KilnMaster Kilns Manufactured after March 1 2006 User Manual
Page 53
53
a
PPendiCes
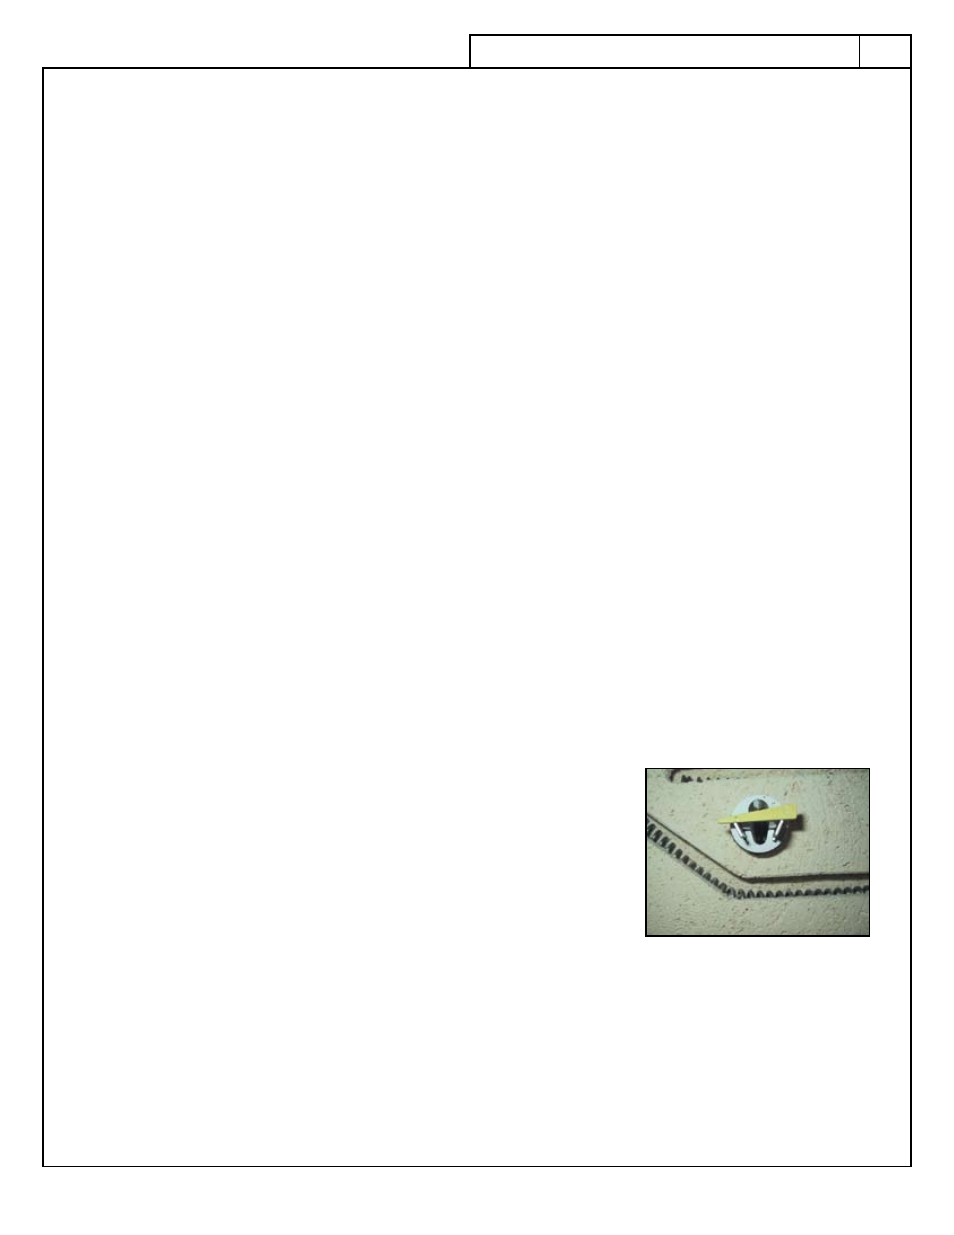
Remove the thumbscrew from the flange.
●
Align the thermocouple flange so that it is exactly over the hole in the stainless band.
●
Position the flange so the thumbscrew is on the top.
●
Attach the flange to the kiln using the two Phillips self-tapping screws provided.
●
NOTE
●
To start the screws, lightly hit each screw with a hammer until the point has pierced the stainless
steel band.
Insert a .5 in. (0.64 cm) twist drill or carpenter’s bit through the flange holder.
●
Slowly drill through the kiln wall brick into the kiln chamber
●
Insert the thermocouple into the kiln so that 1.25 in.(3.18 cm) to 1.5 in.(3.81 cm) of the tip protrudes into
●
the kiln chamber. Tighten the thumbscrew.
Uncoil the yellow thermocouple wire that is hanging from the bottom of the controller enclosure.
●
Plug the thermocouple ends into the receptacle coming from the controller. There is only one way the plug
●
will engage the receptacle.
The controller is now ready for use.
●
t
herMOcOuple
installatiOn
in
a
kiln
nOt
MarkeD
FOr
a
therMOcOuple
.
Mark a .5 in. (1.27 cm) to 5/8 in. (1.58 cm) diameter hole on the stainless jacket in the center of the
●
brick next to the Kiln-Sitter brick (one brick to the right of the master switch box). Be sure placement is
accurate so that you do not drill through an element. Do not drill yet.
Align the flange holder accurately over the mark, positioning the thumbscrew hole on top. Mark the
●
position of the small holes on the jacket. Push hard or tap out with a nail and hammer the small screw
holes. Drill two, 3/32 in (0.23 cm) holes for the smaller sheet metal screws. Drill through the metal only.
Install the flange with the sheet metal screws provided.
For the remaining installation steps consult the previous section on Thermocouple Installation for a Skutt
●
Kiln.
s
tep
3 –
O
perating
i
nstructiOns
FOr
k
ilns
With
a
k
iln
- s
itter
The kiln switches,
k
iln
-s
itter
and
liMit
tiMer
(if so equipped) need to be properly set and adjusted for correct
operation with the controller.
Place a Junior cone one or two numbers hotter than the cone equivalent
●
you program into the KilnMaster to keep the Kiln-Sitter from shutting off
the kiln early. For example, if you program a Cone 5 (2156˚) firing in the
KilnMaster, place a Cone 6 or 7 Junior cone in the Kiln-Sitter.
Push the plunger in. Repeat this procedure using new cones each firing.
●
If your
●
Dawson Kiln-Sitter is equipped with a limit timer, set the timer
for 20 hours (the maximum). Because the KM-1 controller turns the
power to your kiln on and off to control the temperature, the timer
will only run intermittently and will be useless. If you fail to set a
maximum time each firing, the timer may shut off the kiln early.
You may want to disconnect the wires that operate the limit timer to
eliminate the bother of resetting the timer each firing.
Set all switches in your kiln to High. (Exception do not set the center section of the 818-WR above 4. )
●