Microphone position detection, 3 – preparation – Teac DR-40 User Manual
Page 43
TASCAM DR-40
43
If you are using the built-in microphone and this setting is
not used, the current microphone setting icon appears as a
warning on the Home Screen.
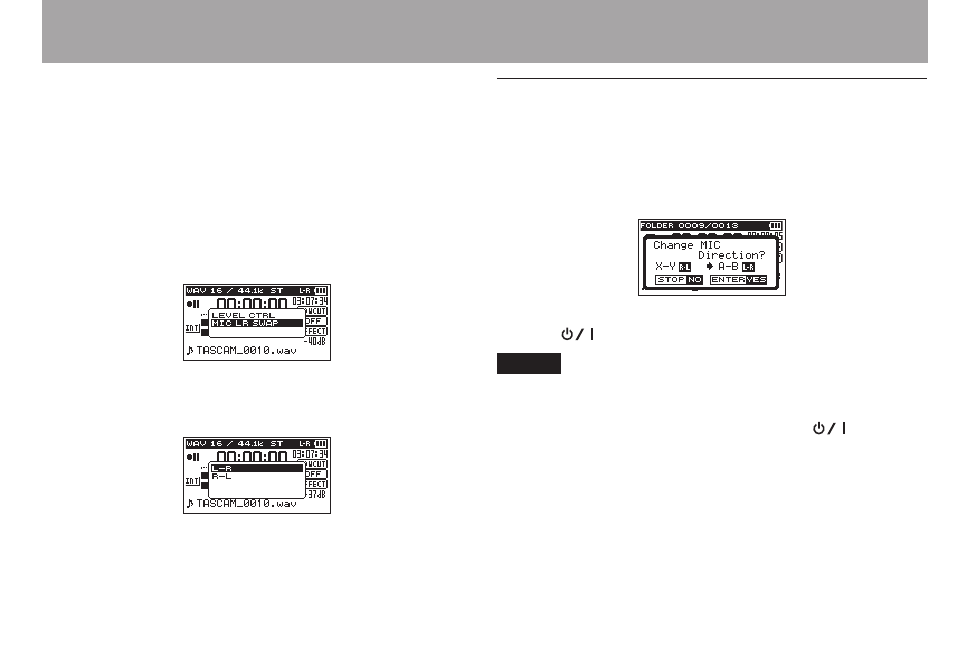
1 Press the RECORD [0] button to bring the unit in
recording standby.
The indicator will flash and the recording screen will
appear.
2 Press the QUICK button.
The Quick menu screen will appear.
3 Use the + or − button to select (highlight)
MIC LR SWAP
,
and press the ENTER/MARK button.
The MIC LR swap screen will appear.
4 Use the + button or – button to select (highlight)
L-R
or
R-L
depending on the microphone pair’s status.
5 Press the ENTER/MARK button to fix the setting, and to
return to the Home Screen.
Microphone position detection
The following pop-up message appears automatically
whenever the left microphone is opened or closed and the
left-right channels does not suit the angle of the microphone.
If only the right microphone is opened or closed, it does not
appear.
Press the ENTER/MARK button to change the setting.
Press the
(
HOME
) [8] button to leave the setting as it is.
NOTE
When you change the microphone angle setting and the
•
pop-up message appears, you must press the ENTER/MARK
button to change the L–R setting, press the
(HOME)
[8] button to keep this setting as is, or restore the previous
microphone angle to close the pop-up message before you
can begin recording.
The pop-up message does not appear if you change the
•
microphone position when recording. If necessary, use
the
MIC LR SWAP
setting by pressing the QUICK button
to switch the setting after change the setting to recording
standby mode by pressing the RECORD [0] button.
3 – Preparation