Thinklogical HDX80 Manual User Manual
Page 64
Revision A December 2011
56
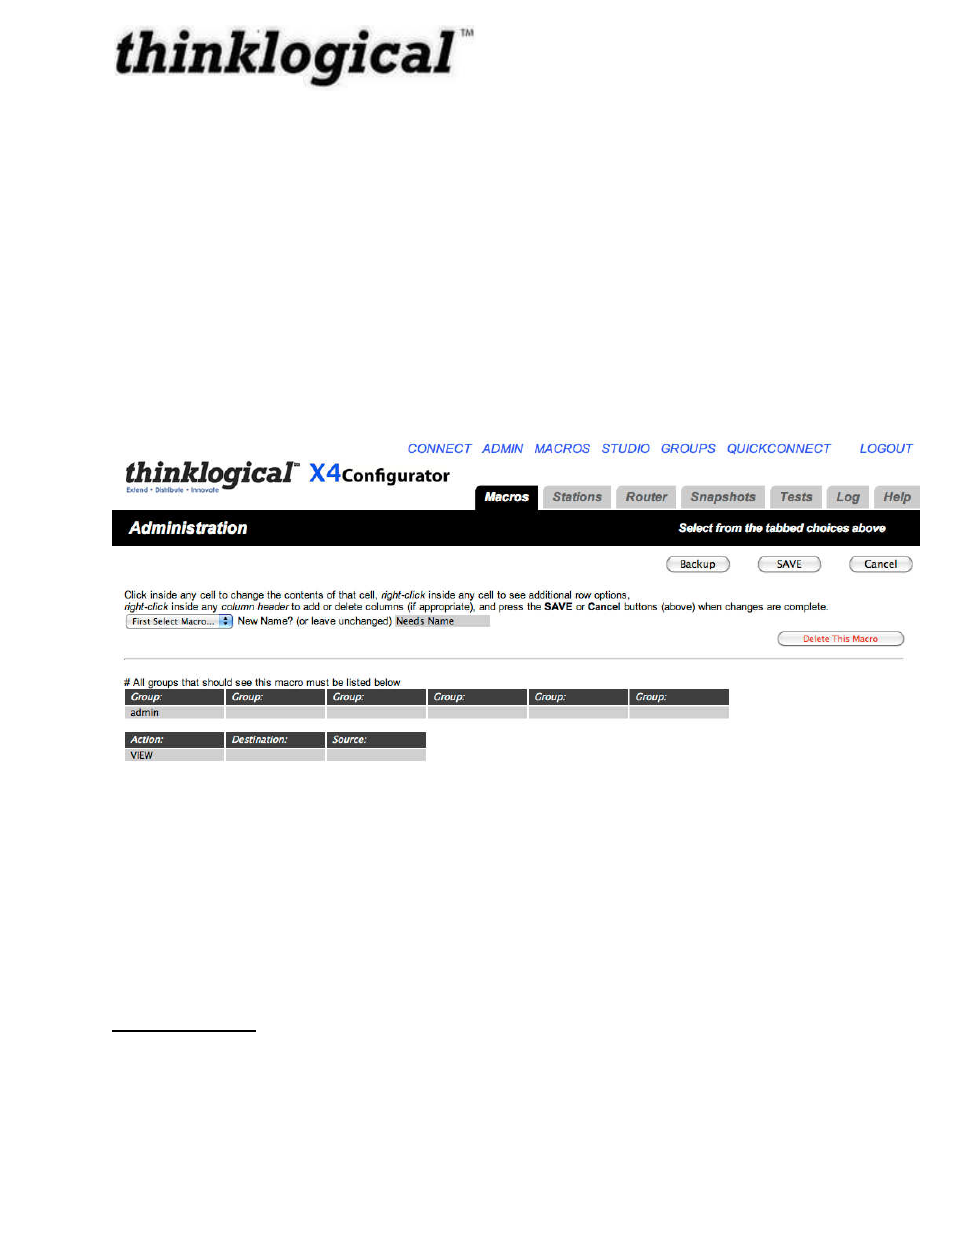
The “Group” rows define which user group(s) will be able to see and execute this macro.
Steps can be added or deleted by right-clicking within any element in a row. Existing steps can
be modified by left clicking within the Action, Destination, or Source columns.
To change the name of a macro, type the changed name into the text input area to the right of
the label, “New Name? (or leave unchanged), and press the “SAVE” button on the right.
To delete a macro, select it from the “First Select Macro...” pull down list and then press the
“Delete This Macro” button at the far right. This step cannot be undone.
It is also possible to create new macros from the ADMIN-MACROS page.
From the “First Select Macros...” pull down menu, find and select the “Create New Macro” line
(at the very bottom of the list).
Figure 40: Create a New Macro
The recommended first step is to change the name from “Needs Name” to something more
appropriate. After that, the action, destination, and source fields should be filled in with the
appropriate values for the desired activity. More action rows can be added in the usual fashion
(right click on the last row, select “Append” from the drop down menu, fill in the new line) until
the macro contains all the actions necessary. Then press “SAVE”. The new Macro will appear
on the Macros page.
TOUCHSCREENS
Please see Appendix F for configuration instructions.