Casio XJ-UT310WN Network Function Guide User Manual
Page 13
13
Computer Operation
6.
Start up Network Connection.
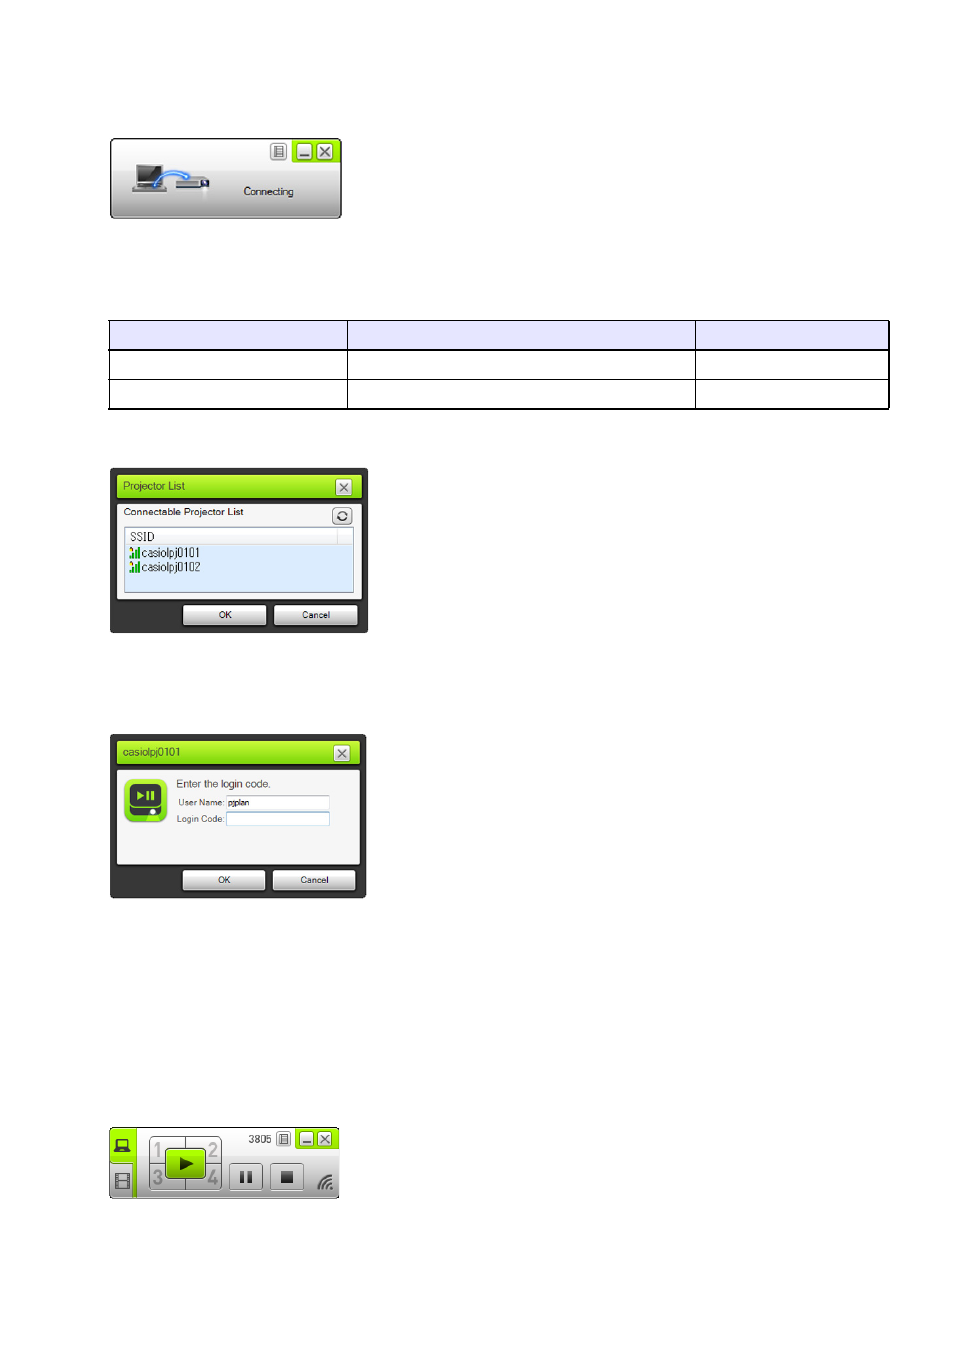
z The Network Connection window will appear with the message “Connecting”.
z If your computer is running Windows 7, 8 or 8.1 and the “Set Network Location” dialog box
appears, click [Cancel] to close the dialog box.
z One of the dialog boxes shown below will appear as soon as Network Connection finds the
projector to connect with.
7.
Click the SSID of the projector you want to connect with, and then click [OK].
8.
On the “Enter the login code.” dialog box that appears, enter the user name and
login code.
z In the “User Name” box, you can enter any name up to 20 characters long. The user name you
enter here will be displayed as the user name on the projection screen.
z In the “Login Code” box, enter the four-digit number shown in the upper left corner of the LAN
connection standby screen that is being projected.
9.
When everything is the way you want, click [OK].
z While the projector is connected to a computer over a wireless LAN, a Network Connection
window like the one shown below will be displayed on the computer screen. The computer
screen image (main screen) will be projected.
z For details about Network Connection window operations, see “Using Network Connection”
(page 39).
If this dialog box appears:
It indicates this status:
Advance to this step:
“Projector List”
Multiple connectable projectors were detected. Step 7
“Enter the login code.”
Only one connectable projector was detected.
Step 8