To change the ssid – Casio XJ-UT310WN Network Function Guide User Manual
Page 49
49
To change the SSID
1.
Press the [MENU] key to display the setup menu.
2.
Use the [
T] key to select “Network Settings” and then press the [ENTER] key.
3.
Use the [
T] key to select “Projector Wireless LAN Settings” and then press the
[ENTER] key.
4.
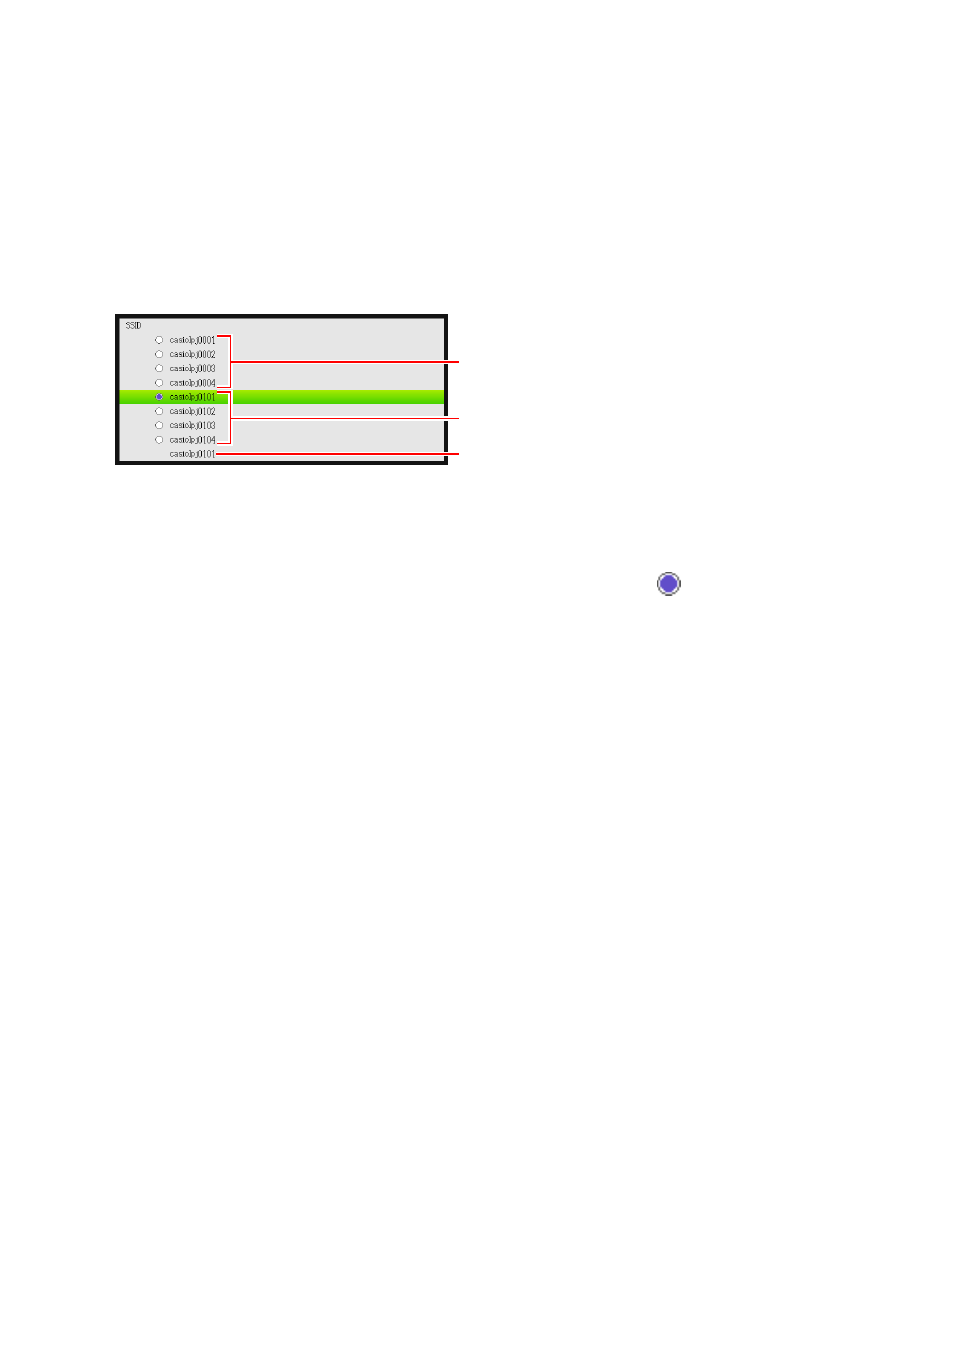
Make sure that “SSID” is selected and then press the [ENTER] key.
z This displays a list of selectable SSIDs.
z If there is a previously created user SSID, it also will appear in the list.
5.
Use the [
S] and [T] keys to select the SSID you want and then press the
[ENTER] key.
z The button to the left of the currently selected SSID will become
.
6.
Press the [ESC] key twice to return to “Network Settings”.
7.
Use the [
T] key to select “Update Network Settings” and then press the [ENTER]
key.
z This will display a confirmation dialog box asking if you want to update network settings.
8.
Press the [
S] key to select “Yes”, and then press the [ENTER] key.
z This applies the SSID change to the projector and closes the dialog box.
Simple Connection SSIDs
Generic SSIDs
Current SSID